
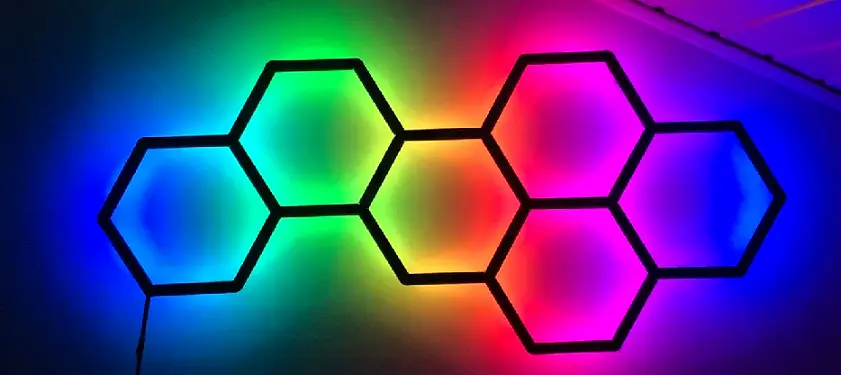
Hexagon lamp
por Dennis H. en Thingiverse
Hexagon lamp This is a wall mounted lamp for indirect lighting. It is assembled using LED aluminium profiles connected by 3d printed parts. Updates V1.1 - Added drawing for electrical wiring - Additional drawings added for easy assembly V1.2 - Added nylon cord to drawing V2.0 - Added link to...
Licencia
Solo uso personalCC BY-NC 4.0 — Atribución, no comercial
Puedes imprimirlo y modificarlo para uso personal dando crédito. No se permite vender las impresiones.
Al descargar aceptas respetar la licencia y dar crédito a Dennis H..
Archivos (9)
- Categoría
- Hogar
- Formatos
- STL, PDF, STP
- Descargas
- 14,233
- Publicado
Sobre este modelo
Hexagon lamp This is a wall mounted lamp for indirect lighting. It is assembled using LED aluminium profiles connected by 3d printed parts. Updates V1.1 - Added drawing for electrical wiring - Additional drawings added for easy assembly
V1.2 - Added nylon cord to drawing
V2.0 - Added link to Software for custom animation
V2.1 - Updated drawing for electrical wiring
Software You can finde the custom software to control this lamp on my GitHUB. I am using an arduino Nano IoT to control the lamp. The software is including a Webvisu. You can also find the installation instructions on GitHUB. Needed parts (for the given example) - 3,19 m LED aluminium profil with cover. I used this one. - 2,9 m LED strip (10 mm wide). Make sure the strip can be cut in 10 cm long pieces. I used WS2812b Neopixel. - LED controller and power supply - wires - nylon cord
Needed Tools - Glue - Metal saw - Soldering iron and solder
Assembling - Cute the aluminium profil into 110 mm long pieces - Connect the profiles using the corner/connector pieces and glue (See HexLamp.pdf) - Cute the led strip into 100 mm long pieces - Connect the stripes with short wires (apprx. 20-30 mm) (See Wiring.pdf and HexLamp.pdf) - Glue the LED strip into the profiles - Mount the distance pieces - Attach the nylon cord in order to hang the lamp on the wall using a nail.
Planned Updates I am planning to design a small enclosure for the arduino. I will add the files as soon as this is done.
Descripción original del autor, publicada en Thingiverse.



