
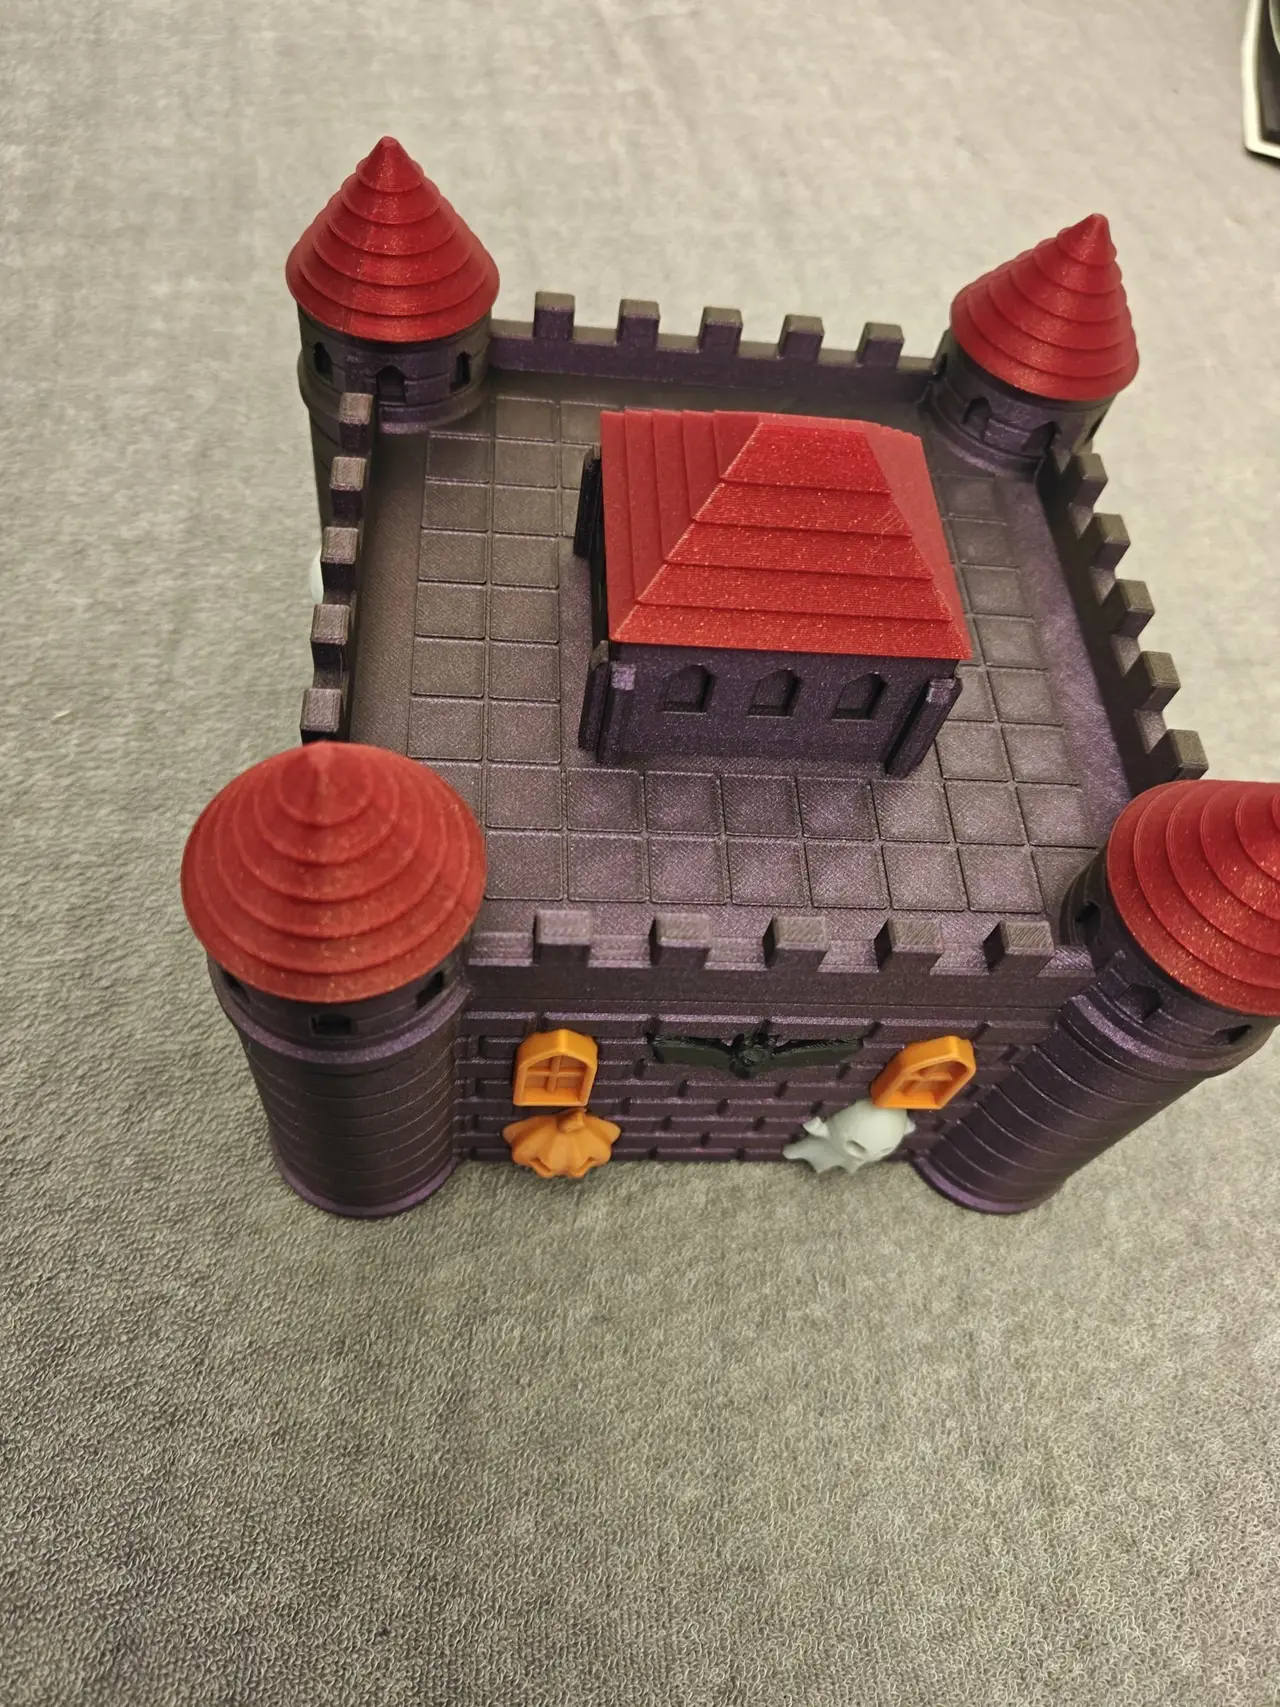
Haunted Castle Magnetic Storage Box
A Halloween castle that opens into a storage box: four corner towers, a central keep, pumpkins, ghosts, a skull, bat, cat and cobweb. The whole roof lifts off; eight enclosed magnets hold it closed and two pins locate it.
Cults3D entrega los archivos a usuarios con cuenta gratuita
Licencia
Uso comercial permitidoPuedes imprimirlo, modificarlo y venderlo dando crédito al autor.
Al descargar aceptas respetar la licencia y dar crédito a Morass.
Archivos (20)
- ams_colour_files.zip ZIP
- bat.stl STL
- body.stl STL
- body_4c.stl STL
- cat.stl STL
- coupon_body.stl STL
- coupon_lid.stl STL
- door.stl STL
- ghost.stl STL
- gravestone.stl STL
- keep_roof.stl STL
- lid_2c.stl STL
- lid_walls.stl STL
- pumpkin.stl STL
- rescue_jig.stl STL
- roof.stl STL
- skull.stl STL
- turret_roof.stl STL
- web.stl STL
- window.stl STL
- Categoría
- Hogar
- Formatos
- ZIP, STL
- Descargas
- 0
- Publicado
Sobre este modelo
A Halloween castle that opens into a storage box: four corner towers, a central keep, pumpkins, ghosts, a skull, bat, cat and cobweb. The whole roof lifts off; eight enclosed magnets hold it closed and two pins locate it.
170 x 170 x 130 mm closed. Main cavity 132 x 132 x 72.8 mm with corner bosses; a rectangular 118 x 118 x 72 mm payload clears them. The finished example has purple walls, red roofs, orange details and pale spirits. Pick your own palette.
Materials
PLA for walls, roofs and decorations. Suggested palette: grey/purple walls, black/red roofs, orange pumpkins/windows/gate, white or pale green spirits.
Eight round neodymium magnets, diameter 5 mm x 3 mm thick: four in the body, four in the lid. Two extra magnets for the test coupons. Use the actual magnets you plan to install when testing.
Tweezers, marker for magnet polarity and a flat sanding block for first-layer edges if needed.
Gel cyanoacrylate for the separate-print roof caps and decorations. The complete multicolour route needs no ornament or roof-cap glue.
Separate-print estimate: 459 g / 18 h 27 min, summed individual slices at 15% infill. Allow about 500 g plus setup waste. Multicolour flushing and body supports are extra: use your slicer's estimate for that route. These are estimates, not measurements of the photographed print.
1. Choose ONE route
Complete multicolour castle: two files = two castle prints. Use body_4c.stl and lid_2c.stl INSTEAD OF the plain body, individual decorations, lid walls and five separate caps. These colour files are also supplied in ams_colour_files.zip; extract them before importing. Print the two coupons first.
Import each colour file as its own object, preferably on its own plate.
Right-click and choose Split > To Parts. Never To Objects; never arrange the individual colour parts.
Body: five parts. Assign body_lower and body_seal the wall colour, body_orange orange, body_bone the spirit colour, body_black the dark accent. Keep the thin upper wall seal with its locating pins.
Lid: seven parts. Both wall sections use the wall colour; five roof caps use the roof colour. All parts stay in their imported positions and weld together during printing.
Body needs Tree (auto) supports, build plate only, 45-degree threshold. Don't support bridges ON. Lid supports OFF. Upright reliefs need support below their projecting details.
Add the magnet pauses in step 3 to BOTH castle prints. The STL files do not contain pauses.
Separate-print route: 25 castle pieces plus two test pieces. Print each colour as separate objects, then glue. No automatic filament changer required. All separate parts print with supports OFF in the supplied orientation.
File Quantity Suggested colour
body.stl 1 wall colour
lid_walls.stl 1 wall colour
turret_roof.stl 4 roof colour
keep_roof.stl 1 roof colour
window.stl 6 orange
door.stl 1 orange
pumpkin.stl 3 orange
ghost.stl 2 pale spirit colour
skull.stl 1 pale spirit colour
web.stl 1 pale spirit colour
cat.stl 1 dark accent
bat.stl 1 dark accent
Descripción original del autor, publicada en Cults3D.



