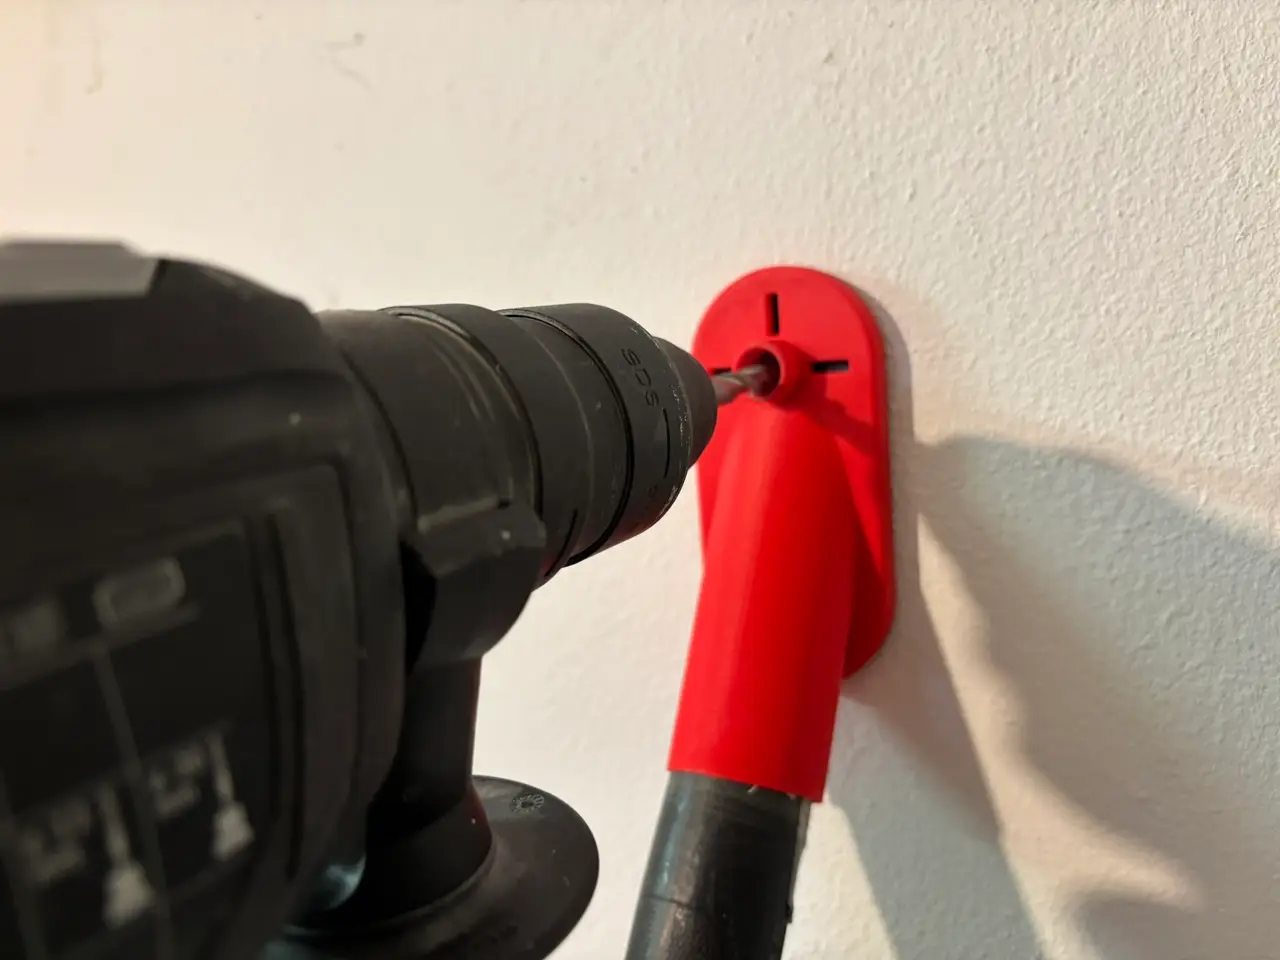
Hands free dust collector for drilling
por Ray en Printables
This dust collector for 34 mm vacuum hose sticks to wall and sucks up all (most?) dust your drill generates.
Licencia
Solo uso personalCC BY-NC-SA 4.0 — Atribución, no comercial, compartir igual
Uso personal dando crédito; sin fines comerciales y las modificaciones con la misma licencia.
Al descargar aceptas respetar la licencia y dar crédito a Ray.
- Categoría
- Herramientas
- Formatos
- STL
- Descargas
- 72
- Publicado
Sobre este modelo
This vacuum cleaner adapter collects all dust created by drilling into a wall (or other object). The beauty is that it will stick to the wall so you don't need someone else to help you. The 'cross hair' can help you to align the adapter to the correct spot. This model fits on my Karcher WD3P vacuum cleaner ("shop vac") as it has a hose of 34 mm (outer diameter) I created this model myself from scratch using Autocad Fusion, the Orca Snapmaker slicer and my new Snapmaker U1 3D printer. I got inspired by the fact that I had to drill near my new printer. I found quite a few dust collectors but none were exactly like the one I envisioned. This one is different for all others (as far as I can tell) as this one has the seal 'build in'. You can't easily remove it. If I didn't had a bit of skills in 3D design I might have used one of these models: https://www.printables.com/model/828355-drill-dust-collector https://www.printables.com/model/1259497-drill-dust-collector-hands-free or one of the million trillion other models out there.
This model requires a tool changer (or perhaps a AMS?) And it uses TPU, PLA and PETG. TPU for the flexible seal, PLA for the body and PETG as support. (I guess I could have swapped the PETG and PLA, now I think about it...) The seal is fixed in place and can not be (easily) removed. It is basically T-shaped and hold in place by the main body. I set up my printer like this: - Main body: filament 2: PLA
- Seal: filament 4: TPU
- Support: filament 1: PETG
It is very easy to remove the PETG support.
Basic settings: - Orca Snapmaker slicer
- 0.4 nozzles
- Global: - layer height: 0.2 mm
- support: tree
- filament for support: PETG
- Advanced: - top Z distance: 0
- top interface layers: 3
- top interface spacing: 0
- Seal (TPU): - 2 layers top shell
- 1 layer bottom shell
- 15% infill
- internal solid infill pattern: concentric
- Main body (PLA): - infill: 30%
-
It could be a bit difficult to remove the TPU from the build plate. Letting it cool down fully (+20 min) should help. Please note; when importing the STLs into Orca slicer, it should ask you "Load these files as a single object with multiple parts?" and then just say "yes".
I hope this is helpful for you in any way. Enjoy! Ray
Descripción original del autor, publicada en Printables.