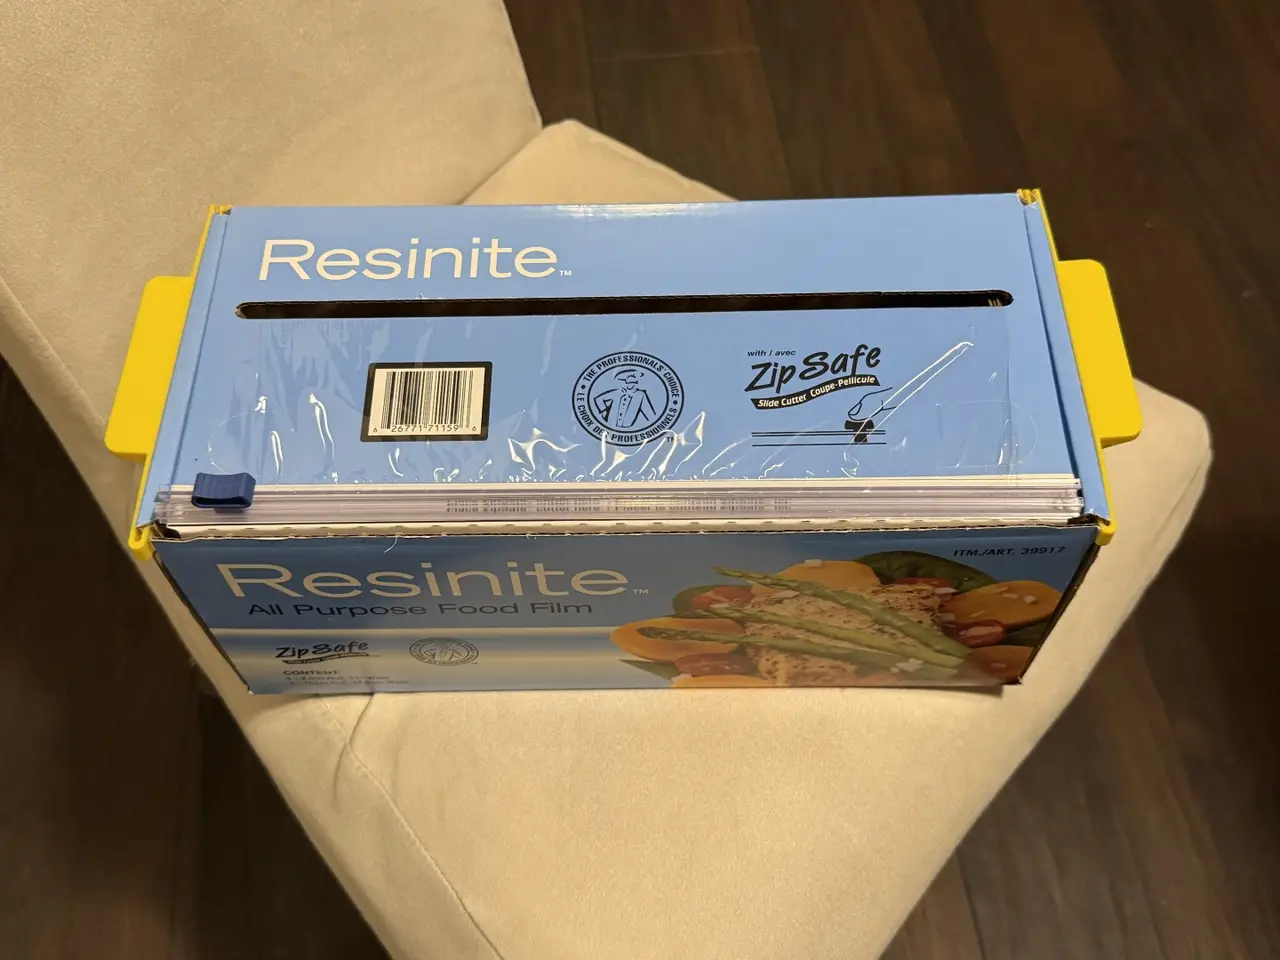
Handles for Resinite All Purpose Food Film Box
por 3D-Dreamer en MakerWorld
If you use the bulk‑pack Resinite food wrap, you probably know the struggle: the box is heavy, awkward to lift, and has no handles. In a small kitchen—like mine—this becomes a daily annoyance. I keep the food wrap tucked away in a cabinet, but every meal ends with the same routine: reach in,…
MakerWorld entrega los archivos a usuarios con cuenta gratuita
Licencia
Solo uso personalStandard Digital File License
Licencia estándar de archivos digitales: solo uso personal. No se permite compartir, revender ni subir el archivo a otros sitios, ni vender las impresiones.
Al descargar aceptas respetar la licencia y dar crédito a 3D-Dreamer.
- Categoría
- Herramientas
- Descargas
- 0
- Publicado
Sobre este modelo
If you use the bulk‑pack Resinite food wrap, you probably know the struggle: the box is heavy, awkward to lift, and has no handles. In a small kitchen—like mine—this becomes a daily annoyance. I keep the food wrap tucked away in a cabinet, but every meal ends with the same routine: reach in, grab the box, wrestle it out, use it, then put it back again. Not exactly ergonomic.
So I designed a pair of slip‑on handles that attach securely to the sides of the food wrap box. No screws, no modifications—just slide them on and instantly turn that bulky box into something easy to lift, carry, and relocate.
These handles make moving the food wrap in and out of cabinets effortless, especially if you deal with limited counter space or heavy rolls like I do. If you’ve ever wished your food wrap box had a proper grip, I hope this little upgrade makes your kitchen workflow smoother and a lot less frustrating. 😊
Installation Steps
- Cut a 13 mm - 15mm slit at the back of the box (as shown in the photo). This opening lets the end of the handle pass through.
- Slide the long flat side of the handle into the carton gap and push it in until the end pops through the slit.
-
- Engage the locking tab to secure the handle.
- Repeat on the opposite side for the second handle.
Boost MeYour feedback and support truly mean a lot to me. Thank you in advance for giving this little creation a try and for being part of my maker journey. 😉
Descripción original del autor, publicada en MakerWorld.