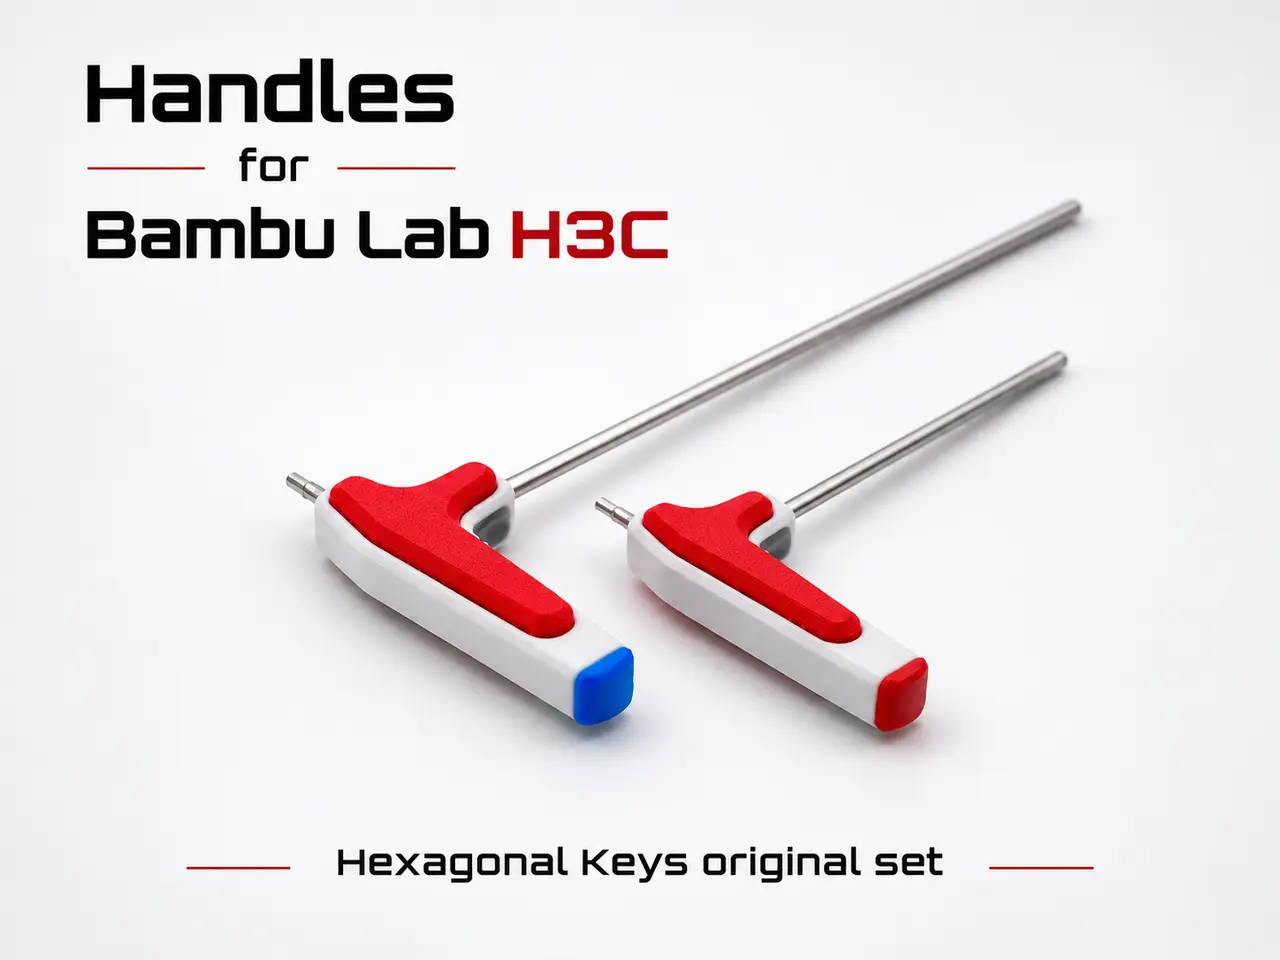
Handles for Bambu Lab H3 and H2 hexagonal keys
por Jorge Rui en MakerWorld
Hex Keys — H3C Edition. A Great Little Test for Your H3C. Beyond their practical purpose, these handles are also an excellent way to explore what the new printer can do.
MakerWorld entrega los archivos a usuarios con cuenta gratuita
Licencia
Solo uso personalMakerWorld Exclusive License
Licencia exclusiva de la plataforma: uso personal, no se permite compartir el archivo ni vender las impresiones.
Al descargar aceptas respetar la licencia y dar crédito a Jorge Rui.
- Categoría
- Herramientas
- Descargas
- 13
- Publicado
Sobre este modelo
Hex Keys — H3C Edition A Great Little Test for Your H3C Beyond their practical purpose, these handles are also an excellent way to explore what the new printer can do. Pay particular attention to the speed of colour changes. It's genuinely impressive how quickly the H3C can switch between colours, even when producing relatively small objects. Material waste can also be remarkably low compared with conventional multicolour printing, although the final amount will depend on your purging and prime tower settings. What previously required several compromises in design or manufacturing can now be achieved with considerably less effort. Two simple tools, a few colours, optional soft-touch grips, and a result that feels much closer to a finished consumer product.
3rd Generation | Multicolour Design | Soft Grips New Printer, a new generation of possibilities. Building on my original hex key designs for the Bambu Lab X and P Series, and the later H2D version, I developed this third generation to explore some of the new capabilities of the H3C. These ergonomic handles are designed for the two original hex keys included with your printer. They could be among the first useful accessories you print on your new machine, while giving you a great opportunity to experience its multicolor and multimaterial capabilities.
P1 and X1 series H2 and X2 series H3 Series
What's New?
- Multicolor design: A more refined appearance, closer to a finished consumer product.
- Soft grips: TPU inserts provide additional comfort and a more secure grip.
- Material flexibility: Don't have TPU? The inserts can also be printed in PLA or another suitable material.
- Ready from day one: Uses the original hex keys supplied with your printer.
A Little More Freedom for the Designer One of the most exciting aspects of the H3C is how much closer 3D printing can now get to the original design intention. As designers, we often simplify our models to accommodate manufacturing limitations, reducing colors, avoiding material combinations or removing details to keep printing times, costs and technical complexity under control. With this new generation of printers, many of those compromises are becoming much less necessary. Even a relatively simple object like a hex key handle can now look and feel much closer to something you'd find on a shop shelf, rather than a typical 3D-printed accessory. Printing and Materials I deliberately designed these handles for a standard 0.4 mm nozzle, rather than taking advantage of the additional detail possible with a 0.2 mm nozzle. This keeps the project more accessible and straightforward, and faster to print; nevertheless, it uses 3 material types and 4 colors. For the soft grip inserts, I used the new TPU 75A, printed with the dedicated TPU system. However, this is entirely optional. You can use other TPU grades, including TPU 85A, or even rigid materials such as PLA instead. Specific PLA support material was added so it's possible to print this without using a drop of glue. Now that you have a printer like this, specific material for supports is something that makes a lot of sense (PETG is a possibility too, since it does not adhere to PLA or TPU).
I’ve also created an alternative print profile that does not require dedicated support material. With this profile, the two light blue TPU grip inserts need to be glued in place after printing, using either contact adhesive or cyanoacrylate glue (super glue). If you use the standard print profile
Important — Print Pause and Hex Key Placement The print includes a programmed pause to insert the original hex keys into their designated slots.
Access Through the Left Side Panel On the H3C, the toolhead rack sits relatively low and close to the front door, making it difficult to insert the hex keys from the front. As you'll probably discover while using the printer, this rack can also make accessing the interior for cleaning or maintenance a little inconvenient. The easiest and safest approach is to remove the magnetic side window on the left (when facing the printer) and insert the hex keys from the side. During the programmed pause, the print head will be positioned away from the parts, near the prime tower, leaving enough space to insert the keys safely. Once both keys are correctly positioned, replace the magnetic window before resuming the print. Check Before Resuming Make sure each key is correctly seated, both in the handle and on the temporary front support bridge, which can be removed after printing. Before resuming, carefully check that each key is straight, properly aligned and securely positioned. Although the supplied hex keys are generally well manufactured, slight bends or deviations from the 90° angle may occur and should be corrected beforehand. If there is any risk of a key coming loose or interfering with the print head, do not resume the print.
Enjoy printing!
Descripción original del autor, publicada en MakerWorld.