H1 Hulk Cooler – Dual 140mm Fan Mod for NZXT H1 V1
por J D en Thingiverse
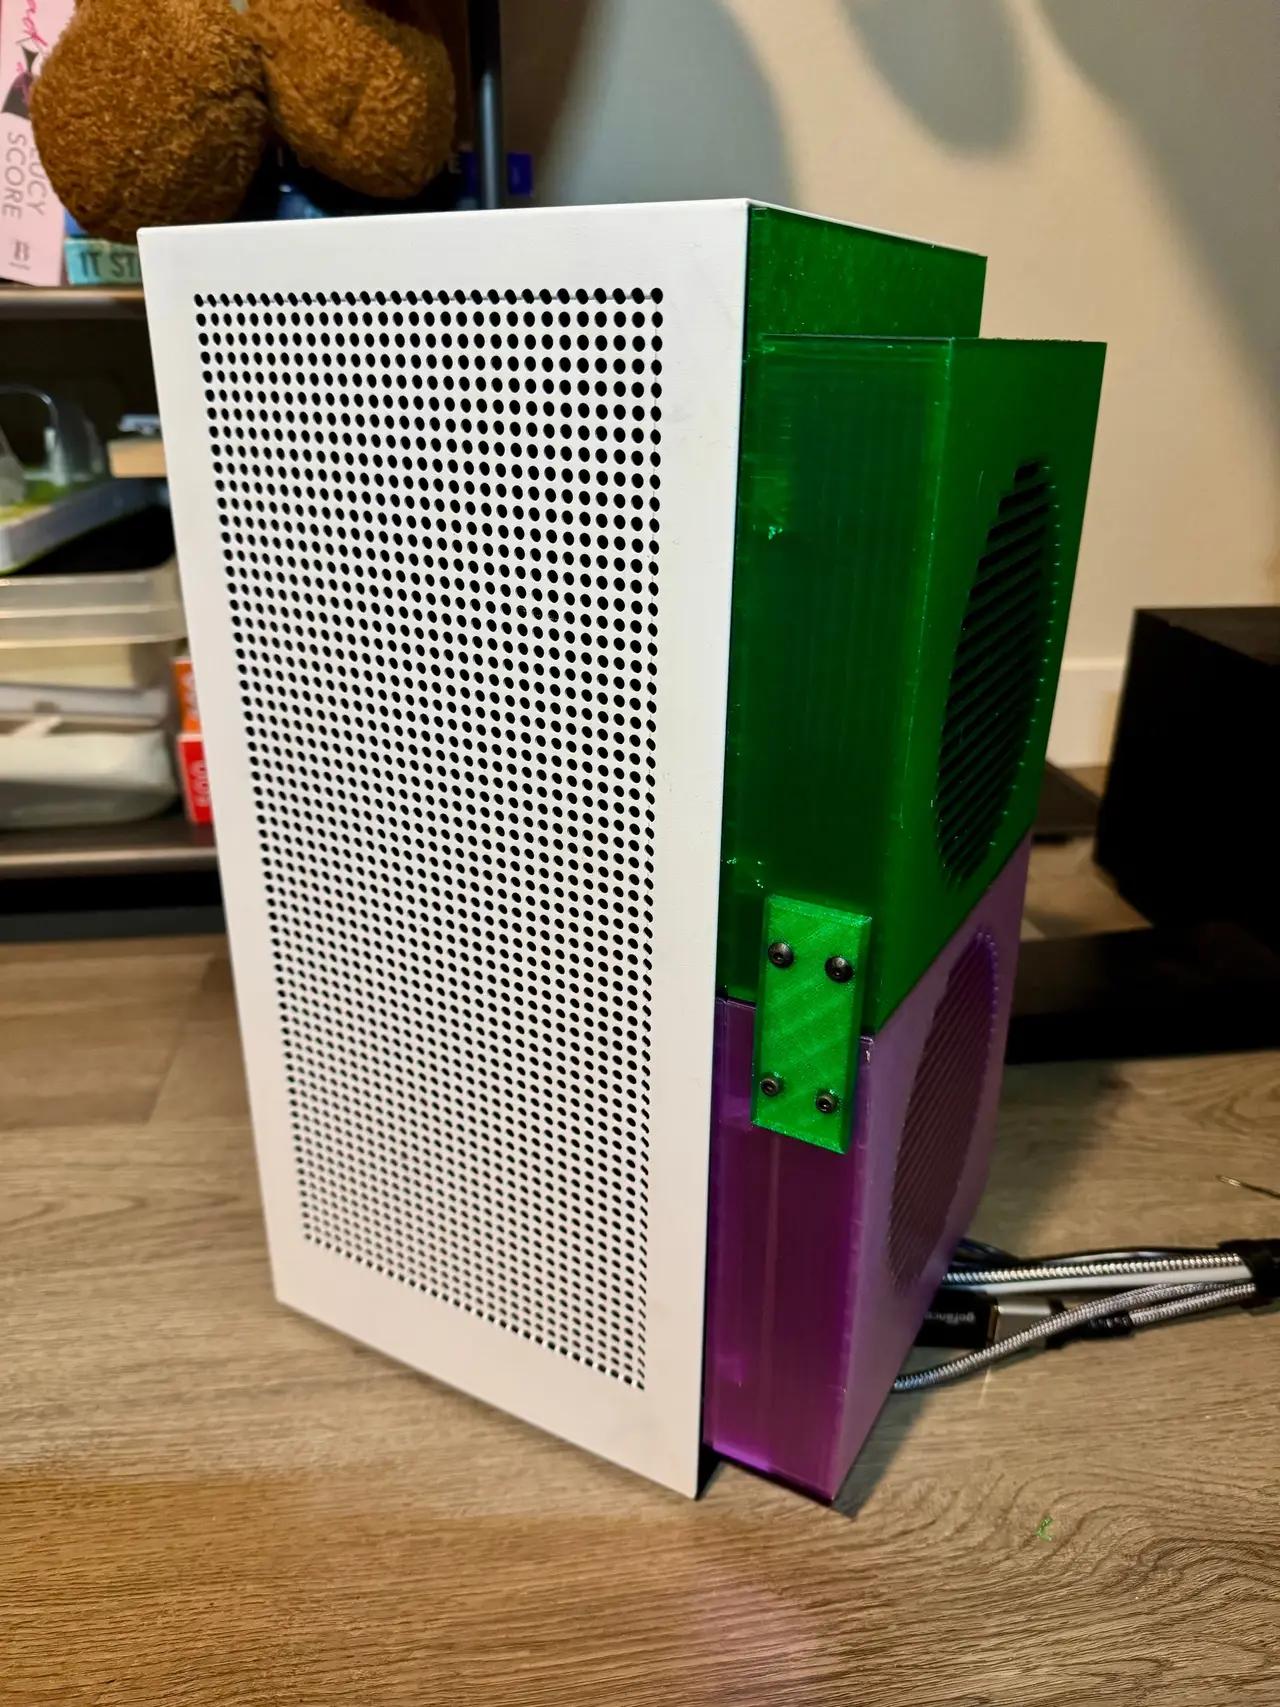
The H1 Hulk Cooler is a custom 3D-printed rear panel for the original NZXT H1 (V1), designed to improve GPU cooling by adding two 140mm exhaust fans. Originally designed to cool my RTX 3080 Ti, the mod replaces the stock rear panel with a modular assembly featuring integrated fan guards, cable...
Licencia
Uso comercial permitidoCC BY-SA 4.0 — Atribución, compartir igual
Puedes usarlo y modificarlo dando crédito; las versiones modificadas deben compartirse con la misma licencia.
Al descargar aceptas respetar la licencia y dar crédito a J D.
Archivos (7)
- 02_Guarded_shroud_LOWER.stl STL · 283 KB
- 02_Guarded_shroud_UPPER.stl STL · 277 KB
- 05_Retention_head_PRINT_4X.stl STL · 680 KB
- 06_Shell_splice_rail_PRINT_2X.stl STL · 39 KB
- 01_Carrier_LOWER__OEM_INTERFACE.stl STL · 146 KB
- 01_Carrier_UPPER__OEM_INTERFACE.stl STL · 331 KB
- H1_V1_Dual_P14_Prototype.f3d F3D · 13,7 MB
- Categoría
- Tecnología
- Formatos
- STL, F3D
- Descargas
- 1
- Publicado
Sobre este modelo
The H1 Hulk Cooler is a custom 3D-printed rear panel for the original NZXT H1 (V1), designed to improve GPU cooling by adding two 140mm exhaust fans. Originally designed to cool my RTX 3080 Ti, the mod replaces the stock rear panel with a modular assembly featuring integrated fan guards, cable management, and chassis retention clips. The name came about accidentally when I ran out of translucent purple PETG and finished the remaining parts in green! Features - Dual 140mm exhaust fans - Replacement for the original H1 V1 rear panel - Integrated fan guards and cable management - Modular design compatible with 220 × 220mm print beds - Uses standard M3/M4 mounting hardware - Includes STL files and Fusion 360 CAD
Print Settings SettingValue PrinterCreality Ender 5 Pro MaterialPETG Layer height0.2 mm Infill15% SupportsGuarded shrouds only PETG is recommended for its heat resistance compared with PLA. Bill of Materials Printed Components ComponentQuantity Lower carrier1 Upper carrier1 Lower guarded shroud1 Upper guarded shroud1 Retention heads4 Shell splice rails2 Purchased Components ComponentQuantity ARCTIC P14 Pro PST 140mm fans2 M4 × 40mm socket-head screws8 M4 hex nuts8 M3 × 12mm socket-head screws16 M3 × 16mm socket-head screws4 M3 hex nuts20 Zip ties (up to 7.6mm wide)4 Assembly Instructions - Prepare the printed parts. Remove any supports or printing debris from the nut pockets and bores. Press the eight M3 shroud nuts directly into the hex pockets at the free ends of the mounting posts. The nuts should seat against the solid clamping shoulders without sideways loading or sliding.
- Join the shrouds. Insert the eight splice nuts from inside the empty shrouds. Connect the upper and lower shrouds using both external splice rails and eight M3 × 12mm screws.
- Install the retention clips. Attach the four retention nuts and printed heads to the carriers using M3 × 16mm screws. Confirm each screw passes through its nut without binding against the printed bore or its blind end.
- Mount the fans. Position both fans with their support-strut/discharge faces toward the guards and cable exits toward the left cable gutter. Secure using eight M4 × 40mm screws and eight M4 nuts. Route the wires through the gutter and secure them with zip ties using the centered lugs. Keep wiring clear of the fan seats, blades, screw tips, and split seam.
- Attach the carriers. With the assembly off the chassis, secure each carrier/fan subassembly to its shroud using four M3 × 12mm screws inserted from the case-facing side.
- Inspect and install. Before final installation, verify retention engagement, wiring restraint, unobstructed fan rotation, flap clearance, and joint stiffness.
Compatibility Designed specifically for the original NZXT H1 V1. Compatibility with the H1 V2 has not been verified.
Descripción original del autor, publicada en Thingiverse.