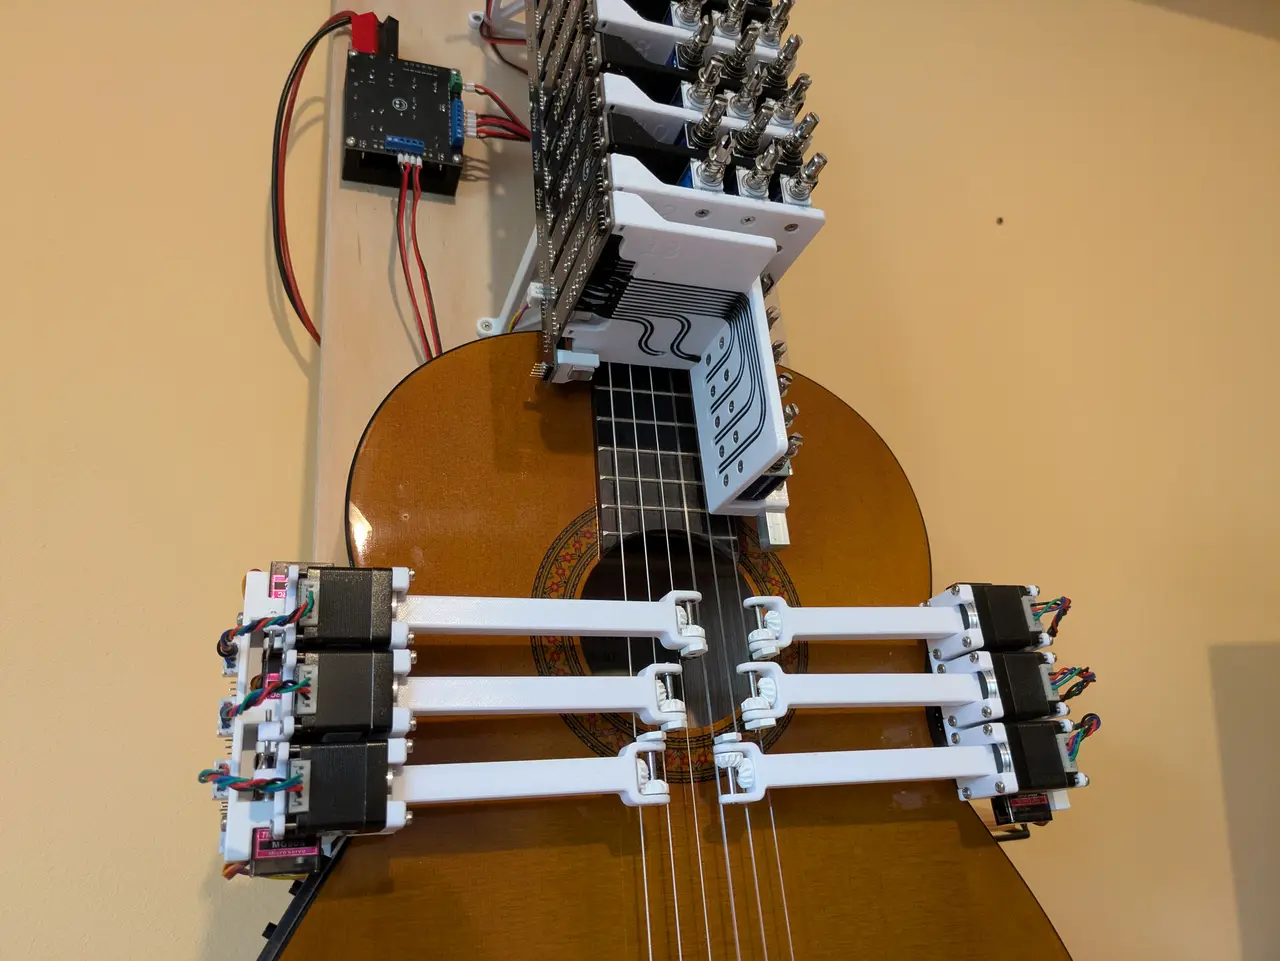
Guitarobot - Self-playing guitar
por Jon en Printables
3D-Printed Components for my self-playing guitar project
Licencia
Solo uso personalCC BY-NC-SA 4.0 — Atribución, no comercial, compartir igual
Uso personal dando crédito; sin fines comerciales y las modificaciones con la misma licencia.
Al descargar aceptas respetar la licencia y dar crédito a Jon.
Archivos (50)
- Fret01.stl STL · 16,4 MB
- Fret02.stl STL · 16,6 MB
- Fret03.stl STL · 16,8 MB
- Fret04.stl STL · 16,3 MB
- Fret05.stl STL · 16,6 MB
- Fret06.stl STL · 16,8 MB
- Fret07.stl STL · 16,3 MB
- Fret08.stl STL · 16,9 MB
- Fret09.stl STL · 16,7 MB
- Fret10.stl STL · 16,6 MB
- Fret11.stl STL · 16,3 MB
- Fret12.stl STL · 16,5 MB
- Fret13.1.stl STL · 8,1 MB
- Fret13.2.stl STL · 5,3 MB
- Finger Long.stl STL · 320 KB
- Finger Short Offset.stl STL · 318 KB
- Finger Short.stl STL · 318 KB
- Finger Cast.stl STL · 141 KB
- Silicone Pouring Cup.stl STL · 11,6 MB
- Spring Spacer.stl STL · 352 KB
- Backplane Clamp L.stl STL · 317 KB
- Backplane Clamp R.stl STL · 317 KB
- Drilling Jig.stl STL · 1,3 MB
- Drilling Jig Extension.stl STL · 179 KB
- Fret Pylon A.stl STL · 4,8 MB
- Fret Pylon B.stl STL · 3,6 MB
- Fret Pylon Pad.stl STL · 2 KB
- Gear A.stl STL · 19,9 MB
- Gear B.stl STL · 19,9 MB
- Gear Support.stl STL · 352 KB
- Pick Frame L.stl STL · 1,7 MB
- Pick Frame M.stl STL · 1,7 MB
- Pick Frame S.stl STL · 1,7 MB
- Pick Shaft Coupler.stl STL · 469 KB
- Pick Stepper Back Bracket L.stl STL · 1,4 MB
- Pick Stepper Back Bracket M.stl STL · 1,4 MB
- Pick Stepper Back Bracket R.stl STL · 1,4 MB
- Pick Stepper Front Bracket.stl STL · 1,0 MB
- Plectrum Main.stl STL · 368 KB
- Plectrum Soft Tip.stl STL · 2 KB
- Servo Arm L.stl STL · 761 KB
- Servo Arm M.stl STL · 783 KB
- Servo Arm S.stl STL · 808 KB
- Motor PCB Spacer.stl STL · 264 KB
- Servo Floor.stl STL · 1,8 MB
- Servo Foot.stl STL · 6,3 MB
- Servo Frame.stl STL · 2,0 MB
- Guitar Mount L.stl STL · 566 KB
- Guitar Mount M.stl STL · 654 KB
- Guitar Mount R.stl STL · 566 KB
- Categoría
- Tecnología
- Formatos
- STL
- Descargas
- 2
- Publicado
Sobre este modelo
This contains all 3D-printed parts of my Guitarobot project. Showcase video:
PCB files are available on OSHWLab: https://oshwlab.com/adfaskdjfasldkf/project_nzxtrjle Source code for firmware and host tools can be found on GitHub: https://github.com/Jonarw/guitar For each model file, I commented the recommended material and how many are needed. Generally, many of the models can really be printed with any moderately stiff material, I would recommend PLA or PETG for ease of printing. For anything that is in direct contact with solenoids or steppers, I would not recommend PLA for its low temperature tolerance. For the gears specifically I would recommend PLA for its hardness. Some parts need to be somewhat soft. I printed these from TPE-83, though anything in the A85 range should work I guess. Most parts can be printed without supports, exceptions are mentioned below in the model-specific printing tips. FretXX.stl: Print without supports. Pay attention to the bridging directions. You may have to add modifier volumes to your slicer to get all bridges in sensible directions (see example below).
Fingers: Add tiny supports for the small structure at the bottom of the fingers. For the short fingers I would recommend adding a brim, unless you have exceptional bed adhesion.
Gears: These are a bit tricky to print because of the integrated spacer at the bottom of the gear. I guess if you have a dual-nozzle printer, you can skip the 'Gear Support' model and just use the second nozzle for PETG supports. As I don't have a dual-nozzle printer, I used the 'Gear Support' model: - Print 12x 'Gear Support.stl' using PETG. Use a layer height that allows you to reach 0.5mm exactly (also pay attention to your initial layer height!).
- Leave the PETG supports on the build plate, do not let the plate cool down
- Print the 12 Gears (6x Gear A, 6x Gear B) in PLA on the exact same positions as the supports on the build plate. Make sure you have Z Hop active, so the nozzle does not touch the support when traveling
- After printing, the PETG support should snap right off and you have nice clean gears
Servo Arm S/M/L: You might have to experiment a bit with hole compensation in your slicer so the arm press-fits properly on the servo.
Descripción original del autor, publicada en Printables.