GravityLock – Self-Clamping Pegboard Holder
por Milda 33 en Printables
A fully 3D-printable self-clamping holder that uses gravity to securely grip objects.
Licencia
Solo uso personalCC BY-NC-SA 4.0 — Atribución, no comercial, compartir igual
Uso personal dando crédito; sin fines comerciales y las modificaciones con la misma licencia.
Al descargar aceptas respetar la licencia y dar crédito a Milda 33.
Archivos (4)
- Categoría
- Figuras y arte
- Formatos
- 3MF
- Descargas
- 1
- Publicado
Sobre este modelo
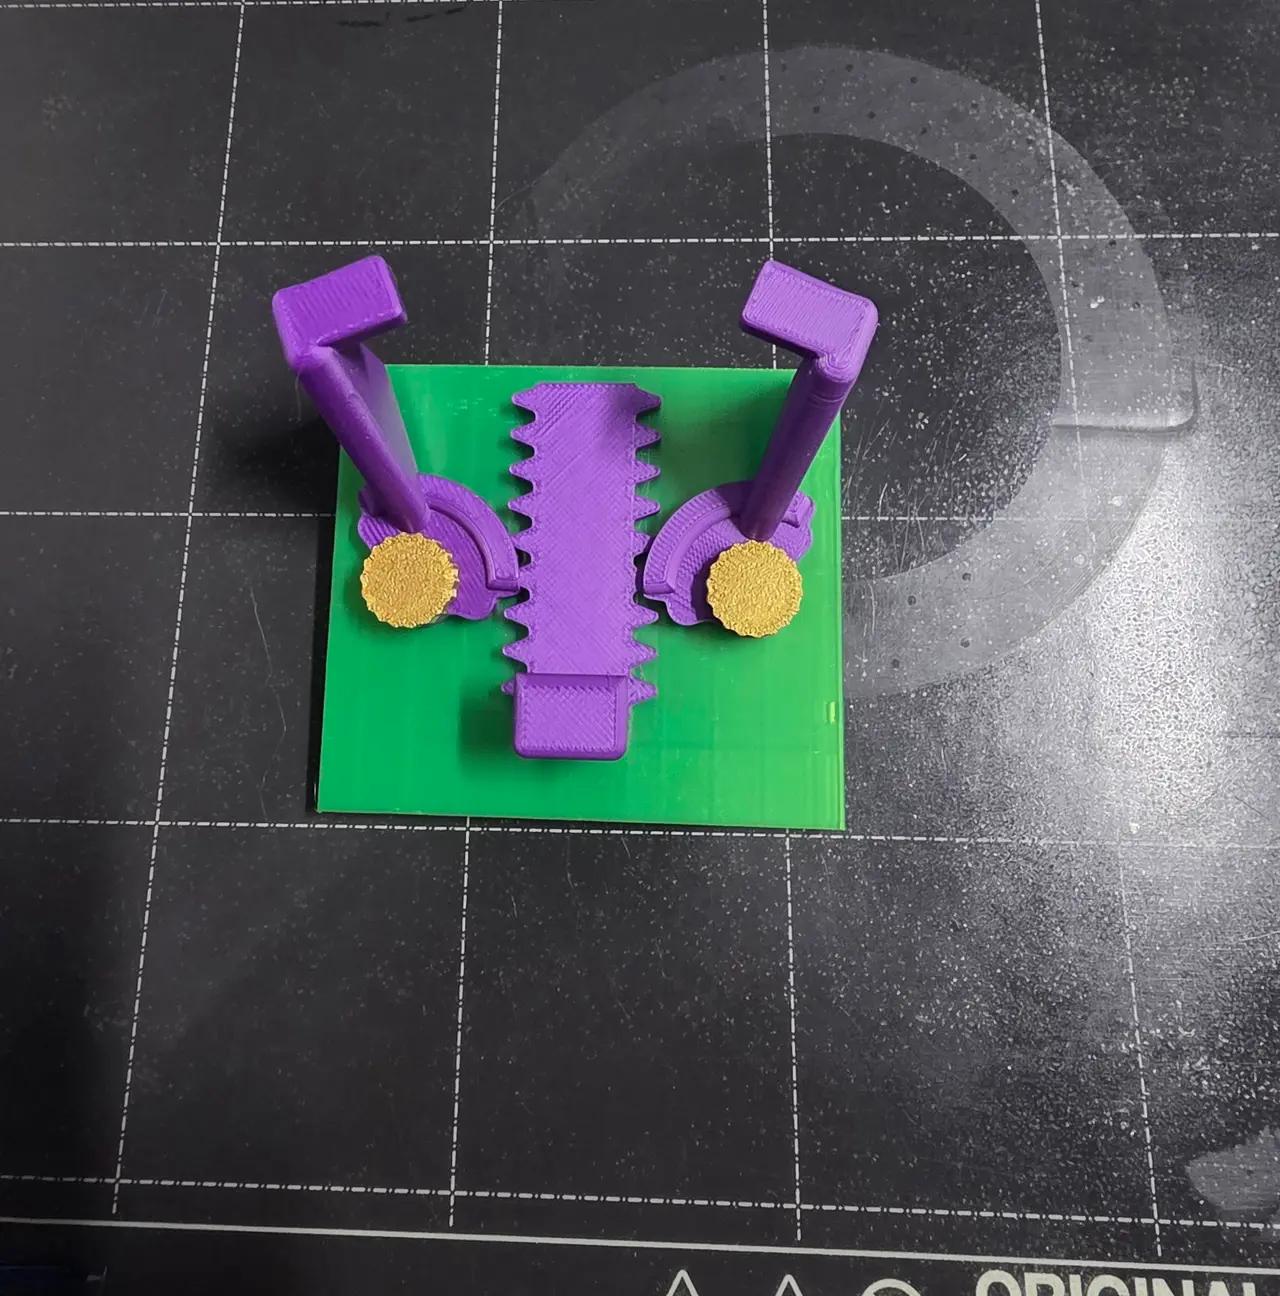
GravityLock was designed as a universal holder for a pegboard/workshop organization system. Instead of using springs, rubber bands or metal hardware, the entire mechanism works mechanically using a central gear rack and two synchronized geared jaws. Place an object between the jaws and push it down. The central rack moves downward and rotates both jaws simultaneously toward the object. The heavier the object pushes on the rack, the more securely the jaws close around it. Lift the object and the mechanism releases. How It Works The mechanism consists of three main moving elements: - 1× Gear Rack Slider
- 2× Jaws
- 2× Pivot Screws
The teeth on both sides of the central rack engage with the geared sections of the jaws. This keeps both jaws synchronized and provides symmetrical clamping from both sides. The printed pivot screws have a smooth bearing section that allows the jaws to rotate freely while keeping the entire mechanism together. No metal screws, springs, bearings or other hardware are required. Everything is 3D printed. Modular Design The clamping mechanism is intentionally separated from the mounting system. This makes it possible to create different base plates for different pegboard standards without redesigning the GravityLock mechanism itself. It also means the same mechanism can later be adapted for different applications simply by changing the shape, length or size of the jaws. Files - Base_Plate
- Gear_Rack_Slider
- Jaws – contains both left and right jaws
- Pivot_Screw – print 2×
The included photos show the assembled mechanism, individual printed parts and practical tests with objects of different shapes and sizes. Printing The model was designed specifically for FDM printing. No metal hardware is required and the individual parts are oriented so they can be printed easily. Recommended starting settings: - Layer height: 0.20 mm
- Perimeters: 3–4
- Infill: 20–30%
- Material: PETG recommended, PLA also works for lighter applications
- Supports: not required for the main parts
For stronger workshop versions, increase the number of perimeters rather than using extremely high infill. Assembly - Install the Gear Rack Slider into the center of the Base Plate.
- Position both Jaws so their teeth engage with the rack.
- Insert the two printed Pivot Screws.
- Check that both jaws rotate freely and move symmetrically.
- Move the rack through its full travel before mounting the holder.
The mechanism should move freely without forcing the gears. Tested Concept The prototype was tested with objects of different widths and shapes to verify the synchronized clamping mechanism. Because the holder is mechanically synchronized, both jaws automatically move together when the central rack moves. Future Development GravityLock is designed as a platform rather than a single-purpose holder. The same mechanism can be adapted into larger or smaller versions for tools, workshop equipment, bathroom accessories and other objects. Different jaw shapes and additional mounting systems can be added without changing the basic operating principle. Designed from scratch in SolidWorks and optimized for 3D printing. If you print GravityLock, I would love to see your make and what you use it to hold!
Descripción original del autor, publicada en Printables.