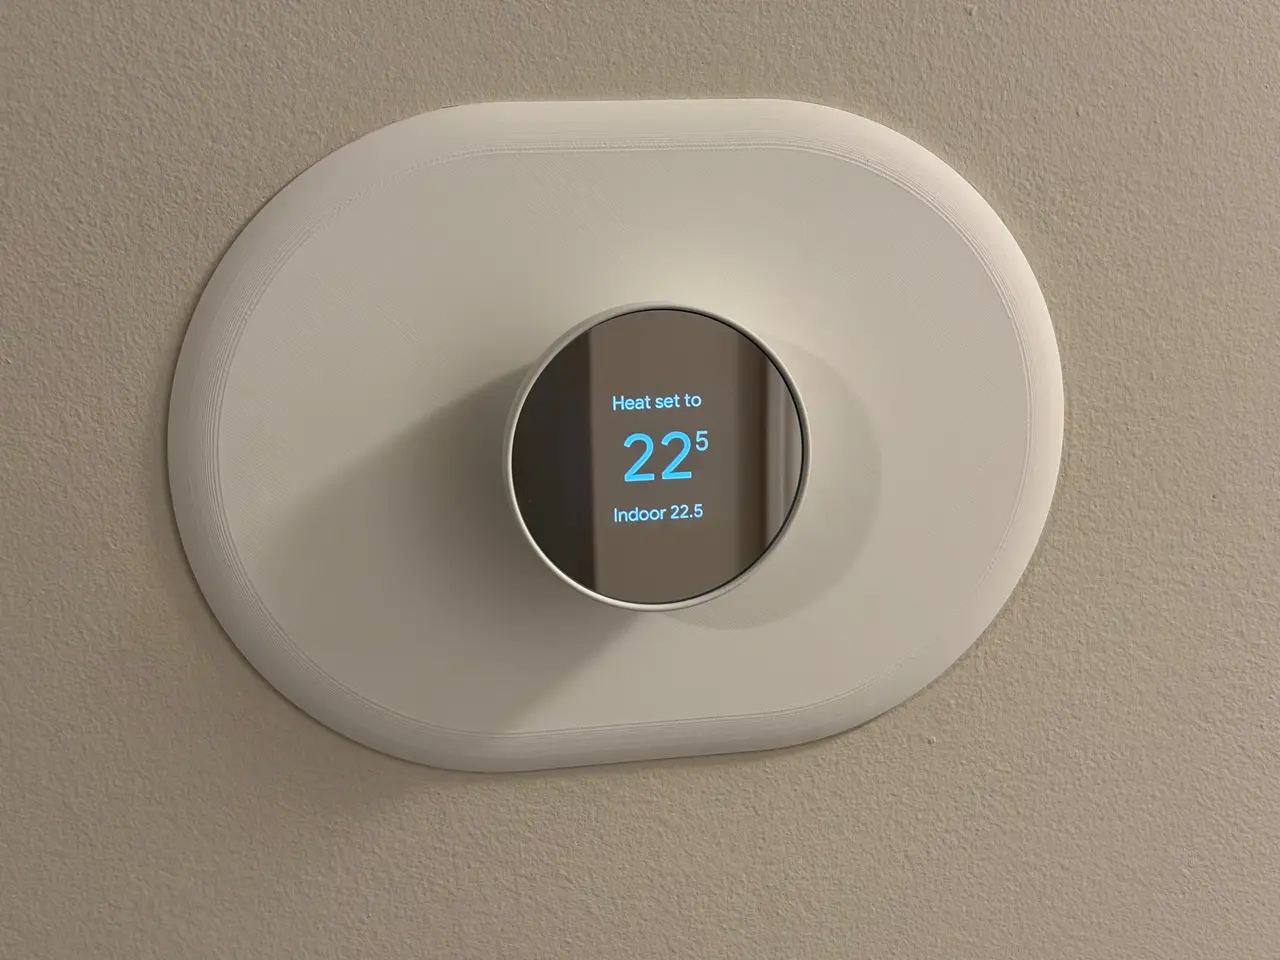
Google Nest Thermostat Trim Plate (2020)
por TheRippedTrojan en Printables
Google Nest Thermostat Trim Plate (2020)
Licencia
Uso comercial permitidoPuedes imprimirlo, modificarlo y venderlo dando crédito al autor.
Al descargar aceptas respetar la licencia y dar crédito a TheRippedTrojan.
Archivos (4)
- Categoría
- Hogar
- Formatos
- 3MF, STL
- Descargas
- 0
- Publicado
Sobre este modelo
Trim Plate for the Google Nest Thermostat (2020) Replaced an old thermostat and found a ghost outline of paint, patched drywall, or old anchor holes? This trim plate covers it. It keeps the clean look of Google's official trim plate, with the same rolled front edge and stadium shape and is available in 2 sizes depending on the damage you need to cover. Size • Standard: 205 × 137 mm (~8.0 × 5.4 in) • Large: 255 × 188 mm (~10.0 × 7.4 in) Fit and compatibility • Made for the Nest Thermostat (2020, model G4CVZ). It does not fit the Nest Learning Thermostat or the Nest Thermostat E. • The thermostat base sits in a recessed pocket on the front, just like it does on the official plate. • The four screw slots line up with the base, so it mounts the same way as the original. • The back has a recess for the steel plate from Google's official Nest Thermostat Trim Kit. The recess works with the plate turned horizontal or vertical, so it suits either box orientation, and there are pockets for the box screw heads so the trim sits flat against the wall. Print settings • Material: Tested and working with PLA and PETG • Layer Height: 0.12 mm for a smoothly curved edge • Seam Position: Random • Arc Fitting: No • Z-Layer Antialiasing: Yes • Wall Generator: Arachne • Avoid Crossing Walls: Yes • Infill Density: 10% • Support: Required ◦ Type: Normal (auto) ◦ Style: Snug Mounting over an electrical box A steel backplate is REQUIRED when mounting over an electrical (junction) box. The thermostat screws thread into the steel plate, which is screwed to the box. That plate is not included in this download. Use the one from Google's Nest Thermostat Trim Kit. If you are mounting directly to drywall, no backplate is needed. Installation 1. Turn off power to your HVAC system at the breaker. 2. If you are mounting over an electrical box, screw the steel plate to the box first. 3. Pull the wires through the center hole, then set the trim plate over the steel plate or against the wall. 4. Screw the Nest base through the trim plate's slots, level it, connect the wires, and snap the thermostat on.
Descripción original del autor, publicada en Printables.