GableNest - Compact Nativity Stable | 5 Pieces
por MARGRAF ITALY en Printables
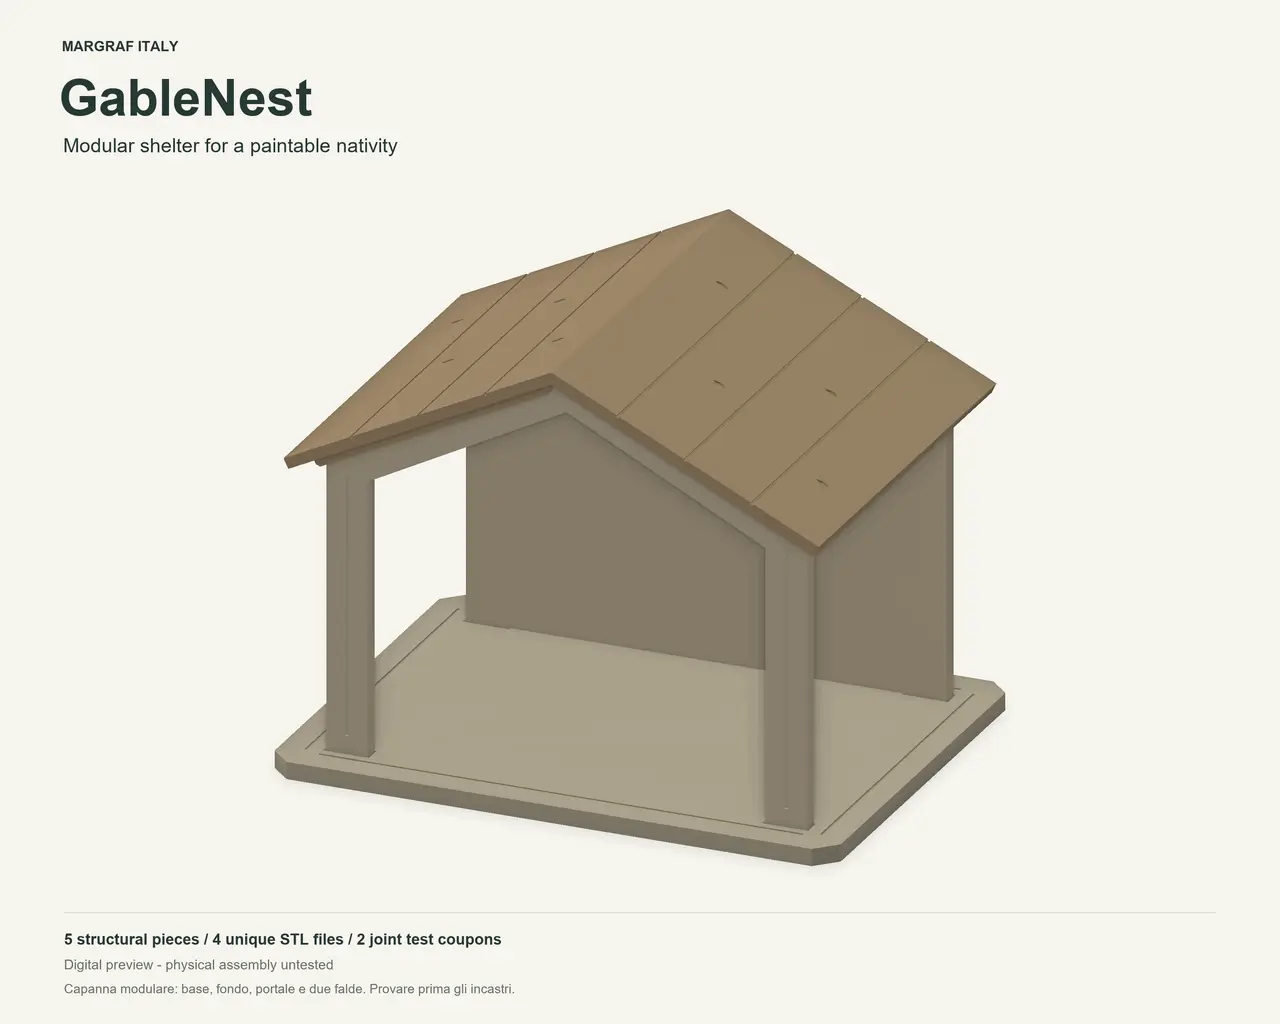
A compact nativity shelter: five pieces printed flat, two identical roof panels and joint test coupons.
Licencia
Uso comercial permitidoPuedes imprimirlo, modificarlo y venderlo dando crédito al autor.
Al descargar aceptas respetar la licencia y dar crédito a MARGRAF ITALY.
Archivos (9)
- GableNest_Base_R01.stl STL · 9 KB
- GableNest_Fit_Coupon_Male_R01.stl STL · 3 KB
- GableNest_Front_Portal_R01.stl STL · 11 KB
- GableNest_Back_Wall_R01.stl STL · 21 KB
- GableNest_Roof_Panel_PRINT_2_R01.stl STL · 22 KB
- GableNest_Fit_Coupon_Female_R01.stl STL · 6 KB
- build_gablenest.py PY · 12 KB
- GableNest_Instructions_EN_IT.txt TXT · 8 KB
- GableNest_Print_Assembly_Guide_EN_IT.pdf PDF · 586 KB
- Categoría
- Miniaturas
- Formatos
- STL, PY, TXT, PDF
- Descargas
- 1
- Publicado
Sobre este modelo
GableNest is a compact gabled shelter for a small paintable nativity. Its open front leaves the figures visible, while the separate wall and roof panels make printing and painting more manageable. Size and parts Assembled size is approximately 165 x 125 x 131 mm. The kit has five structural pieces: one base, one rear wall, one front portal and two identical roof panels. Print the roof STL twice. There are four unique structural STL files and two additional joint test pieces. The largest supplied print footprint is 165 x 125 mm. The orientation chart uses a nominal 180 mm reference bed; check the usable area of your own printer, including skirt, brim and clearance. Matching figures The example scene uses the original MARGRAF ITALY Holy Family at 100% scale: Joseph about 85 mm tall, kneeling Mary about 71 mm, and the Baby in a manger. Those figures are available separately and are not included in this structural kit: MARGRAF ITALY Holy Family - figures available separately Print and test the joints Print the two small fit coupons first. They reproduce the base and roof joints; test one tongue at a time. Nominal design clearance is 0.35 mm per side, with chamfered entrances. Actual fit depends on the printer, material and finishing. Keep mating surfaces free of paint until the fit is checked, and do not force them. Use the supplied flat orientations. The roof's broad exterior face goes on the bed, with its retaining cheeks upward. Its first layer has four contact bands separated by the engraved seams and joined in later layers; check adhesion and bridges in your preview. Six generic PLA checks with a 0.4 mm nozzle and 0.20 mm layers produced actual toolpaths without supports. Review a profile suited to your own printer and material. Assembly Fit the rear wall and open portal into the base, engraved faces outward. Turn one copy of the roof panel 180 degrees around the vertical axis relative to the other. Align the channels and keys, starting slightly above and outside the final position, then guide each panel diagonally down and inward toward the ridge. The illustrated exploded positions separate parts for clarity; they are not the insertion directions. Check the dry fit before painting or using a compatible craft adhesive. The joints locate the parts; handling strength, friction fit and glue-free assembly have not been physically demonstrated. Verification and files Geometry, actual joint/coupon sections, roof bearing faces, final assembly and selected insertion poses were checked digitally; one isolated source regeneration produced identical STLs. The generic diagnostic estimate for the five structural pieces is about 201.4 g / 16h 49m; the two fit coupons together are about 6.75 g / 39 min. Re-slice for your own printer; these are not validated real-machine estimates. The images are digital previews of the exported geometry. Physical printing, joint fit, adhesion, strength, stability and painting remain untested. Included files: six unique STLs, original editable Python source, bilingual instructions and a three-page print/assembly PDF. The five-piece shelter uses the roof STL twice; the two fit coupons are accessories within this project. Italiano Capanna compatta con fronte aperto, fondo a timpano e due falde uguali. Ingombro montato circa 165 x 125 x 131 mm. I cinque pezzi strutturali sono base, fondo, portale e due falde; stampare lo stesso STL della falda due volte. Il pezzo più grande occupa 165 x 125 mm sul piatto, da confrontare con l'area utile della propria stampante. Le figure mostrate sono quelle della Sacra Famiglia MARGRAF ITALY alla scala originale, disponibili separatamente nel collegamento sopra. Non sono incluse nel kit della capanna. Prima del kit completo stampare i due provini e verificare gli incastri base e tetto separatamente. Gioco nominale 0,35 mm per lato, con smussi d'invito; non verniciare le sedi prima della verifica e non forzare il montaggio. Le falde si stampano con la faccia esterna sul piatto e le guide verso l'alto. Il primo strato ha quattro zone separate dalle incisioni e unite più in alto: controllare adesione e ponti. Sei controlli PLA generici 0,4/0,20 hanno prodotto percorsi effettivi senza supporti. Inserire fondo e portale nella base, poi accompagnare ciascuna falda dall'alto e dall'esterno in diagonale verso il basso e il colmo, tenendo allineati canali e tenoni. Provare a secco prima di dipingere o incollare. Stampa, accoppiamento, tenuta, stabilità e pittura reali restano da provare. Guida PDF, istruzioni e sorgente modificabile inclusi. Original design MARGRAF ITALY. Creative Commons Attribution 4.0 International.
Descripción original del autor, publicada en Printables.