Full-Size Modular Vending Machine
por Martin en MakerWorld
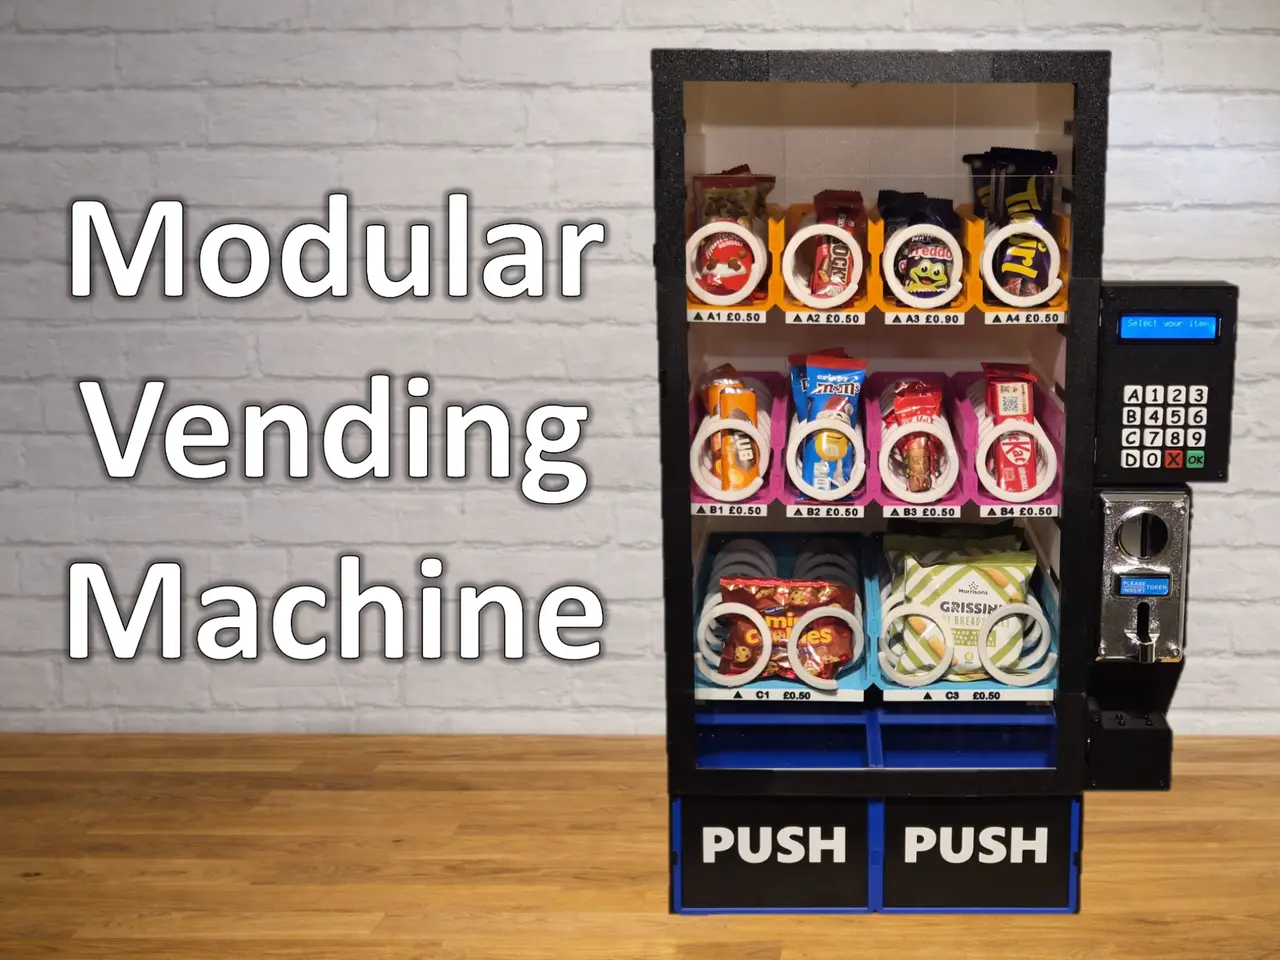
Welcome to the first ever full size 3D printed vending machine! Whether it’s stocked with nuts for your home bar, snacks in the office, prizes in a classroom, or treats your kids will absolutely love, this machine turns vending into a conversation piece.
MakerWorld entrega los archivos a usuarios con cuenta gratuita
Licencia
Solo uso personalMakerWorld Exclusive License
Licencia exclusiva de la plataforma: uso personal, no se permite compartir el archivo ni vender las impresiones.
Al descargar aceptas respetar la licencia y dar crédito a Martin.
Archivos (82)
- Door.3mf 3MF · 315 KB
- Door Bottom Corner Latch.stl STL · 265 KB
- Door Straight Latch.stl STL · 268 KB
- Door Glass Holder.stl STL · 26 KB
- Door 150mm Spacer (1) (1).stl STL · 260 KB
- Door Top Corner Right.stl STL · 72 KB
- Door Bottom Corner Right.stl STL · 65 KB
- Door Straight.stl STL · 45 KB
- Door Top Corner Hinge.stl STL · 110 KB
- Door Straight Hinge.stl STL · 84 KB
- Bottom Door Corner Hinge.stl STL · 83 KB
- Door Joiner.stl STL · 1 KB
- Front Lid Edge v2.stl STL · 98 KB
- Front Lid Joiner.stl STL · 75 KB
- Front Lid Plate.stl STL · 39 KB
- Lid Joiner.stl STL · 62 KB
- Lid Plate.stl STL · 39 KB
- Lid.3mf 3MF · 177 KB
- Plate Joiner.stl STL · 17 KB
- Lid Edge v2.stl STL · 63 KB
- Button 0.stl STL · 82 KB
- Button 1.stl STL · 68 KB
- Button 2.stl STL · 86 KB
- Button 3.stl STL · 93 KB
- Button 4.stl STL · 69 KB
- Button 5.stl STL · 95 KB
- Button 6.stl STL · 84 KB
- Button 7.stl STL · 69 KB
- Button 8.stl STL · 93 KB
- Button 9.stl STL · 86 KB
- Button A.stl STL · 72 KB
- Button B.stl STL · 82 KB
- Button C.stl STL · 84 KB
- Button D.stl STL · 77 KB
- Button OK.stl STL · 99 KB
- Button X.stl STL · 80 KB
- Keypad Body.stl STL · 117 KB
- Keypad Front Plate.stl STL · 178 KB
- Coin Tray.stl STL · 15 KB
- Door solenoid Cover.stl STL · 16 KB
- Door solenoid.stl STL · 233 KB
- Accessories.3mf 3MF · 488 KB
- Coin Reader.stl STL · 68 KB
- Flat Keypad Plate.stl STL · 60 KB
- Black Keypad Plate.stl STL · 84 KB
- Coil 5 Items Left Hand.stl STL · 5,3 MB
- Coil 5 Items Right Hand.stl STL · 5,3 MB
- Coil 6 Items Left Hand.stl STL · 5,2 MB
- Coil 6 Items Right Hand.stl STL · 5,2 MB
- Coil 7 Items Left Hand.stl STL · 5,2 MB
- Coil 7 Items Right Hand.stl STL · 5,2 MB
- Coil 8 Items Left Hand.stl STL · 5,2 MB
- Coil 8 Items Right Hand.stl STL · 5,2 MB
- Coil 9 Items Left Hand.stl STL · 7,6 MB
- Coil 9 Items Right Hand.stl STL · 7,6 MB
- Coils.3mf 3MF · 17,6 MB
- Front Side Bottom Right.stl STL · 60 KB
- Front Side Right Door Latch.stl STL · 96 KB
- Front Side Right.stl STL · 270 KB
- Front Sides.3mf 3MF · 336 KB
- Categoría
- Tecnología
- Formatos
- 3MF, STL
- Descargas
- 3,071
- Publicado
Sobre este modelo
Welcome to the first ever full size 3D printed vending machine!
Whether it’s stocked with nuts for your home bar, snacks in the office, prizes in a classroom, or treats your kids will absolutely love, this machine turns vending into a conversation piece.
The design is fully modular, letting you create a small one for your desk, a medium size for your worktop, or a full-size floor standing vending machine packed to the brim with snacks. There's plenty of accessories you can add to it too including a coin reader that'll work with any currency, a keypad and screen to control it, and a door lock to keep those pesky hands out without paying.
This listing includes all print files, plus drafted build instructions, electronics guide, parts list, and bill of materials to walk you through the entire process from first print to first vend.
Early Access Disclaimer This model is currently released as early access for makers who are keen to get stuck in early and help shape the project.
You don’t need to be an electronics wizard, but you should be comfortable with Arduino basics and happy controlling stepper motors, an I2C screen, and a button matrix. An electronics guide is included to walk you through the setup step‑by‑step and take some of the fear out of it.
I’m actively working on a plug‑and‑play electronics kit (planned for Etsy) that will make this build far more accessible for non‑techy builders — but that’s still a few weeks away.
Expect the occasional tweak, improvement, or clarification as the project evolves. Feedback is hugely appreciated and directly helps improve future updates. How It Goes Together
- Print modules & coils - identical parts repeated across the build
- Assemble module trays - Attach motors, coils and modules together
- Add sides & front panels - slide in the sides, add the lid and push bins.
- Install accessories - assemble the keypad, coin reader, screen and door latch
- Fit the electronics - Add your own electronics to control the motors and screen.
Check out the Assembly Instructions for a more detailed breakdown. Check out the Electronics Guide to help you get started with the overwhelming part. Also check out the Model Print List so you know which parts to print. Print Profiles
- Modules - has the modules, push bin, labels and joiner parts.
- Coils - A range of different coils for different size items.
- Module Sides - The white sides around the modules.
- Front Sides - The black sides at the front the snacks drop through.
- Lid - The lid over the module / front sections.
- Accessories - Door lock, keypad & screen, and coin reader.
- Door - Door frame with hinges - just add the 2mm acrylic sheet.
Printing Overview
- Designed for Bambu A1, P1S, P2S, H2S. (min size 240 x 200)
- Doesn’t fit with the A1 Mini (sorry!)
- Only needs an AMS for the keypad buttons.
The coils are printed laying flat with supports. If you’re printing on a bed slinger like the Bambu A1, make sure you print the coils across the bed like this:
A full 4×3 machine typically requires ~100–120 hours of print time, and around 5KG of filament. Electronics (Approachable, Not Black Magic) This project is designed so you don’t need to be an electronics expert, but you should be comfortable with:
- Arduino basics
- Stepper motors
- Simple wiring
Descripción original del autor, publicada en MakerWorld.