Fractal Baby North - Raspberry pi case (3, 4 & 5) + BIGTREETECH Pi 2 (beta)
por nagrom en Printables
Fractal Baby north-is
Licencia
Uso comercial permitidoCC BY-SA 4.0 — Atribución, compartir igual
Puedes usarlo y modificarlo dando crédito; las versiones modificadas deben compartirse con la misma licencia.
Al descargar aceptas respetar la licencia y dar crédito a nagrom.
Archivos (24)
- main body final.stl STL · 403 KB
- front final.stl STL · 347 KB
- wood mount.stl STL · 190 KB
- wood.stl STL · 73 KB
- easy tray.stl STL · 296 KB
- foot M2.5.stl STL · 158 KB
- foot M3.stl STL · 110 KB
- new back pannel pi5.stl STL · 1,1 MB
- top panel pi5.stl STL · 139 KB
- new back panel pi4.stl STL · 1,1 MB
- top panel pi4.stl STL · 139 KB
- new back panel pi3.stl STL · 1,1 MB
- top panel pi3.stl STL · 133 KB
- dust cover.stl STL · 18 KB
- acrylic panel final.stl STL · 1 KB
- main body btt pi2.stl STL · 414 KB
- front btt pi2.stl STL · 338 KB
- wood mount btt pi2.stl STL · 183 KB
- wood bbt pi2.stl STL · 69 KB
- back panel btt pi2.stl STL · 1,2 MB
- back panel btt pi2 more space around IO ports.stl STL · 1,3 MB
- top panel btt pi2.stl STL · 142 KB
- dust cover btt pi2.stl STL · 19 KB
- acrylic panel btt pi2.stl STL · 2 KB
- Categoría
- Tecnología
- Formatos
- STL
- Descargas
- 2,122
- Publicado
Sobre este modelo
Fractal Design uploaded the files for their model on their website : https://www.fractal-design.com/north-pi-3d-files/
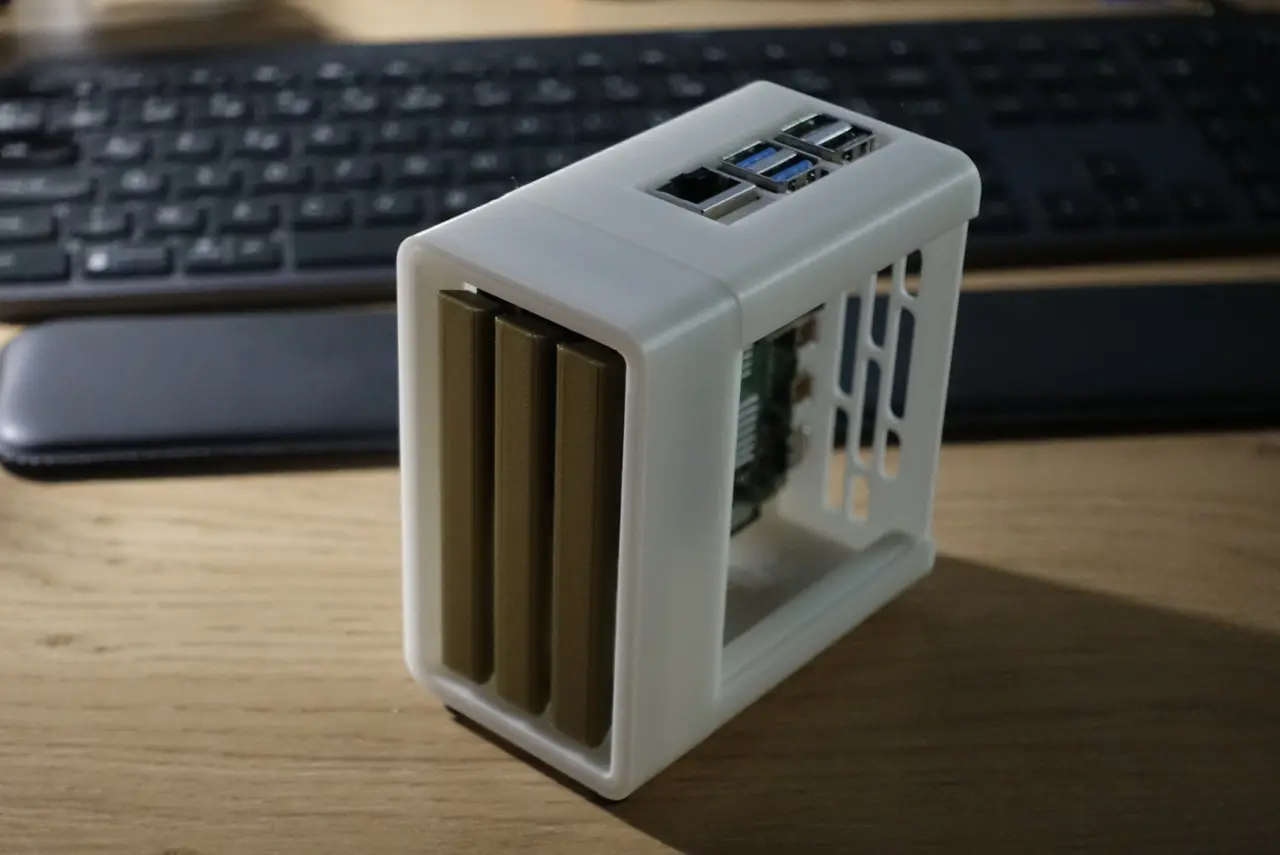
This is my take on the Fractal baby north.
EDIT 3 of August 2024 Added a BBT pi 2 version (for the tray & foot use the raspberry version)
EDIT 23 of July 2024 I pushed the fan monts on the front element (like it is on the OG), added a space to put the fan cables and clean the design a bit. Resized the pi mount hole to 3.9mm to be able to use cheap heat insert (M2.5x3x4mm)
The other holes can be used with M3x3x4.6mm heat inserts (or M2.5x3x4.6 like those of cnc kitchen)
I recommend not using M3 inserts for the Pi mount because you'll have to drill the Pi board holes to 3mm diameter! (I did it, but you probably shouldn't!)
The main body and tray need to be printed with supports. If the tray is hard to insert/remove, you can trim a bit where the supports were, and it should slide easily. If you want to have the same finish as the main body, you should print it on its side: You can also print the dust cover on the side (but it may be a challenge :)).
For the side panel, you can use some 1.5 mm acrylic and cut it to the dimensions 71mm(L) X 84mm(H). (Or a 4mm acrylic panel and use a router to make it like the model I uploaded.)
The IO panels are available for the Raspberry Pi 3B, 4, & 5. Under the top panel is a mark that needs to be placed facing the bottom front of the case.
I'm currently happy with how it ended up and because of the original files from Fractal, I will probably not update this model again.
Descripción original del autor, publicada en Printables.