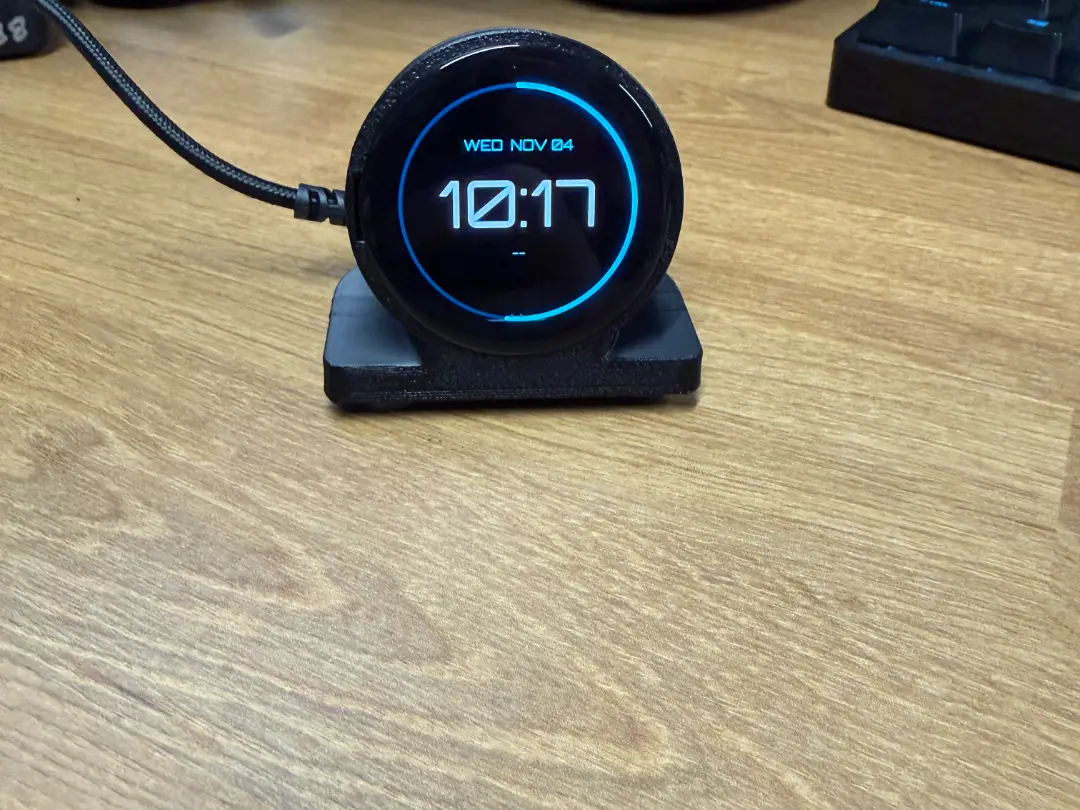
ESP32-S3 Round AMOLED Desk Clock + Home Assistant
por Double Diamond Printing en MakerWorld
A compact desk stand that turns the Waveshare ESP32-S3 1.43" round AMOLED touch display (466×466) into a desk clock. It also works as a touch controller for Home Assistant. In my build, one screen toggles my Living Room, Kitchen and Front Door lights. It prints in one piece, and USB-C power…
MakerWorld entrega los archivos a usuarios con cuenta gratuita
Licencia
Solo uso personalStandard Digital File License
Licencia estándar de archivos digitales: solo uso personal. No se permite compartir, revender ni subir el archivo a otros sitios, ni vender las impresiones.
Al descargar aceptas respetar la licencia y dar crédito a Double Diamond Printing.
Archivos (1)
- desktop_clock.stl STL · 74 KB
- Categoría
- Herramientas
- Formatos
- STL
- Descargas
- 0
- Publicado
Sobre este modelo
A compact desk stand that turns the Waveshare ESP32-S3 1.43" round AMOLED touch display (466×466) into a desk clock. It also works as a touch controller for Home Assistant. In my build, one screen toggles my Living Room, Kitchen and Front Door lights. It prints in one piece, and USB-C power comes in through a port in the back of the stand. The display is a press-fit into the round front opening — no screws or glue. Board silkscreen on the unit photographed for this listing: ESP32-S3-Touch-LCD-1.43 (same Waveshare 1.43" round AMOLED family as ESP32-S3-Touch-AMOLED-1.43). Features
- Crisp 1.43" round AMOLED clock face (the board has an onboard PCF85063 RTC)
- Home Assistant light control on the touchscreen through the Home Assistant REST API (no ESPHome). It uses a dedicated Home Assistant user with a long-lived access token.
- Rear USB-C power port built into the stand (USB-C pigtail routed through the case)
- Press-fit display install — no hardware fasteners required
- No battery in this build — the case has no room for a cell. Power is from a normal USB supply only.
Parts list
- ESP32-S3 1.43" AMOLED touch display (Waveshare ESP32-S3-Touch-AMOLED-1.43 / silkscreen Touch-LCD-1.43): https://www.amazon.com/dp/B0DTPDG2BJ
- USB Type-C pigtail: https://www.amazon.com/dp/B0CFWVYJCY
- 2-pin MX1.25 / PH1.25 (1.25 mm pitch) lead/pigtail to match the board's lithium BAT header. Search Amazon for "MX1.25 2 pin pigtail" or "PH1.25 2 pin pigtail". (Waveshare names this header MX1.25 on the product page and PH1.25 in the wiki FAQ / schematic footprint.)
- Soldering iron, solder and heat-shrink
How power is wired in this build (important) This stand does not use the board's USB-C port for day-to-day power. A USB-C pigtail is soldered to a 2-pin MX1.25/PH1.25 lead, which plugs into the board's BAT header (the larger white 2-pin near the top of the board with + / - silkscreen). That header is the board's 3.7V lithium battery recharge/discharge connector, not a separate dedicated 5V "power JST". Sources:
- Waveshare product page: "Onboard 3.7V MX1.25 Lithium battery recharge/discharge header" — https://www.waveshare.com/product/esp32-s3-touch-amoled-1.43.htm
- Waveshare wiki FAQ: lithium packs use the PH1.25 interface; RTC backup uses SH1.0 — https://www.waveshare.com/wiki/ESP32-S3-Touch-AMOLED-1.43
- Schematic BAT block (J7, VBAT–GND), footprint PH1.25_2P — https://files.waveshare.com/wiki/ESP32-S3-Touch-AMOLED-1.43/ESP32-S3-Touch-AMOLED-1.43-Schematic.pdf
Nearby silk that is not this connector: I2C and UART are 4-pin SH1.0 headers; PWR near the UART side is the power-indicator area, not a power JST; the small RTC header is SH1.0. In this build the BAT header is fed from a normal USB supply (whatever the USB-C pigtail outputs, typically ~5 V). No cell is installed. Match polarity to the + / - silk (red to +, black to - in the listing photos). Firmware and Home Assistant setup
- Firmware is not attached to this MakerWorld listing (file-type limits). The Arduino sketch for the Waveshare ESP32-S3-Touch-AMOLED-1.43 and setup notes can be shared separately - ask in the comments. You will fill in your own Wi-Fi, HA host/port, token, weather entity, time zone, and light entity IDs in a config.h; never share that file once filled.
- Setup outline: flash the sketch with Arduino IDE, create a dedicated Home Assistant user with a long-lived access token, then set your entity IDs in the config.
- How it works: Home Assistant REST API over HTTP with a Bearer long-lived access token from a dedicated (non-admin, local-network) HA user. Not ESPHome. Not MQTT. UI has two swipe pages — clock (time/date/weather + seconds ring) and three light toggle buttons that call light.turn_on / turn_off and poll entity state.
- ⚠️ Never share your long-lived access token. Don't post it in comments or screenshots, and don't commit config.h to public code. If it ever leaks, revoke it in your Home Assistant profile (or delete the dedicated user).
- Board docs: https://www.waveshare.com/wiki/ESP32-S3-Touch-AMOLED-1.43
- The shipped UI is one clock page plus the lights page.
Assembly
- Print the body (supports are needed; see Print settings) and remove the supports.
- Solder the USB-C pigtail's power wires to the 2-pin MX1.25/PH1.25 lead. Check polarity against the board silk: + / -. Insulate the joints with heat-shrink.
- Route the lead through the stand so the USB-C receptacle sits in the rear opening.
- Plug the 2-pin lead into the board's BAT header (larger white 2-pin with +/- silk — lithium battery header). Do not use the small RTC header, and do not confuse nearby I2C / UART 4-pin headers or the PWR LED silk with a power jack.
- Press-fit the display into the round front opening — no screws or glue.
- Flash the firmware (ask in the comments for the sketch and setup notes) and set up Home Assistant as described above.
Print settings (recommended — publish these) Primary recommendation: Bambu PLA with Double Diamond defaults:
Descripción original del autor, publicada en MakerWorld.