Epoxy & Glue Bottle Holder for 1/4" Pegboard – With 4 Mixing Trays
por Simmer65 en Printables
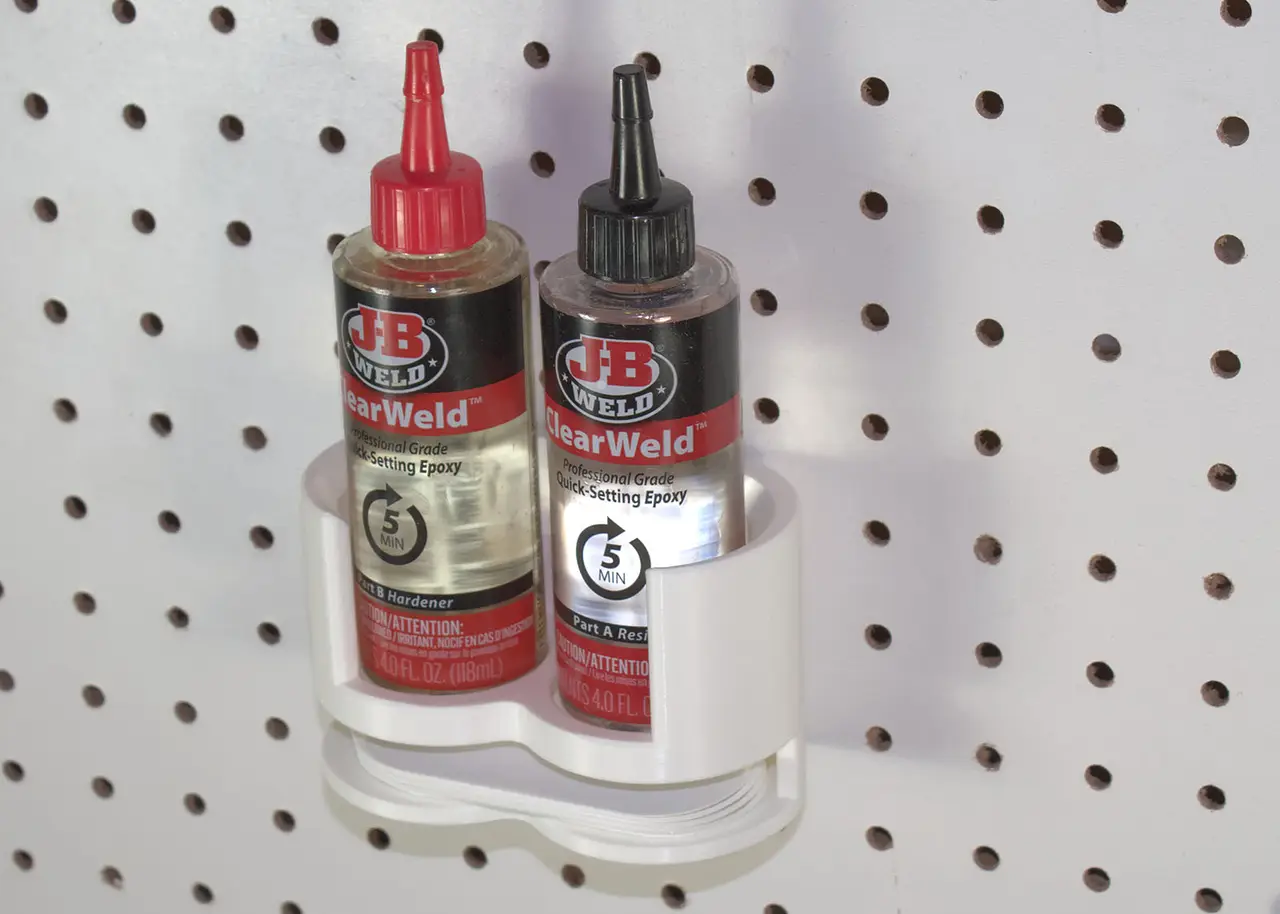
Keeps two-part epoxy and something to mix it on in one spot on the pegboard. The resin and hardener bottles stand side b
Licencia
Solo uso personalCC BY-NC 4.0 — Atribución, no comercial
Puedes imprimirlo y modificarlo para uso personal dando crédito. No se permite vender las impresiones.
Al descargar aceptas respetar la licencia y dar crédito a Simmer65.
Archivos (4)
- Categoría
- Organización
- Formatos
- STEP, 3MF, SLDPRT
- Descargas
- 3
- Publicado
Sobre este modelo
Both bottles, and something to mix on Two-part epoxy comes in two bottles, and every time you use it you also need something to mix it on. This rack keeps all of that in one spot on the pegboard. The resin and the hardener stand side by side, and a stack of four printed mixing trays slides into a slot underneath them. The front is open, so you can read which bottle is Part A and which is Part B, and lift either one straight out. It hangs on two 3D printed screws in keyhole slots, so it stays put when you grab a bottle. What it holds - Two bottles up to 1.75" (44.5 mm) across. I've used it with: - J-B Weld ClearWeld quick-setting epoxy, 4 fl oz (118 mL) bottles
- Devcon 2 Ton epoxy, 4.5 oz (128 g) bottles
- Four mixing trays, 3.75" × 1.75" (95 × 44.5 mm) ovals, stacked in the slot under the bottles. Each tray has a thin tab on its front edge that sticks out at the front of the rack, so you can pull out one tray at a time.
Each bottle sits in a 3/16" (5 mm) deep recess in the floor, so its base can't slide out the open front. The pockets are 1.8" (46 mm) deep. It also stands on its own on a workbench if you don't want it on the wall. Two pieces, snapped together I modeled the rack in SolidWorks as a single part. Printed in one piece, the ceiling of the tray slot would be a 4" (103 mm) span that needs supports. So I cut it in PrusaSlicer right at that ceiling, using the Cut tool's Snap connectors. Now each half sits flat on the bed and neither one needs supports. - Bottom piece: the floor and the walls of the tray slot. The four snap pins print standing up on top of the back wall.
- Top piece: the bottle holder. Its underside is the slot's ceiling and has the four holes the pins snap into.
- Connector settings: Snap type, 1/8" (3.175 mm) size, 1/4" (6.35 mm) depth, 0 radius tolerance and 0.1 mm depth tolerance.
The two halves snapped together on the first try. How it hangs It uses the same printed screw as my Magnetic Tool Holder Bar. The screws go into the board first and the heads stay out. The rack hangs on them. - Grips the hole: the special 1/4"-20 thread is slightly oversize, so it bites into the edge of the pegboard hole and holds tight.
- Self-centering: a tapered tip drops into the hole and centers the screw as you start it.
- Flat-blade drive: the head has a slot for an ordinary flat-head screwdriver.
- Locks the rack on: the underside of the head is a cone. Two keyhole slots on the back of the rack have tapered lips that fit that cone, so the rack can't pull away from the board.
Pegboard compatibility - Standard pegboard with 1/4" (6.35 mm) holes on 1" (25.4 mm) spacing
- The two screws go in neighboring holes in one row, 1" (25.4 mm) apart
- Tested on 3/16" (4.8 mm) thick pegboard
- Not for IKEA Skådis or other slotted boards
Dimensions - Rack: 4.44" wide × 2.50" deep × 2.79" tall (112.7 × 63.5 × 70.8 mm)
- Bottle pockets: 2 × 1.75" (44.5 mm) across
- Tray slot: 4.04" wide × 0.57" tall (102.7 × 14.5 mm)
- Mixing tray: 3.75" × 1.75" × 1/8" (95 × 44.5 × 3 mm), 2.21" (56 mm) deep including the tab
- Sticks out from the board: 2.5" (63.5 mm)
The STEP files of the uncut rack and the tray are included if you want different pocket sizes for your bottles. Print settings Everything prints together on one plate: the two halves, four trays and two screws. On my Prusa CORE One it took 3 h 6 min and 100 g of PLA. My PrusaSlicer config file is included. - Printer: Prusa CORE One, 0.4 mm HF nozzle
- Slicer profile: 0.25mm STRUCTURAL @COREONE HF0.4 (PrusaSlicer 2.9.6)
- Material: Generic PLA, 230 °C nozzle for the first layer and 225 °C after; 60 °C bed
- Layer height: 0.25 mm (0.2 mm first layer)
- Perimeters: 2
- Infill: 15% grid
- Top / bottom solid layers: 4 / 3
- Supports: none
- Brim: none
- Orientation: the top piece stands upright on its flat underside, the bottom piece lies on its floor with the snap pins pointing up, the trays lie flat, and the screws stand on their heads
You'll need - A flat-head screwdriver to drive the printed screws
Descripción original del autor, publicada en Printables.