Ender 3 S1 Pro Tray Insert
por Alexander Turbett en Thingiverse
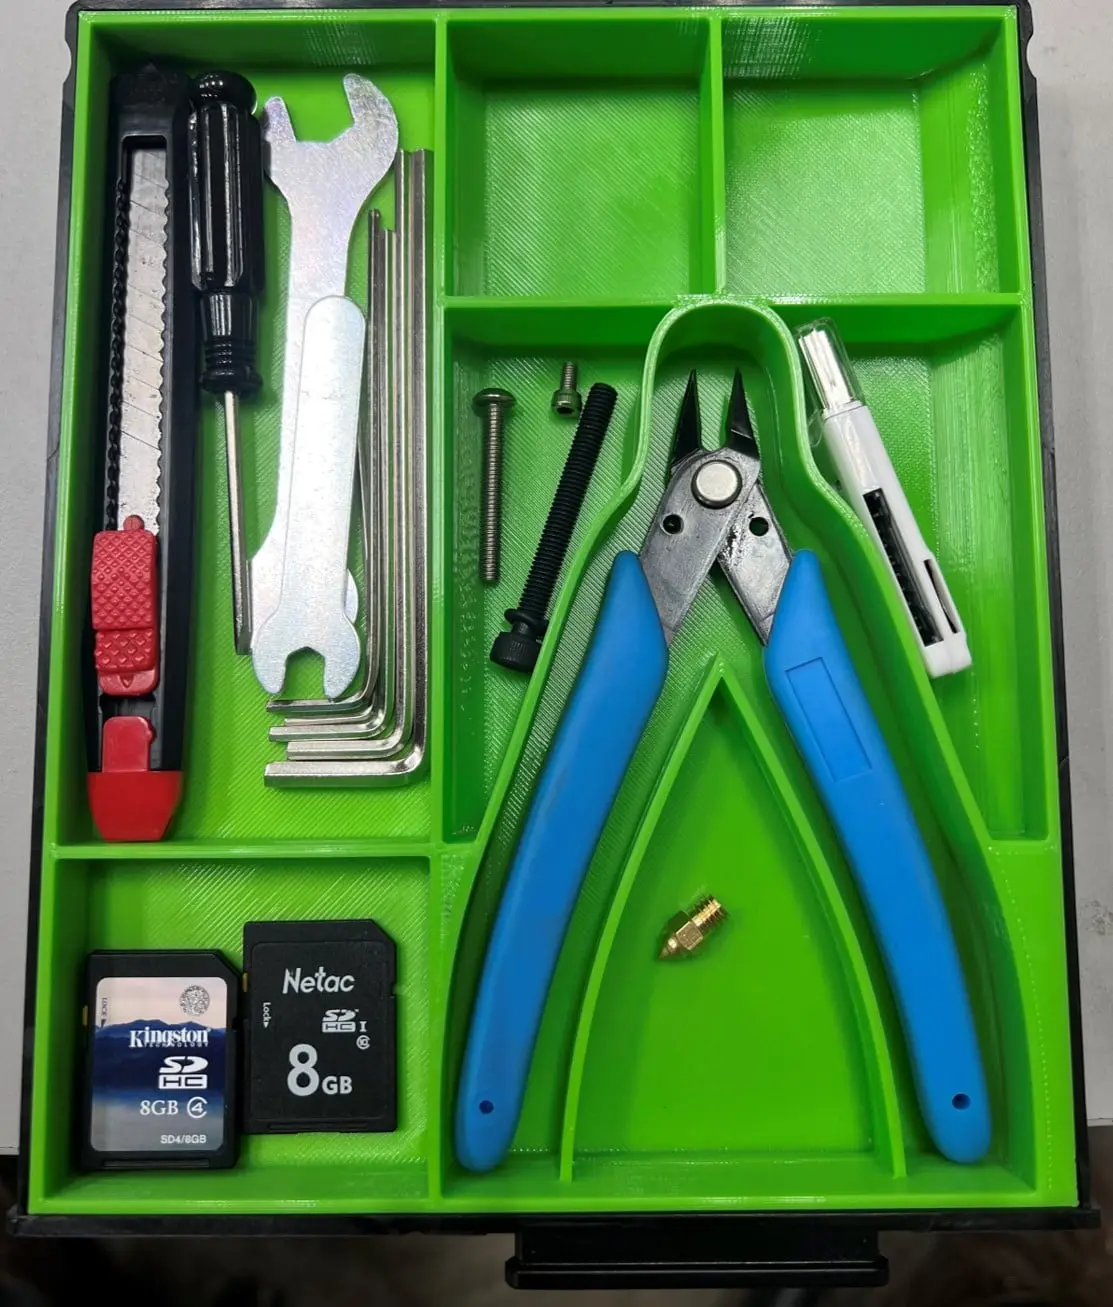
I was unable to find and Ender 3 S1 Pro Tray Insert anywhere so I decided to take a deep dive and dabble in some Fusion 360 3D modelling learning a lot in the process. This is my first 3D model from scratch, my first design that I'm sharing with the world, and I think it came out awesome. I hope...
Licencia
Uso comercial permitidoPuedes imprimirlo, modificarlo y venderlo dando crédito al autor.
Al descargar aceptas respetar la licencia y dar crédito a Alexander Turbett.
Archivos (3)
- Categoría
- Para tu impresora
- Formatos
- STL, F3D, STEP
- Descargas
- 15,481
- Publicado
Sobre este modelo
I was unable to find and Ender 3 S1 Pro Tray Insert anywhere so I decided to take a deep dive and dabble in some Fusion 360 3D modelling learning a lot in the process. This is my first 3D model from scratch, my first design that I'm sharing with the world, and I think it came out awesome. I hope you all enjoy this cool add-on for your S1 Pro. Have Fun! PRINTING INFO Nozzle: 0.4 mm Layer Height/Resolution: 0.20 mm Perimeters/Vertical Shells: 4 Hollow Infill: 20% Honeycomb/Hex Horizontal Shells: Bottom Surfaces = 4 Top Surfaces = 4 Tray bottoms are total of 8 layers thick solid infill = 1.6mm Perimeter Speed: 50 mm/s External perimeter speed: 40 mm/s Solid Infill speed: 50 mm/s Top infill speed: 30 mm/s Support material speed: 50 mm/s 1st Layer Extruder Temp: 215 C 1st Layer Bed Temp: 70 C 1st Layer Cooling: 0% 2+ Layer Extruder Temp: 210 C 2+ Layer Bed Temp: 65C 2+ Layer Cooling: 100% Z-Hop: 0.1 mm Wipe: No Supports: Slicer Auto Generated ONLY on left side under the "Shelf" and the small "Dimple" in the bottom. No supports under the angled side profiles, I tried and the angled support messed up my first print Extras: Ensure your bed is super level with a recent leveling probe mesh performed ON A HOT BED (Bed can warp slightly when hot so you want to run the level program while its "warped"). Ensure your start G-Code is calling out the saved bed level mesh with (M420 S1) placed after the (G28) command. Ensure build plate is clean, and the z-offset on the 1st layer extrusion is perfect, if necessary adjust on the fly during 1st layer print using the S1 Pro touchscreen. If any of these are "OFF" the bottoms will get very rough with them being 8 layers of solid infill, if the bottom comes out rough the side separator walls will look nasty as well. This print sliced out to about an 8hr print
Descripción original del autor, publicada en Thingiverse.