Elegoo Centauri Carbon Magnetic Vent Assembly
Overview
Thangs entrega los archivos a usuarios con cuenta gratuita
Licencia
Solo uso personalSin licencia indicada
El autor no indicó una licencia: todos los derechos le pertenecen. Úsalo solo para imprimir en casa y consulta al autor para cualquier otro uso.
Al descargar aceptas respetar la licencia y dar crédito a AL E.
Archivos (4)
- Mag_Vent_Part_A-Body.step STEP · 77 KB
- Mag_Vent_Part_A-Body.stl STL · 722 KB
- Mag_Vent_Part_B-Body.step STEP · 28 KB
- Mag_Vent_Part_B-Body.stl STL · 222 KB
- Categoría
- Para tu impresora
- Formatos
- STEP, STL
- Descargas
- 5
- Publicado
Sobre este modelo
Overview
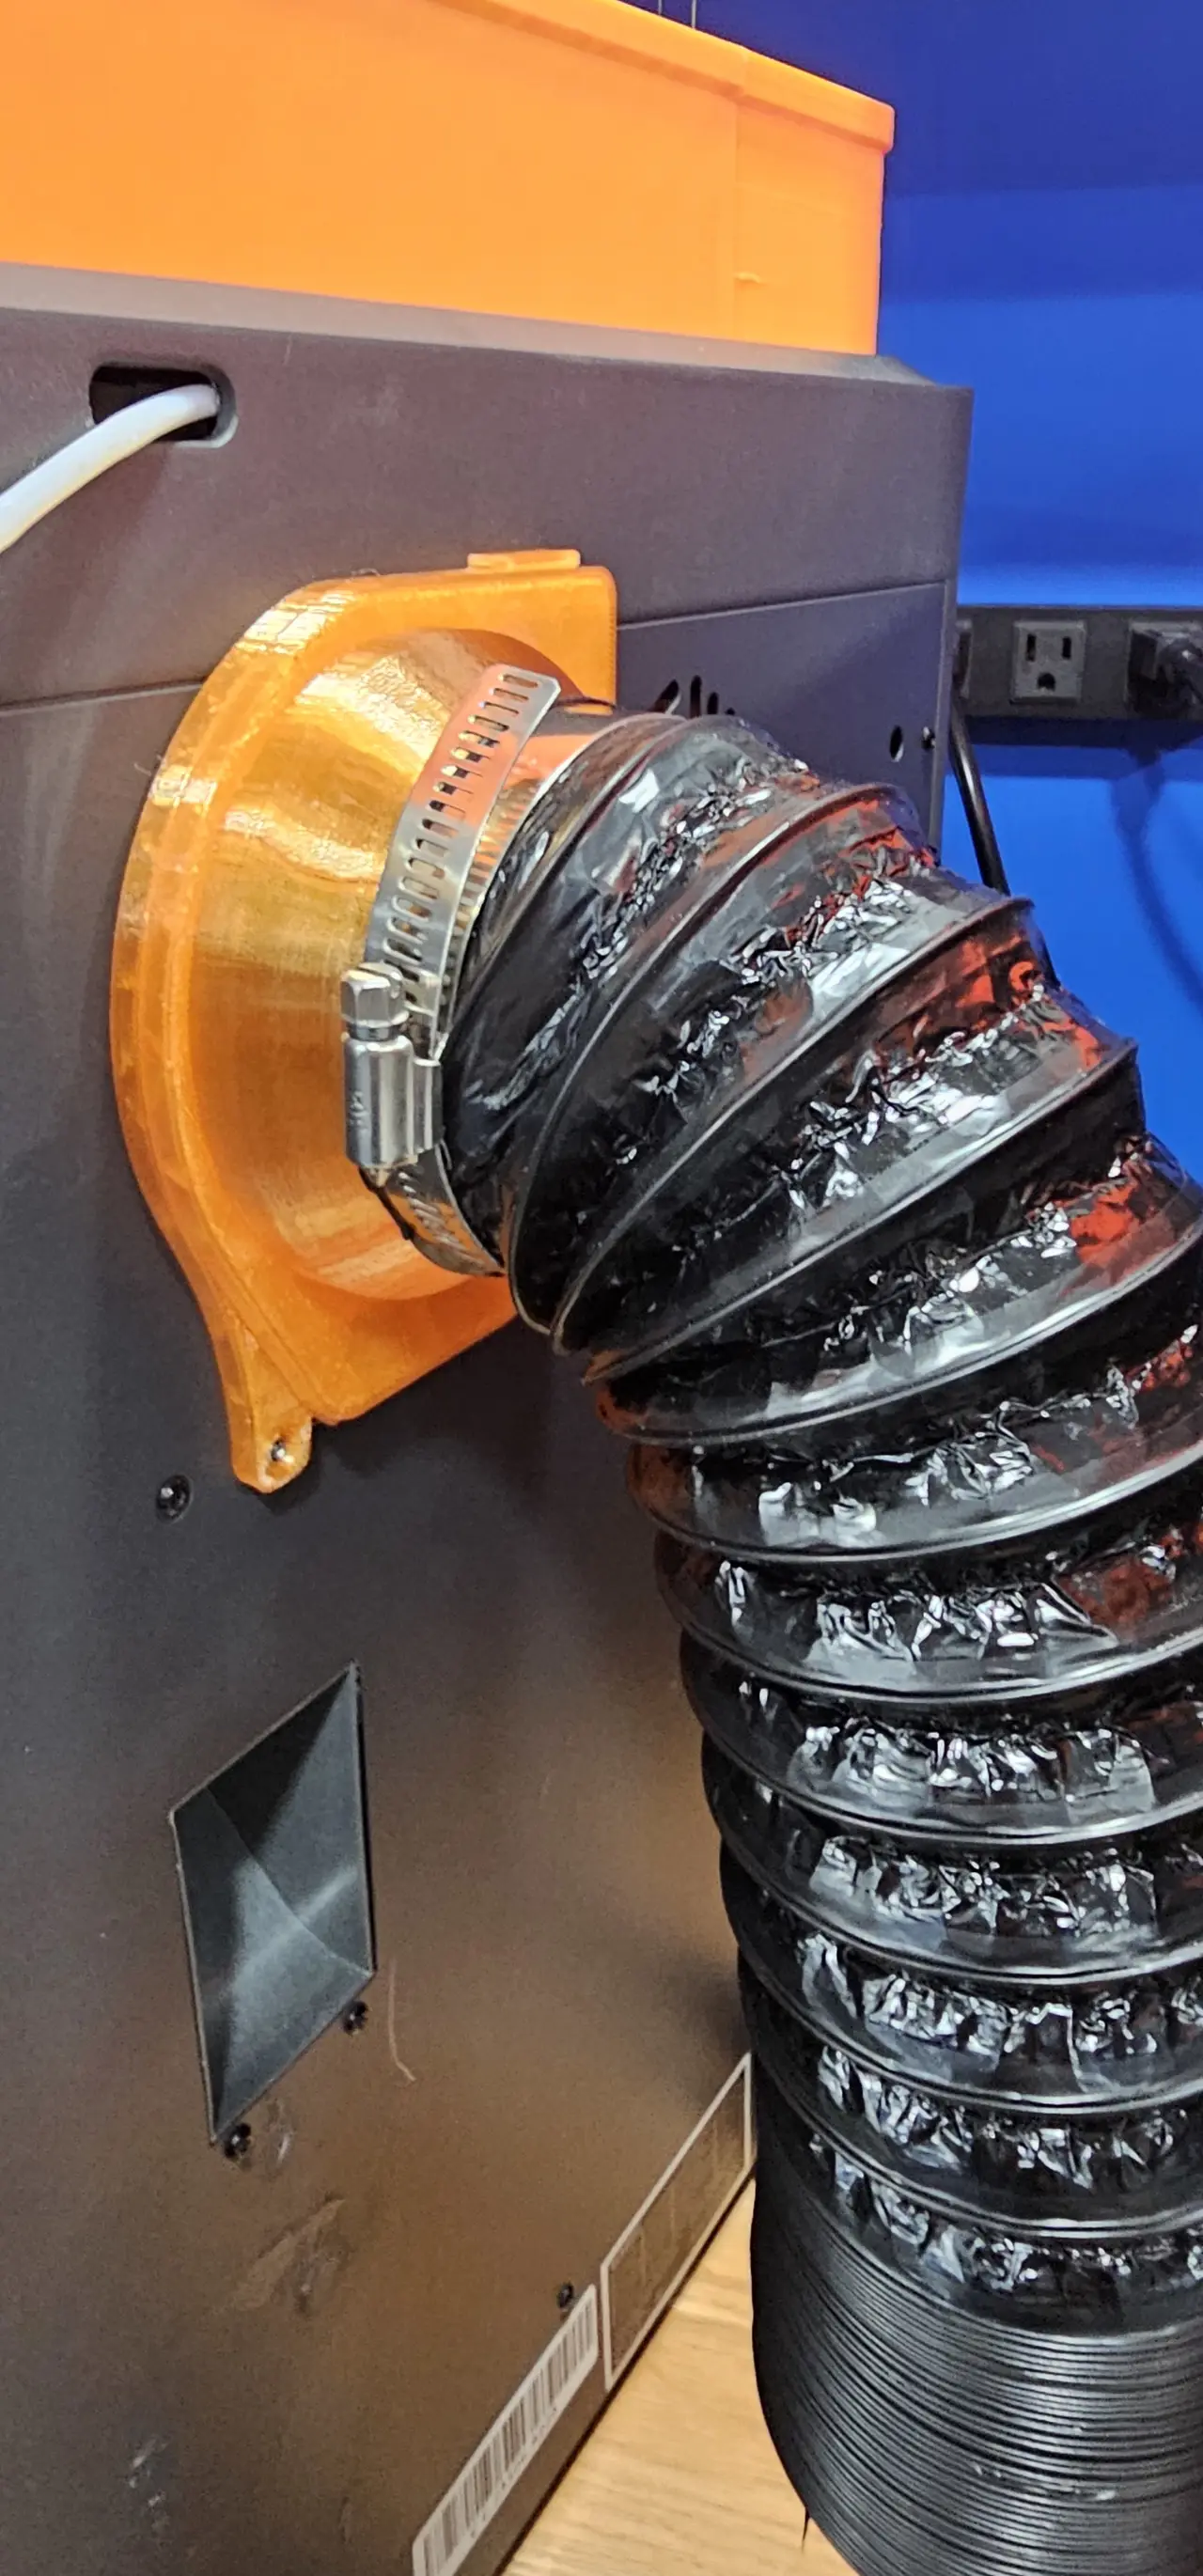
A precision magnetic vent opening designed for the rear exhaust of the Elegoo Centauri Carbon 3D Printer. This modular system allows for easy airflow management without permanent drilling, utilizing a dual-part design and strong neodymium magnets.
--- 1. Component Specifications ** Part A: Rear Exhaust Mount The base component that attaches directly to the printer chassis. - Mounting: Secures to the rear exhaust port using two (2) screws. (May need just slightly longer screws) - Connection Points: - Top Center: Screw located on the upper center of the rear panel. - Upper Nozzle Area: Center screw positioned between the top two chute guide screws. - Alignment Features: - Features a raised central rim to ensure Part B remains centered. - Includes corner edge guides to maintain alignment during assembly.
** Part B: Vent Pipe Adapter The insert that accepts the external ventilation tubing. - Pipe Size: Optimized for standard 3-inch diameter vent pipes. - Connection: Magnetically attaches to the outside of Part A. - Fitment: Designed to sit snugly within the vent opening.
--- 2. Magnetic Assembly Requirements
To achieve a strong, vibration-resistant hold, the following magnets are required: - Magnets: Qty 4 x Neodymium Disc Magnets (10mm Diameter x 2mm Thickness). - Reference: Amazon Link (https://www.amazon.com/dp/B09WZTSQ9Y?ref_=ppx_hzsearch_conn_dt_b_fed_asin_title_6&th=1) - Adhesive: Cyanoacrylate (CA) Glue recommended for securing magnets to the 3D printed parts. - Reference: Amazon Link (https://www.amazon.com/dp/B07Y6HG8B6?ref=ppx_yo2ov_dt_b_fed_asin_title)
--- 3. Assembly & Fitment Notes - Pipe Clamping: For the best seal, use pipe clamps to hold the vent pipe Part B tight. - Tension Warning: When tightening clamps, avoid over-tightening to prevent stress cracking the printed plastic. - Vent Pipe: The vent pipe (see link below) fits snugly onto the Part B assembly. - Vent Pipe Reference: Amazon Link (https://www.amazon.com/dp/B0DSKVX7XQ?ref_=ppx_hzsearch_conn_dt_b_fed_asin_title_5)
--- 4. Materials List (Quick Reference)
Item / Qty / Description
Part A / 1 / Rear Exhaust Mount Part B / 1 / 3-Inch Vent Adapter Magnets / 4 / 10mm x 2mm Disc Magnets Screws / 2 / M3 or M4 (Printer specific) Glue / 1 / CA Glue (for magnets)
Descripción original del autor, publicada en Thangs.