
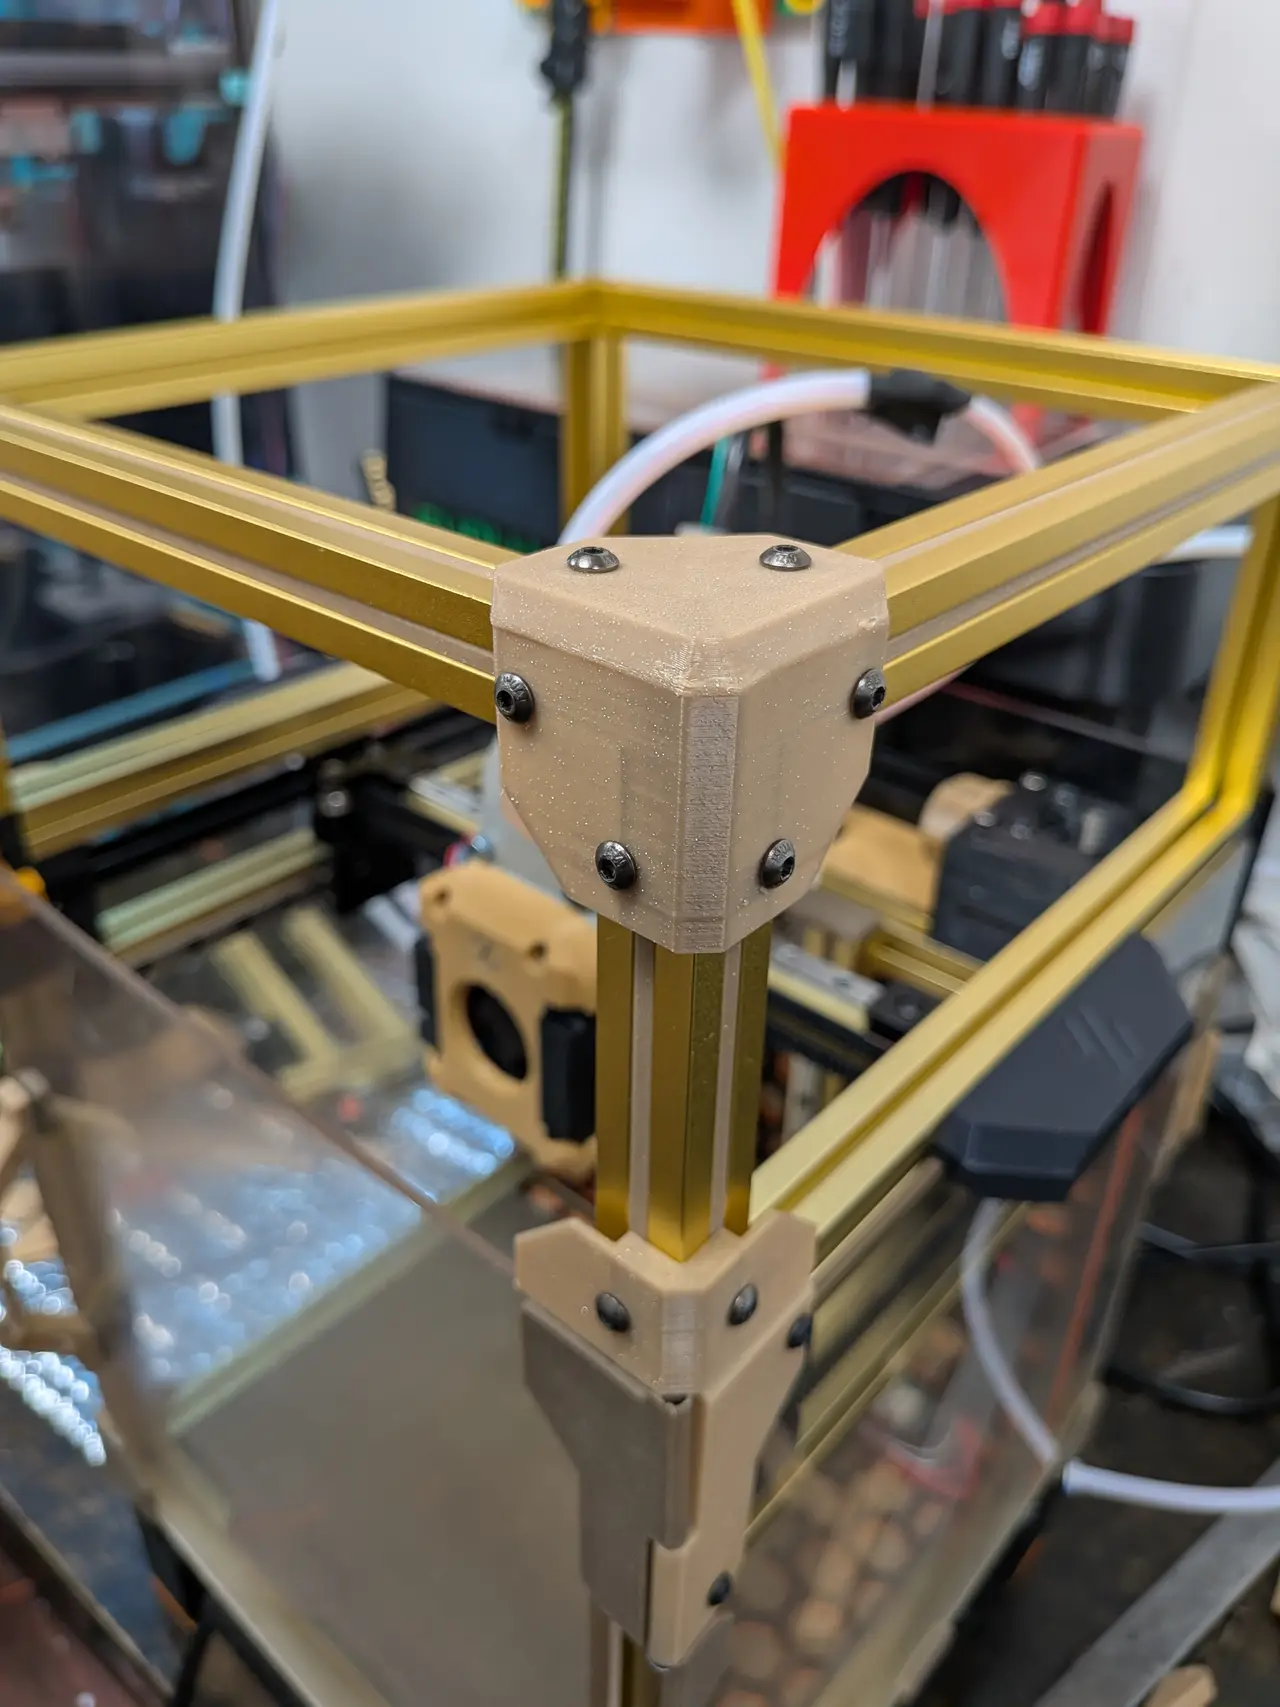
Easy to assemble Voron V0.2 top hat - with trim nuts for LDO / Formbot / Misumi 1515 extrusions no drop
por AXG68K en Printables
Makes it super fast to assemble Voron V0.2 top hat. Frustration free design. Rids you of those embarrassing seam lines.
Licencia
Uso comercial permitidoPuedes usarlo, modificarlo y venderlo; si distribuyes versiones modificadas deben ir con la misma licencia y sus fuentes.
Al descargar aceptas respetar la licencia y dar crédito a AXG68K.
Archivos (15)
- Top_Corner_Fixed_Symmetry_4X.stp STP · 227 KB
- 80MM_Rear_TRIM_NUTS-CaptiveSquareNut_X2.stp STP · 197 KB
- 100MM_Rear_TRIM_NUTS-CaptiveSquareNut_X2.stp STP · 248 KB
- Back_Right_Bottom_X1.stp STP · 43 KB
- Front_Bottom_Corners_X2.stp STP · 76 KB
- 100MM_TRIM_NUTS-CaptiveSquareNut_X6.stp STP · 162 KB
- Back_Left_Bottom_X1.stp STP · 45 KB
- Top_Corner_Fixed_Symmetry_4X.stp STP · 227 KB
- 200MM_TRIM_NUTS-CaptiveSquareNut_X8.stp STP · 128 KB
- 80MM_Rear_TRIM_NUTS-CaptiveSquareNut_X2.stp STP · 244 KB
- 200MM_TRIM_NUTS-Blank_X8.stp STP · 70 KB
- 100MM_TRIM_NUTS_Blank_X8.stp STP · 69 KB
- 80MM_TRIM_NUTS_Blank_X8.stp STP · 69 KB
- V0.2R1_Top_Hat_Easy_Assembly.stp STP · 10,4 MB
- Easy_Assembly_Top_HatV2.3mf 3MF · 540 KB
- Categoría
- Para tu impresora
- Formatos
- STP, 3MF
- Descargas
- 7
- Publicado
Sobre este modelo
Updates:
2026-10-15: archiving self tapping style, not strong enough for the top had hold downs. Updated 3mf with brims and removed self tappers. 2026-10-14: shortened blanks and added wings so they press in and stay put. 2026-10-13: added two versions of the rear trim nuts with nut spacing to support the hinges. added a tool to hold the trim pieces for pre-"tapping". Optional, but makes for faster assembly. added blanks Frustration-free assembly of the Voron 0.2 top hat using Trim Nuts. Trim Nuts meaning, a slide in trim and nut combination for the 1515 extrusions. This makes them frustration free.
*** Use the square nut version. The self taping version is easy to strip. NOTE: if you do need to put something else on the extrusion just take a 2.5mm - 2.7mm drill in a hand fixture and drill it by hand. This is a simple solution to the frustrating problem of working with 1515 extrusions.
Changes to the original design: 1 - all 4 bottom corners have been trimmed down so they have a flat. This allows all parts to be printed in the same orientation. Your OCD will thank me for aligning all those lines. 2 - 3 top corner parts have been combined into one on each corner. Their hole locations fixed to 15mm from the edge so the part can be used in every corner. The original parts are not consistent here. This allows for the re-use of parts and trim nuts.
There are two requirements for this assembly: 1 - LDO / post V0.1 Formbot / Misumi profile extrusions. They look like this:
2 -QTY:30 M3 X 8mm long bolts.
The step files are included as well as an assembly so you can always modify the design for your particular needs.
V0s come in two top hat sizes, 80mm and 100mm. Print all the plates for your version plus the common corner. The only recommended option is the captive square nut version. Slide the square nuts in, or LDO chamfered square nuts, then slide in the assembled trim nut. Notes: Printing at .12 layer height is optimal. The captive nuts come out perfect when placed on the 45 degree corner. The short leg blanks have wings on them, it is not support. When you slide them in, they will have a decent press and stay there since there are no bolts to hold them in place.
Descripción original del autor, publicada en Printables.



