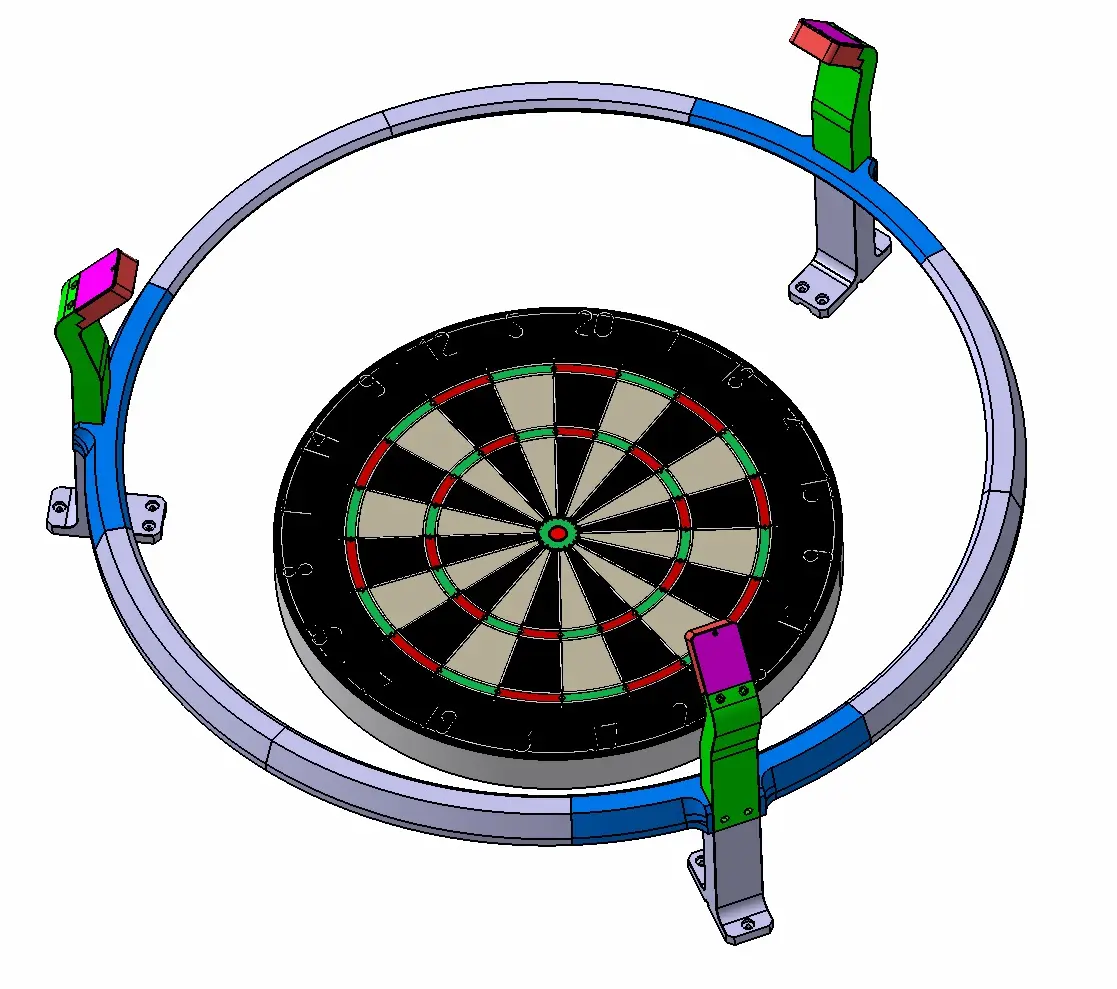
Dartboard LED Ring and Camera Mount V2
por viperman3 en Printables
Dartboard LED Ring and Camera Mount V2
Licencia
Uso comercial permitidoPuedes imprimirlo, modificarlo y venderlo dando crédito al autor.
Al descargar aceptas respetar la licencia y dar crédito a viperman3.
Archivos (23)
- Ring Light - Camera Housing Cover.stl STL · 164 KB
- Ring Light - Connection Peg.stl STL · 99 KB
- Ring Light - Arm.stl STL · 896 KB
- Ring Light - Camera Housing.stl STL · 649 KB
- Ring Light - Ring Element.stl STL · 1,3 MB
- Ring Light - Ring Mount.stl STL · 1,8 MB
- Ring Light - Foot.stl STL · 1,3 MB
- Ring Light - Foot LED cable route.stl STL · 2,7 MB
- Ring Light - Camera Housing Cover v2.stl STL · 2,0 MB
- Ring Light with Camera Mount.stp STP · 1,5 MB
- Ring Light - Connection Peg - More Clearance.stl STL · 102 KB
- Ring Light v2 - Connection Peg.stl STL · 93 KB
- Ring Light v2 - Camera Housing.stl STL · 705 KB
- Ring Light v2 (40mm) - Arm.stl STL · 906 KB
- Ring Light v2 - Ring Element.stl STL · 1,5 MB
- Ring Light v2 (40mm) - Foot.stl STL · 1,5 MB
- Ring Light v2 - Ring Mount.stl STL · 2,0 MB
- Ring Light v2 (40mm) - Foot LED cable route.stl STL · 2,9 MB
- Ring Light with Camera Mount (Ring Light 40mm).stp STP · 1,7 MB
- Ring Light v2 - Camera Housing Cover v2.stl STL · 2,2 MB
- Ring Light - Foot (mounting holes updated for CNC base).stl STL · 1,5 MB
- Ring Light - Foot LED cable route (mounting holes updated for CNC base).stl STL · 2,9 MB
- Base_plate_Standard_RL3d-B3D.dxf DXF · 474 KB
- Categoría
- Jardín
- Formatos
- STL, STP, DXF
- Descargas
- 3,000
- Publicado
Sobre este modelo
Wanted to make LED ring and Camera mounts for my Dartboard Setup which was easy to print. This design is adapted from this website (https://docs.autodarts.io/3d-printing/). Github for autodarts is https://github.com/autodarts Discord server is https://discord.com/servers/autodarts-community-802528604067201055 All parts except for the camera cover can be printed without any supports. I printed mine at 0.28mm layer height with a 0.4mm nozzle using PLA Plus without any issues. LED segments were glued using 5 minute epoxy adhesive. Hardware requires is M4x20 and M4x18 Socket Button-head screws with M4 hex nuts. The OV2710 USB Camera Module is held with M2x6 screws as is the Camera Cover Assemble the LED ring elements with the connection pegs using 5 minute epoxy. Update 3/24/2023: Added Ring Light - Connection Peg - More Clearance.stl (Connector Peg with 0.3mm clearance for easier assembly) Update 2/21/2024: Added "Ring Light v2" Prefixed models that add provision to block light-bleed (add 1.75" Diameter filament in groove before assembling the light ring with the connection peg). The "Ring Light v2 (40mm)" Prefix raises the LED Ring by 40mm from the previous version. Update 3/02/2024: Added relief in camera cover for modules that have straight connector. Press down wires to route closer the connector then install the Ring Light v2 - Camera Housing Cover v2.stl Update 2/22/2025: Added Ring Light - Foot (mounting holes updated for CNC base).stl, Ring Light - Foot LED cable route (mounting holes updated for CNC base).stl and Base_plate_Standard_RL3d-B3D.dxf for anyone who wants to mount the complete assembly onto a CNC base. DXF was provided by RupiLab3D with his remix version of the base models available here: https://www.printables.com/model/1193212-autodarts-foot-variants-for-viperman3-with-new-sta
Hardware: Qty 6 M4x20 Buttonhead Cap Screw Qty 6 M4x18 Buttonhead Cap Screw Qty 12 M2x6 Buttonhead Cap Screw Qty 3 M2x6 Countersink Screw 2 part Epoxy to assemble Led Ring Segments and Connection Pegs Small pieces of 1.75" Diameter Filament for light-bleed block (see images)
Descripción original del autor, publicada en Printables.