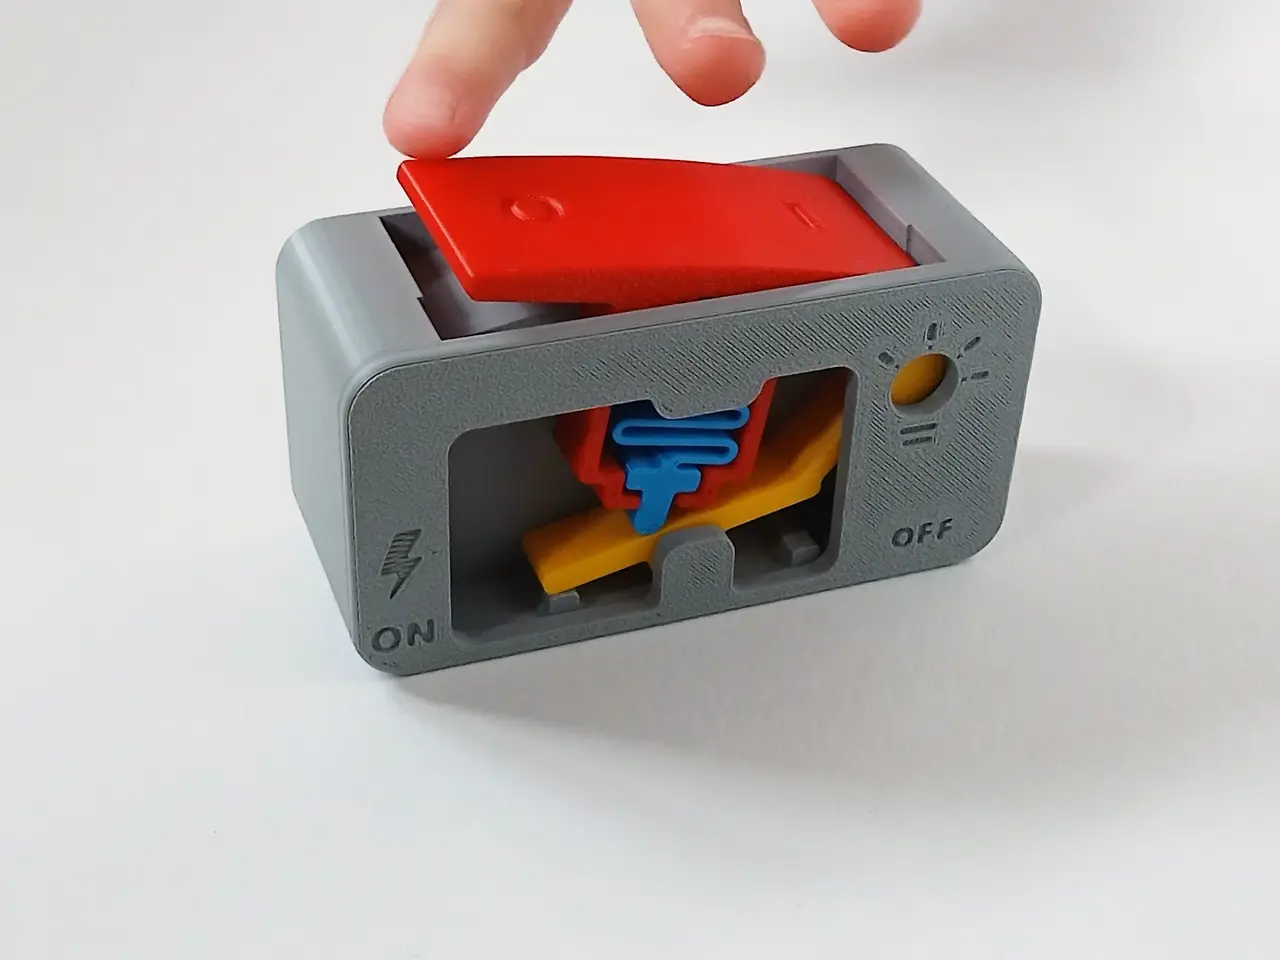
CuriousGear #03 Light Switch | No AMS, No Supports
por curiousgear3d en Printables
A light switch cut in half: press the I/O rocker and watch the spring snap the contact over the dead point.
Licencia
Solo uso personalStandard Digital File License
Licencia estándar de archivos digitales: solo uso personal. No se permite compartir, revender ni subir el archivo a otros sitios, ni vender las impresiones.
Al descargar aceptas respetar la licencia y dar crédito a curiousgear3d.
Archivos (6)
- CuriousGear03_P1_Spring_Plunger_Blue-PETG.stl STL · 53 KB
- CuriousGear03_P3_Contact_Bridge_Yellow-PLA.stl STL · 108 KB
- CuriousGear03_P4_Rocker_Red-PLA.stl STL · 429 KB
- CuriousGear03_P2_Cover_Gray-PLA.stl STL · 950 KB
- CuriousGear03_P2_Frame_Gray-PLA.stl STL · 1,5 MB
- CuriousGear_03_Light_Switch_A1_4plates.3mf 3MF · 735 KB
- Categoría
- Educación
- Formatos
- STL, 3MF
- Descargas
- 0
- Publicado
Sobre este modelo
CuriousGear: How It Works – #03 Light Switch Ever wondered why a light switch snaps instead of stopping halfway? This is a wall switch cut in half: on the front you press a real rocker (I / O), and through the window you watch what happens inside. A blue PETG spring sits in the red rocker and pushes a plunger onto the yellow contact bridge. Press the rocker and the plunger slides over the bridge's pivot – the "dead point" – and the bridge snaps to the other side. Click: the contact closes and the little bulb window turns yellow (ON). Click again: the bulb window goes dark (OFF). It can never stop in between. ✔ No AMS – 4 plates, 4 colors (gray, red, yellow PLA + blue PETG) ✔ No supports · No screws · No glue – snap-fit assembly in about 2 minutes ✔ Print time: ~2.5 h total (4 plates) · Filament: ~56 g PLA + ~2 g PETG · Tested on Bambu Lab A1 ✔ Every part is pre-oriented for printing – just load the plates and print What kids learn: lever (rocker), spring energy, over-center (bistable) mechanism, and what the I / O symbols on real switches mean. Color key (same in every CuriousGear model): Gray = Frame · Red = Press · Yellow = Moves · Blue = Spring Assembly: 1. Slide the blue plunger into the pocket of the red rocker. 2. Put the yellow bridge on the small axle. 3. Lower the rocker into the frame and onto the big axle – gently push the plunger against the bridge. 4. Snap on the cover. Recommended age 6+ · Adult supervision · Contains small parts – not suitable for children under 3. Inspect before giving to a child. Montessori-inspired: one mechanism, one idea, visible cause and effect. Printed one? Post a Make – and if it clicked 100 times, leave a Boost 💙 Selling prints? Commercial license coming soon – follow for updates.
-------------------------------- PRINT SETTINGS (tested on Bambu Lab A1, 0.4 mm nozzle, 0.20 mm layer) No supports on any plate · 1 filament per plate – no AMS needed Plate 1 – Spring plunger – PETG (blue) – ~17 min, 1.5 g Arachne walls, 0 % infill, elephant foot compensation 0.15 mm, Textured PEI plate. Let the plate cool, flex it to remove the spring. Print 2–3 spare springs. Plate 2 – Frame + Cover – PLA (gray) – ~1 h 21 min, 41.7 g 15 % infill, ironing on top surfaces (smooth housing floor) Plate 3 – Contact bridge – PLA (yellow) – ~14 min, 2.2 g Plate 4 – Rocker – PLA (red) – ~35 min, 12.5 g Printed upside down (flat cut face on the bed) Total ~2 h 28 min · ~58 g. Parts are pre-oriented – just place them on the bed. The .3mf file contains all 4 plates with these settings (Bambu Studio / OrcaSlicer).
Descripción original del autor, publicada en Printables.