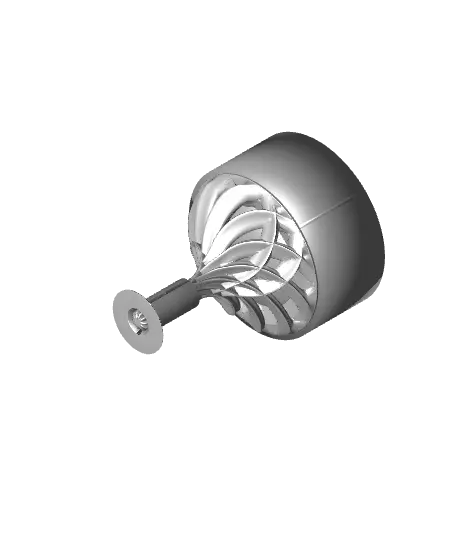
Counterswirl Top
Now, there's a new generation of this design: Counterswirl Top - Generation 2 (https://thangs.com/designer/dazus%20k/3d-model/Counterswirl%20Top%20-%20Generation%202-875416?manualModelView=true&source=All+Files).
Thangs entrega los archivos a usuarios con cuenta gratuita
Licencia
Uso comercial permitidoCC BY-ND 4.0 — Atribución, sin derivadas
Puedes imprimirlo y compartirlo sin cambios dando crédito; no se permite distribuir versiones modificadas.
Al descargar aceptas respetar la licencia y dar crédito a Scott M.
Archivos (8)
- 2023 Counterswirl Top Support Collar.stl STL · 51 KB
- 2023 Counterswirl Top 2-Piece.3mf 3MF · 899 KB
- 2023 Counterswirl Top 2-Piece Top Half.stl STL · 1,9 MB
- 2023 Counterswirl Top 2-Piece Bottom Half.stl STL · 1,3 MB
- 2023 Counterswirl Top 1-Piece Inverted.3mf 3MF · 818 KB
- 2023 Counterswirl Top 1-Piece.stl STL · 2,9 MB
- 2023 Counterswirl Top 85 Percent.3mf 3MF · 896 KB
- 2023 Counterswirl Top 70 Percent.3mf 3MF · 893 KB
- Categoría
- Educación
- Formatos
- STL, 3MF
- Descargas
- 234
- Publicado
Sobre este modelo
Now, there's a new generation of this design: Counterswirl Top - Generation 2 (https://thangs.com/designer/dazus%20k/3d-model/Counterswirl%20Top%20-%20Generation%202-875416?manualModelView=true&source=All+Files).
Not for commercial use. Please see license agreement.
Want to show off your top? Download my Display Stand for Tops (https://thangs.com/designer/dazus%20k/3d-model/Display%20Stand%20for%20Tops-896365?manualModelView=true&source=All+Files). It prints in as little as 10 minutes!
Resizing
I've experimented with printing this and a few other of my tops at different sizes. I find this one spins consistently well at 100%. At 85% and at 70%, it spins well with a gentle spin, but some prints spin erratically if you spin them with more enthusiasm. They all seem to be aligned right with a clean tip. So, I'm guessing alignment is just more sensitive at the smaller sizes for this design.
I've updated my 3MF files to reduce the Elephant Foot Compensation from 0.2 mm to 0.05 mm. This has done a lot to diminish the visible seam between the two pieces. As always results will vary based on the usual suspects: your individual printer, the filament you use, and all your other settings.
If your top has a little wobble, check the tip for any tiny inconsistencies and gently remove them using a sharp knife.
Summary
This print is great for all levels of experience. The open lattice pattern looks great still and while it's spinning. The openings form patterns that change based on the viewing angle and the speed it's spinning.
I've included my STL files, PrusaSlicer 3MF files, and my GCODE (for my Prusa MKS3+). The top is available as 1 piece and two. I recommend the 2 piece. It prints a lot smoother and takes less time (almost ½ the time of the 1 piece). They spin about the same. To assemble the top, just sand the flat art of each top a little to reduce the seam and add texture for the glue, then glue together with medium CA.
The 1 piece is printed inverted (as suggested by @layerworks on one of my other prints). @layerworks on Printables.com succeeded in doing so with just a brim and organic supports (using PrusaSlicer 2.6.0 Alpha v6). I tried it, but I knew for my printer, I'd need supports for to keep the stem from moving sideways until the supports made contact. So, I designed a support collar which just makes contact with the stem. If you want to print as one piece, I recommend using the stem and printing just the first 30mm (takes about 45 minute). While the print is still on the plate, try moving the stem sideways to see if it has give. Then, remove it from the plate and the collar and see if it was too tight. Then, scale the collar up or down as needed (probably no more than 0.5 - 1%). My 3MF file for the 1 piece version includes the collar. If you don;t have the alpha version, PrusaSlicer will substitute the organic support setting with grid, which should work ok and takes about 1.5 hours less.
This is a great design for 2 or 3 color filament, rainbow filament, or adding color changes by swapping filament.
Print Settings If you don't use my 3MF file, I suggest you set perimeters to 11 (yes, really) and infill to 100%. The tops need the mass to spin well.
Layer height is 0.1mm and initial layer is just .12mm to reduce the seam (and sanding).
Also, print external perimeters first. I couldn't explain why, but they are a lot smoother if you print the outside first.
I added grid supports with an overhang angle of 50 degrees.
Filament If anyone's curious, I used MatterHackers Quantum Blue Yellow.
Descripción original del autor, publicada en Thangs.