Core One INBXX Door Sealing Hinge
por Incongruity en Printables
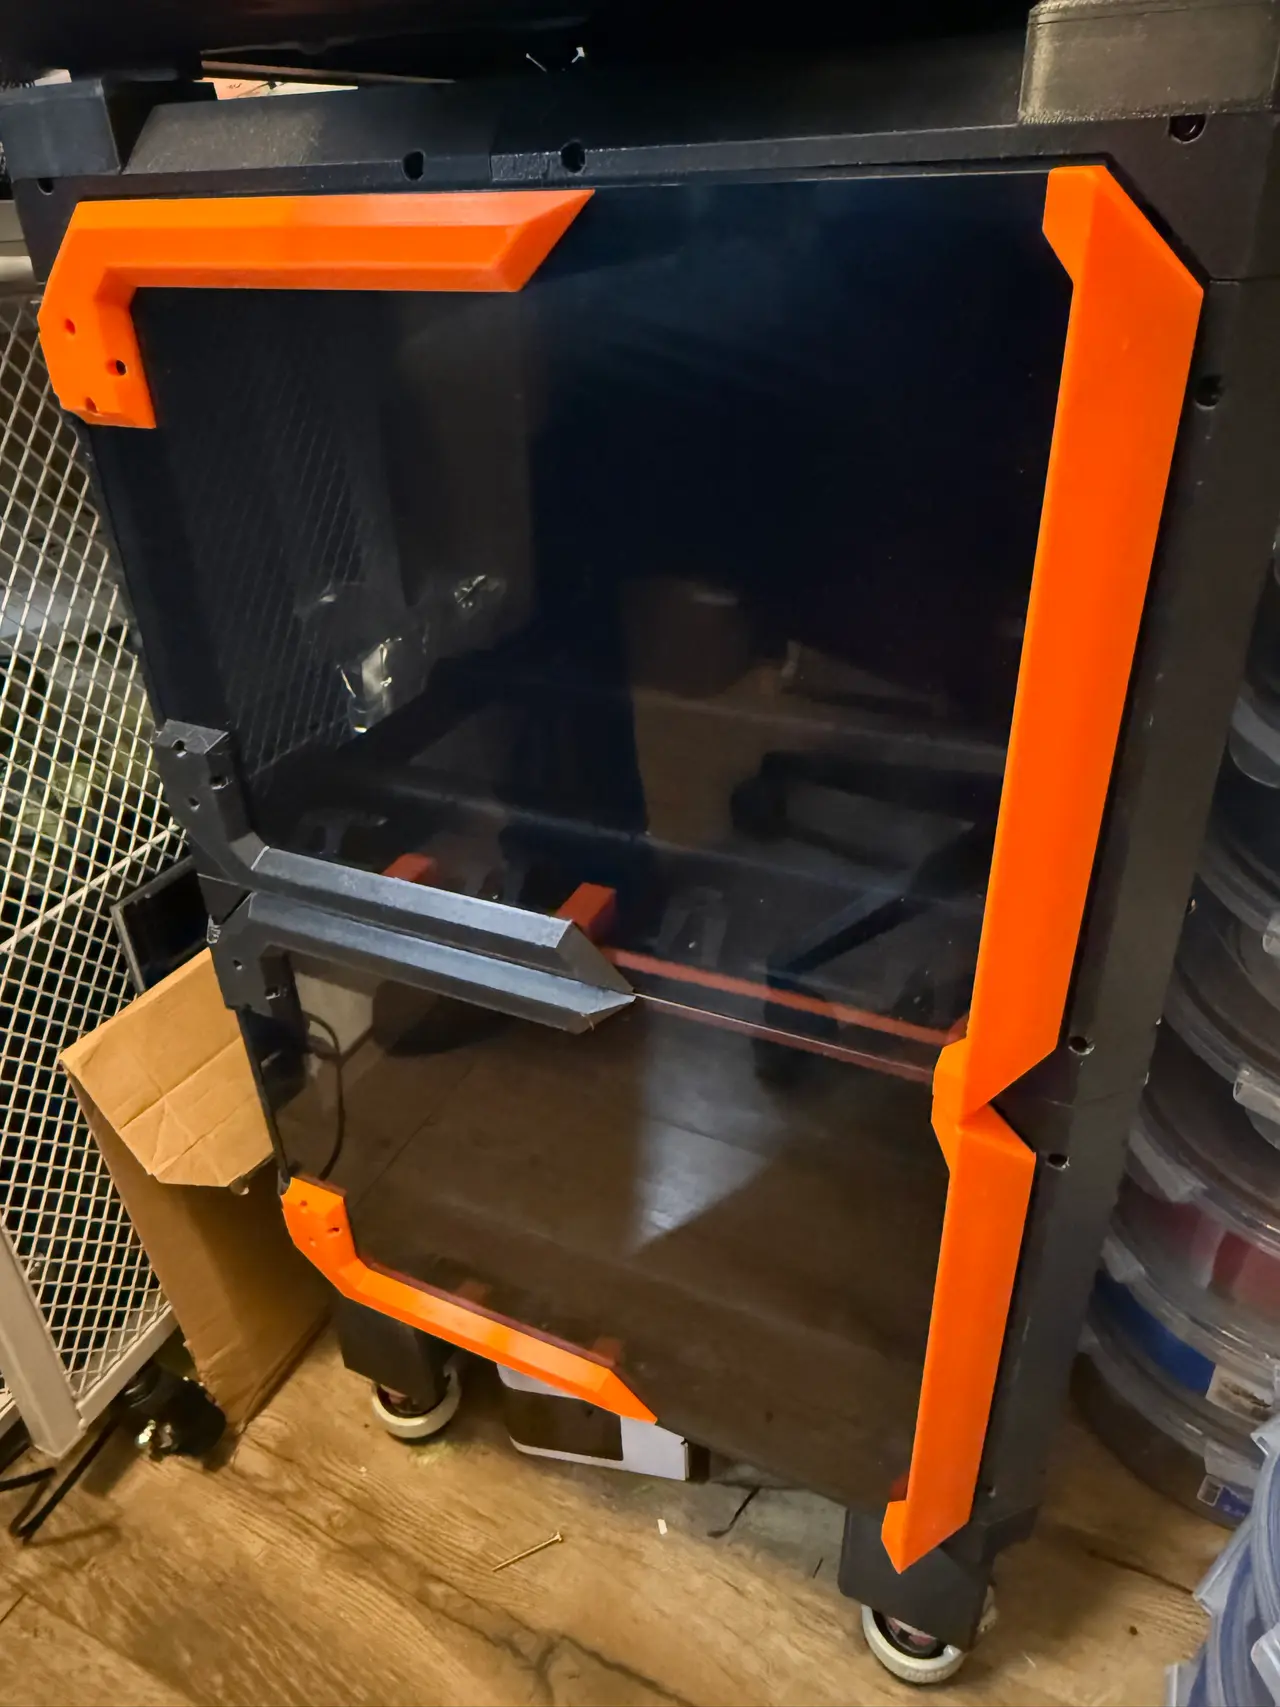
No-drill mod to make the Core One INBXX doors sit flat against the INBXX frame to make it a more effective dry box.
Licencia
Uso comercial permitidoCC BY-SA 4.0 — Atribución, compartir igual
Puedes usarlo y modificarlo dando crédito; las versiones modificadas deben compartirse con la misma licencia.
Al descargar aceptas respetar la licencia y dar crédito a Incongruity.
Archivos (20)
- Door Stiffening Hinge - Part L2b - standard hinge left hand - bottom inside.stl STL · 114 KB
- Door Stiffening Hinge - Part L1b - standard hinge left hand - top inside.stl STL · 114 KB
- Door Stiffening Hinge - Part L1a - standard hinge left hand - top outside.stl STL · 183 KB
- Door Stiffening Hinge - Part L2a - standard hinge left hand - bottom outside.stl STL · 182 KB
- Door Stiffening Hinge - Part L1a_O - Offset hinge locations - top outside.stl STL · 183 KB
- Door Stiffening Hinge - Part L2b_O - Offset locations left hand - bottom inside.stl STL · 179 KB
- Door Stiffening Hinge - Part L1b_O - Offset hinge locations - top inside.stl STL · 179 KB
- Door Stiffening Hinge - Part L2a_O - Offset locations left hand - bottom outside.stl STL · 182 KB
- Door Stiffening Hinge - Part R1b - standard hinge right hand - top inside.stl STL · 114 KB
- Door Stiffening Hinge - Part R2a - standard hinge right hand - bottom outside.stl STL · 183 KB
- Door Stiffening Hinge - Part R2b - standard hinge right hand - bottom inside.stl STL · 114 KB
- Door Stiffening Hinge - Part R1a - standard hinge right hand - top outside.stl STL · 182 KB
- Door Stiffening Hinge - Part L1a_O - Offset hinge locations - top outside.stl STL · 183 KB
- Door Stiffening Hinge - Part L2a_O - Offset locations left hand - bottom outside.stl STL · 182 KB
- Door Stiffening Hinge - Part L1b_O - Offset hinge locations - top inside.stl STL · 179 KB
- Door Stiffening Hinge - Part L2b_O - Offset locations left hand - bottom inside.stl STL · 179 KB
- Door Stiffening Hinge - Part M2t - magnet mount twist-in.stl STL · 120 KB
- Door Stiffening Hinge - Part M3t - magnet mount- 3 magnet twist-in.stl STL · 120 KB
- Door Stiffening Hinge - Part M2 - magnet mount.stl STL · 134 KB
- Door Stiffening Hinge - Part M3 - magnet mount- 3 magnet.stl STL · 133 KB
- Categoría
- Para tu impresora
- Formatos
- STL
- Descargas
- 0
- Publicado
Sobre este modelo
Description The INBXX is a fantastic solution for filament management and it's a good pairing with INDX or an MMU. These alternative hinges and magnet mounts allow it to seal better and keep more moisture out.
Inspired by the the Janus project for the Core One L INBXX, this brings similar ideas to the Core One (non-L) -- unlike Janus, this requires no drilling.
This project uses an alternative hinge design (compatible with the original INBXX hinge mounts and door panels) to mount magnets in two place at the top and bottom of each door.
It is strongly recommended that you also print and install a center frame insert. There are a few options but my remixed version is here: https://www.printables.com/model/1887271-inbxx-slim-symmetrical-center-frame-insert BOM - Per hinge: - 8-14x 10x3mm circular magnets per hinge, depending on options chosen
- 3x M3x12mm socket head cap screws & nuts or m3 heat-set inserts used as nuts
- 1x M3x30 screw for hinge connection (reuse original INBXX screw)
- 2x Roll-in t-nuts (optional if you prefer a screw-mounted magnet holder vs. a twist-in)
Hinge Part Options - Options included for both left-handed and right-handed hinge locations
- Each hinge has an outside/front-facing part (black part, in the first two images below) and an inside part (orange part, in the first two images below). The inside part is optional but allows for additional magnet placements to hold the hinge face to the frame more closely when the doors are opened.
- Many INBXX kits have shipped with doors that have asymmetrical hinge locations drilled. Given that, I've produced files for each, labeled standard and offset to match the location layouts
- The top and the bottom hinges are mirrors of one another, but to reduct the mental gymnastics of taking the left-hand top and using it as the righthand bottom, there are top and bottom hinge versions.
- As a result, there are 16 hinge part options but they are hopefully sensibly organized here.
- Each door needs a top and a bottom hinge printed. Be sure to select standard or offset as appropriate.
- Part names reflect options: - Example Part R1a: - R: it is a right handed hinge
- 1: it is the top hinge
- a: it is the outside face
- Example Part L2b_O: - L: it is a left handed hinge
- 2: it is the bottom hinge
- b: it is the (optional) inside part for the hinge
- _O: it is the offset hinge location
Magnet Mount Part Options: - Magnet mounts come in: - Two mounting styles -- screw-mount (t-nuts required) and twist-in
- Two magnet "strengths": Two 10x3mm circular magnets or three 10x3mm magnets for a stronger hold. 3 magnets are recommended.
Printing - No supports needed
- PETG recommended
- 15% infill recommended
- Parts to be printed: - Print a top and a bottom hinge for each door (see above) - Inside parts are optional but recommended
- 4 magnet mounts per door – I recommend you use a bit of superglue (cyanoacrylate) to bond the innermost magnets to the printed parts. This is primarily for aesthetics and will keep the hinge face attached to the magnets when closed, keeping it pressed against the plexiglass for a cleaner look. Functionally, the magnets will do their job either way.
Descripción original del autor, publicada en Printables.