
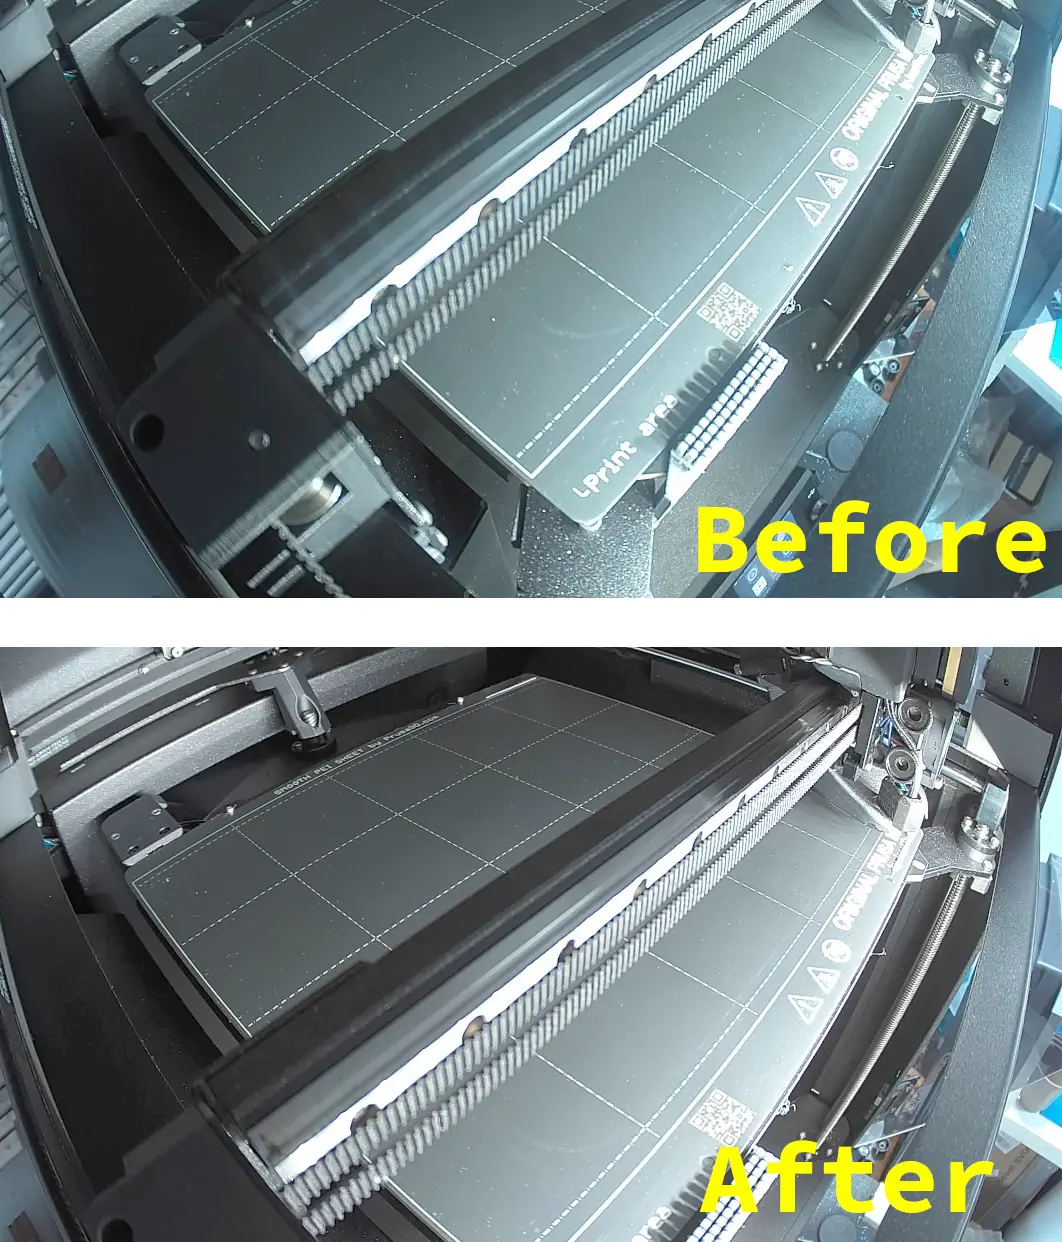
Core One Buddy3D Camera lid remixed to improve view of printbed
por Jason en Printables
Adjusts field of view of the camera in the Core One, ensuring back right of the bed is not cut off.
Licencia
Uso comercial permitidoPuedes usarlo, modificarlo y venderlo; si distribuyes versiones modificadas deben ir con la misma licencia y sus fuentes.
Al descargar aceptas respetar la licencia y dar crédito a Jason.
Archivos (4)
- Categoría
- Para tu impresora
- Formatos
- STL, STEP
- Descargas
- 2,766
- Publicado
Sobre este modelo
Version 2 - moar magnets: After feedback about the camera not sticking - probably due to weaker 6mm x 20mm x 2mm magnets than the ones I had available, the model was revised with the following changes: - The 6mm x 20mm magnet is repositioned so it is parallel with the metal frame, and slightly closer to the metal along its width. A small ridge holds the magnet in place so it can be snapped in. - Two recesses for 10mm diameter round magnets (2mm to 3mm thick) have been put into the top ‘wings’ that align the camera mount with the top of the printer frame.
The only round magnets I had to test had a countersunk hole in them - but any 10mm round magnet around 2mm - 3mm thick should do. As will smaller magnets, but you might want to hold those in place with glue. Once attached to the camera case they should be held in place anyway. They help support the camera even more securely against the top of the frame. Original description I got the Buddy camera for the Core One, and was a little disappointed that the camera was angled too low, cutting off the rear right of the print bed. This mod amends the lid piece of the camera enclosure so it tilts the camera up slightly bringing more of the print bed into view. As the mod pushes the lower part of the camera away from the frame, an additional 20mm x 6mm x 2mm magnet is used to secure the case to the printer's frame. The existing camera magnets are retained in the main casing. Orientate the 20mm x 6mm magnet so it is not repelled by the original magnet in the pocket in the the top part. The larger magnet is slid and pressed into place in the pocket in the lid before assembly. It's a tight fit! I printed in Prusament PCCF Blend, but any heat resilient material should be OK. 0.2mm Structural profile, 20% cubic infill. Printed in about 30 minutes on the Core One. It was designed by importing the original STL into FreeCAD and working on it there.
Descripción original del autor, publicada en Printables.



