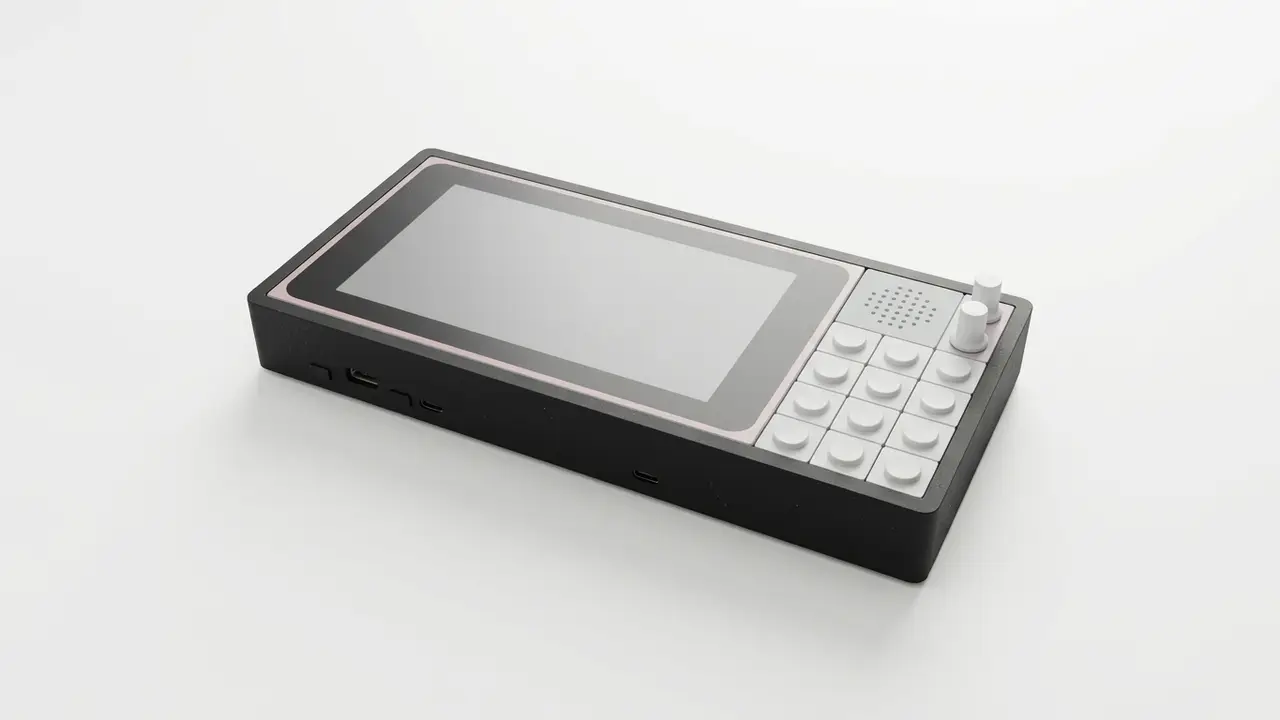
CoralBoard based cyberdeck (AI assistant)
por MakerOne en Printables
A compact CoralBoard cyberdeck that turns your AI assistant into a portable, futuristic desktop companion.
Licencia
Uso comercial permitidoPuedes imprimirlo, modificarlo y venderlo sin pedir permiso ni dar crédito.
Al descargar aceptas respetar la licencia y dar crédito a MakerOne.
Archivos (8)
- Categoría
- Tecnología
- Formatos
- STL
- Descargas
- 8
- Publicado
Sobre este modelo
CoralBoard Cyberdeck — AI Assistant This project is a compact cyberdeck built around the CoralBoard, designed to work as a portable AI assistant with a custom physical interface. The main computer is connected to a dedicated LCD display and powered by a 5000 mAh battery through an Amp Ripper 3000 power module. A 28 mm speaker provides audio output, creating a self-contained AI assistant that can be used without a conventional desktop setup. The user interface is built around an RP2040-Zero, which acts as a USB HID keyboard controller. It connects to 16 physical switches arranged in a 4×4 matrix and two rotary encoders, allowing the user to interact with the CoralBoard through buttons, rotary controls, and shortcuts. Main components - CoralBoard — main computer and AI processing
- LCD Display — dedicated display connected directly to the CoralBoard
- 5000 mAh battery — portable power source
- Amp Ripper 3000 — 5 V power supply
- CoralBoard-compatible LCD display
- 28 mm speaker
- RP2040-Zero — USB HID controller
- 16 switches — 4×4 matrix
- 2 rotary encoders with push buttons
The wiring diagrams show how the different components are connected and how the RP2040-Zero communicates with the CoralBoard via USB. The goal of the project is to create a small, functional and customizable cyberdeck that combines AI capabilities with a dedicated physical interface in a compact 3D-printed enclosure. Assembly Guide
Follow these steps to assemble the CoralBoard Cyberdeck: 1. Mount the CoralBoard and Amp Ripper 3000 Place the CoralBoard and Amp Ripper 3000 on the bottom panel and secure them using the required M3×10 mm screws. 2. Install the switches Snap the 12 switches into their designated positions in the enclosure. Make sure all switches are fully seated and aligned correctly. 3. Install the rotary encoders Insert the two rotary encoders into their designated mounting positions and secure them in place. 4. Mount the RP2040-Zero Place the RP2040-Zero inside the enclosure and secure it using double-sided adhesive tape. 5. Solder the electronics Solder the 12 switches, two rotary encoders, RP2040-Zero, CoralBoard, and other required connections according to the wiring diagrams provided with the project. Before closing the enclosure, check all solder joints and verify that the wiring is connected correctly. 6. Mount the LCD display Position the LCD display in its designated opening and secure it using double-sided adhesive tape. Make sure the display is properly aligned before pressing it firmly into place. 7. Connect the battery Install the 5000 mAh battery inside the enclosure using double-sided adhesive tape and connect it to the Amp Ripper 3000. 8. Assemble the enclosure Once all components are installed and connected, carefully place the outer body panels together. Make sure no wires are pinched or obstructed, then secure the outer body parts together with the remaining M3×10 mm screws. 9. Final check Before powering on the cyberdeck, check that: - All components are securely mounted.
- No wires are shorting or pinched.
- The LCD cable is properly connected.
- The RP2040-Zero is connected to the CoralBoard via USB.
- All switches and rotary encoders are wired correctly.
- The battery and Amp Ripper 3000 connections are correct.
Once everything is checked, the CoralBoard Cyberdeck is ready to power on and use.
Descripción original del autor, publicada en Printables.