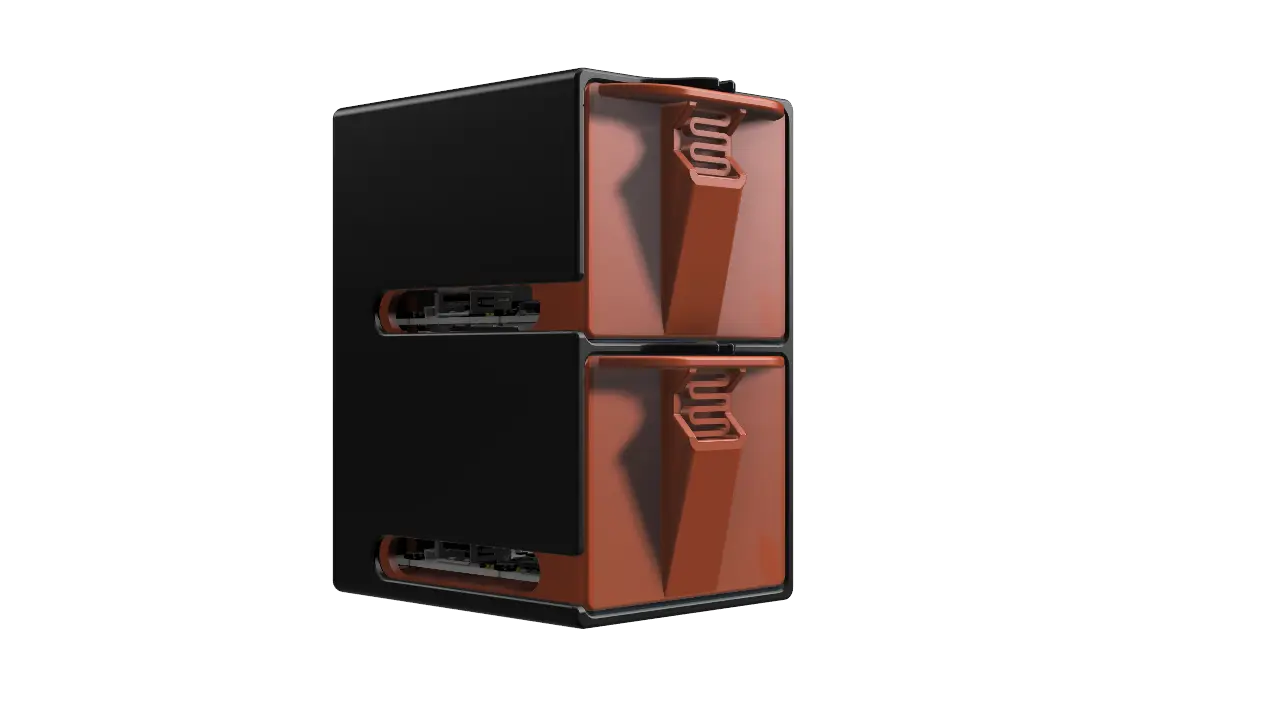
Coral Board Case with spring locked Double Compartments
por Fredrik_S en Printables
Coral Board Case that allows easy acess for storage and prototyping. Closed by Spring Latch Mechanism.
Licencia
Solo uso personalCC BY-NC-SA 4.0 — Atribución, no comercial, compartir igual
Uso personal dando crédito; sin fines comerciales y las modificaciones con la misma licencia.
Al descargar aceptas respetar la licencia y dar crédito a Fredrik_S.
Archivos (5)
- Categoría
- Tecnología
- Formatos
- STL
- Descargas
- 4
- Publicado
Sobre este modelo
Coral Board Case with Double Compartments This Coral Board Case is designed for easy acess that allow prototyping and also storage. The open design allow easy installation of expansions boards, fans or customization. I will update with a rack for easy installation and customization. The design make it possible to lock with a Spring Latch Mechanism Remix. About the design This case is design with the user in focus, with that said the compartment with Coral Board can be conntected and still be open to do some changes to the GPIO pins or other adjustments while the Coral Board is on. This is done by using compartment that has an open side, this allow the connection to the Power, screen and USB to be connected while the compartment is taken out of the Main Box. Other board dont have this feauture and this make it easy to use. After the changes have been done, just put it back in to the Main Box without need of connecting any cables back again.
Recommended Specifications - Material: PLA, but feel free to use any filament you prefer.
- Color: Main Box black, Compartments Prusa orange.
- Support: Recommended for the compartments and the Box.
Disclaimer This model has been made without been able to 3D print it, since I don't own a printer right now. Use with caution. You assume all responsibility for any damage or injury that may occur. Included Files & Build Options All files needed for construction are provided. You can choose between two different build versions depending on your needs. 1. Coral Board and a Spair Part compartment
For those who want to use the Coral Board but also want to have spair parts in same case. This is the solution for you. Use the following parts: - Main box for Compartment
- Coral Board Compartment
- Spair Parts Compartment
- 2X Moded button
This version offers the best practise since it's allways good to have a tidy table. Perfect if you have one Coral Board, when you get a new one you can print out a new Coral Board compartment since same main design for both. 2. Two Coral Boards
For users that want the best performance. Use the following parts: - Main box for Compartment
- 2X Coral Board Compartment
- 2X Moded button
This version offers the best performance since you can have two Coral Boards. If you have spair parts, then you could print Spair Parts Contanment and use it (See option 1). Plus: Lid for the moded button
For those who want a lid for the button for the compartments. Use the prefered build option and then print the lid. Plus: Buttons information for the compartments
This design is made possible by using the spring latch mechanism design by Iker Labano here at Printables.com. I have integrated his design in mine, and this allowes the compartments to lock. I have design the locking button to fit the design, but he has more choices, so please check out his awesome contribution. I want to add a BIG THANKS to this user!
Overview See GIF pictures attached at the end of the diffrent versions. Information Please ,if you print this construction, please take pictures. Updates that are coming - Rack for the Coral Board TBA.
- Custom STEP file for creating your own lid design TBA.
Instructions - Start to print the parts that are named under the option you have chosen.
- Place the Coral Board in the Coral Board Compartment as you see in the picture below. Let the plastic pipes guide the Coral Board, so that it's looks like this:
- Put both Compartments in the Main Box, be sure that the compartment is side-hunged at the Main box internal sides. See picture:
- Installing the button.
Take one of the moded button and one of the compartment.
The button upper part enter first in the hole with a 45 degree angle. When the upper part is in, start to push upwards and push the bottom part in the hole below.
When completed, it should look like this:
If problem, see this guide that original designer has made at 11:00.
- (Optional) Installing the lid. The lid can be mounted to the button to give it a more sleak design. When the lid is pushed towards the button, it will stuck in place. If want a custom design, I can upload a custom plate so that you can create your own design.
Descripción original del autor, publicada en Printables.