
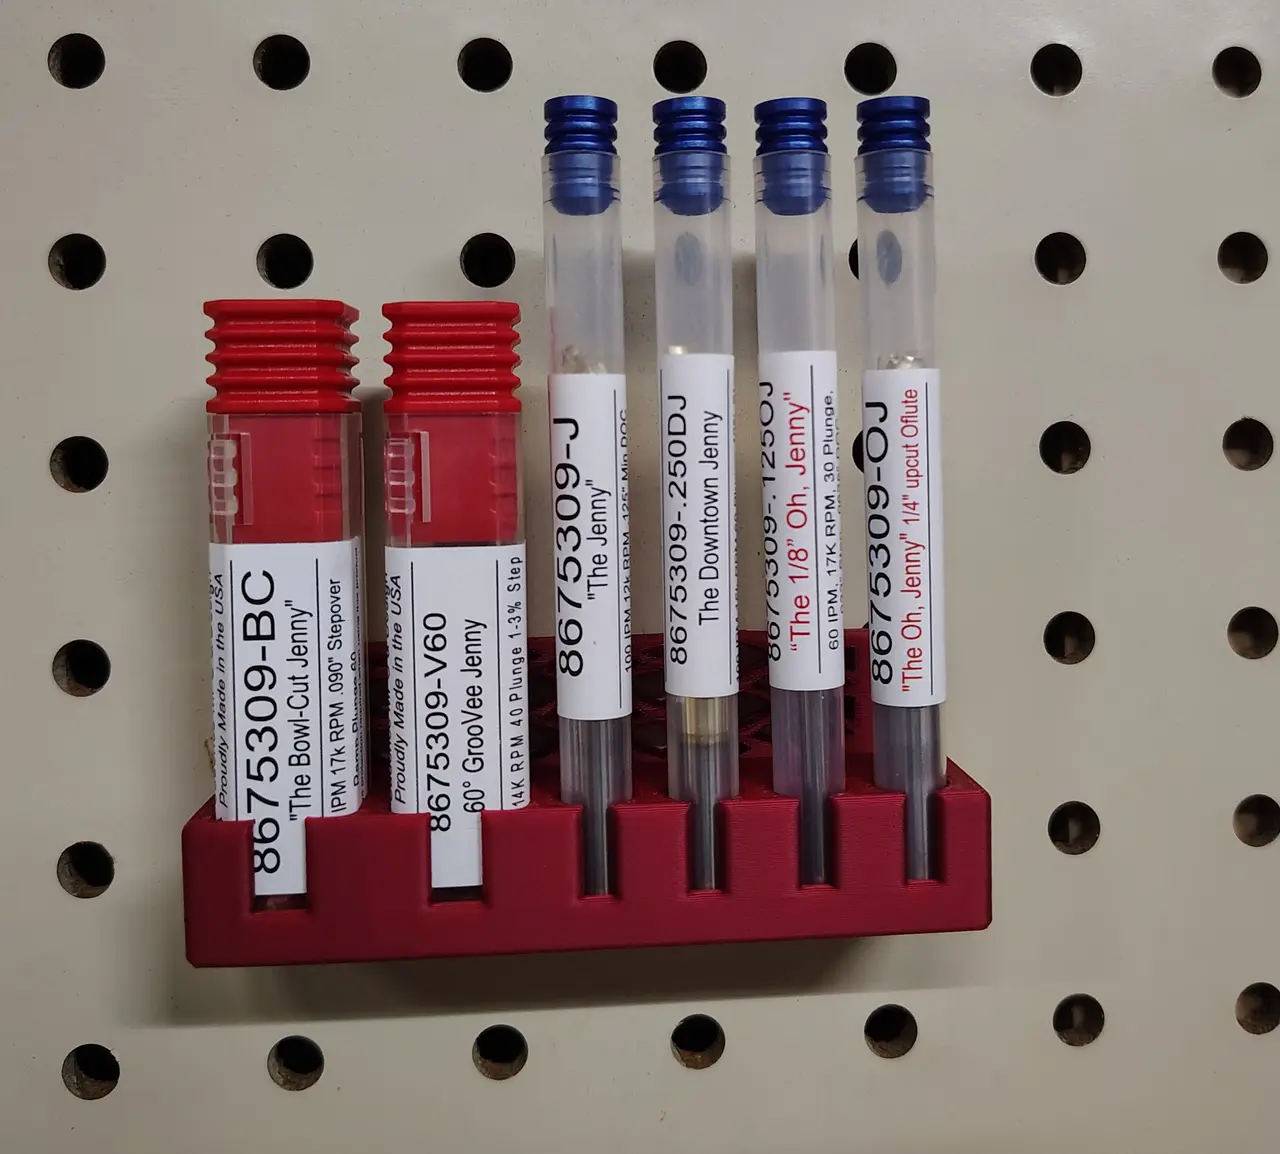
CNC End Mills Organizer
por Madscientist en Printables
Keep your CNC's End Mills in their containers, clean(-ish :) ), and organized on a peg board.
Licencia
Solo uso personalCC BY-NC 4.0 — Atribución, no comercial
Puedes imprimirlo y modificarlo para uso personal dando crédito. No se permite vender las impresiones.
Al descargar aceptas respetar la licencia y dar crédito a Madscientist.
Archivos (8)
- Endmill Peg Board Organizer Large.stl STL · 291 KB
- Endmill Peg Board Organizer Thin.stl STL · 429 KB
- Endmill Peg Board Organizer Tall Thin.stl STL · 418 KB
- Endmill Peg Board Organizer Large - Beveled.stl STL · 156 KB
- Endmill Peg Board Organizer Thin - Beveled.stl STL · 196 KB
- Endmill Peg Board Organizer Tall Thin - Beveled.stl STL · 188 KB
- Endmill Peg Board Organizer Original.stl STL · 382 KB
- Endmill Peg Board Organizer Original - Beveled.stl STL · 172 KB
- Categoría
- Para tu impresora
- Formatos
- STL
- Descargas
- 0
- Publicado
Sobre este modelo
Don't have a drawer or counter to keep you End Mills organized? Me neither! Worried that they will be placed somewhere and you won't be able to find them again? Same. Thankfully, I had a peg board that could be mounted (and wall space avaliable) near where our CNC is going to live, so I designed a holder for the end mills. File Descriptions The Original & Original - Beveled files are the ones I made first, and the only ones I printed. However, all the variation files were just slightly modified versions of the originals, so they should all print well. The Original file fits all the end mills that came as a starter pack with our CNC. Notes: - I wanted to be conscientious about the amount of filament that was being used. So Please Note, this led to a change between the one that is pictured and actual file that I attached. The lattice required a lot of support which I got rid of most of it hence the kind of scruffy looking lattice in the pictures. I added two beams and left it at that. Those beams shouldn't need support, so you may have to go in and use the Paint-On Supports option and remove any that your slicer may try to put in.
- There are two versions of each variation. The ones with 'Beveled' at the end are ones that I rounded the edges, cause some people prefer that, and the ones with out the addition wording have just normal staight/cornered edges.
In the Variations folders there are three different files. - The one labeled large holds five of the square containers. (Mine were roughly 15.36 mm wide.)
- The one lableled thin hold seven of the cylindar conainers. (Mine were roughly 8.5 mm wide.)
- The one labeled tall thing, I made the models a bit taller so that more of the cylindar container would be held by the model.
Printing Settings (that I used) - Printer: Prusa MK4
- Filament: Prusa PLA
- Layer height: 0.20 mm Speed
- Supports: Organic Supports
- Infill: 15%
I did try reducing infill on a practice print, but I found this made the pegs that hook into the peg board a little flimsy. Nothing major, but considering the weight the end mills put in the slots, I chose to go with the 15%. The only supports that should be needed are the ones for the peg that is on the back. Measurement Peg Specs I assume what I have is relatively standard peg board, but I thought I would include it for those who would need it. If you have access to something like Blender or Fusion360, etc. you can alter those things. These measurements are what I got using the measuring feature inside of the Prusaslicer, just so you know. - Between top and bottom pegs: 19.5 mm
- Between left and right pegs (inside space): 71.2 mm
Descripción original del autor, publicada en Printables.



