
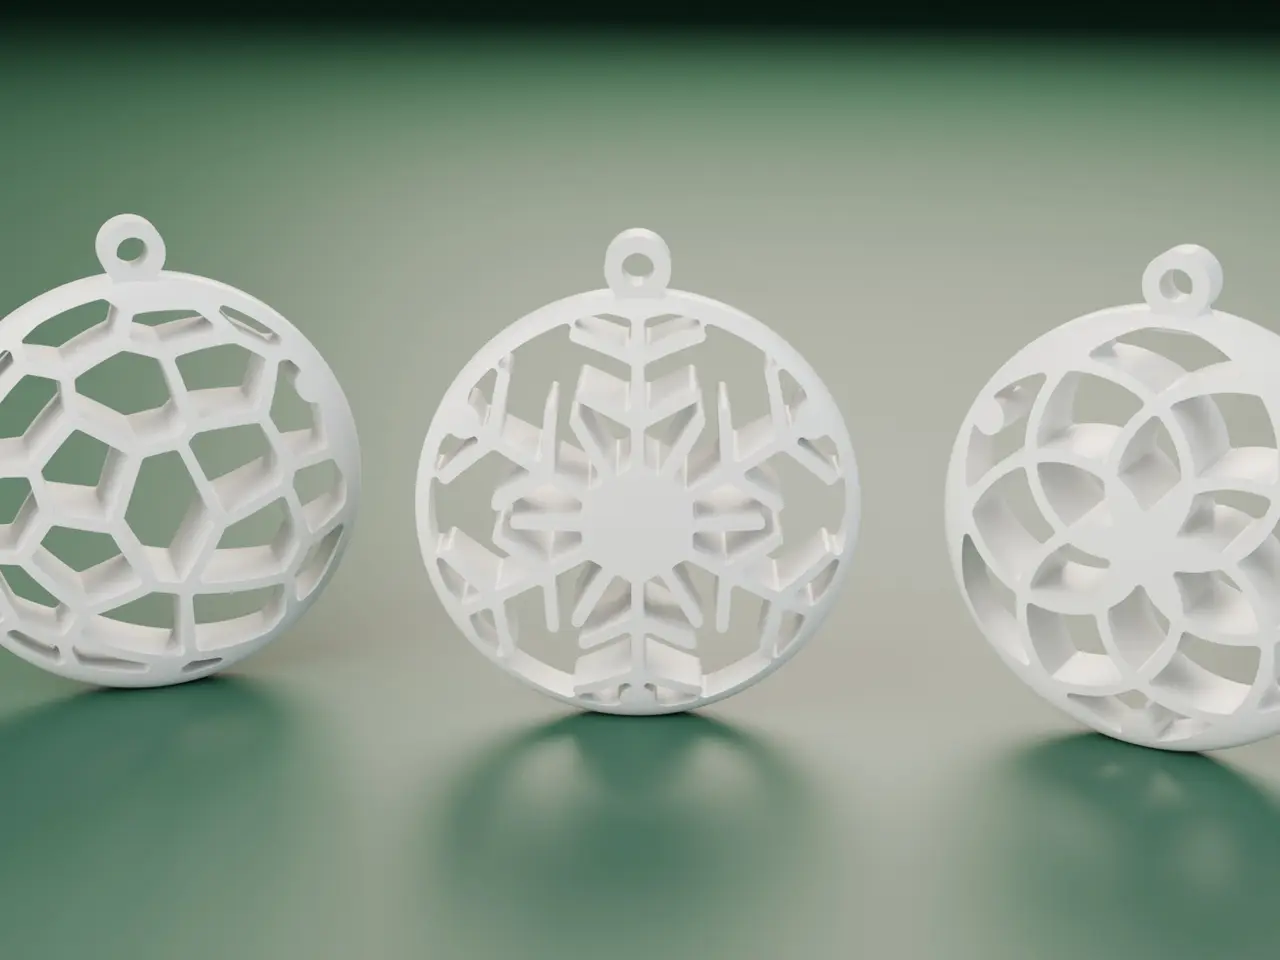
Christmas Ball Ornament – Openwork Bauble, 3 Patterns: Voronoi, Snowflake, Rosette – Free
por made_by_Roman en Cults3D
A lacy Christmas bauble that prints without a single support. 🎄
Cults3D entrega los archivos a usuarios con cuenta gratuita
Licencia
Solo uso personalLicencia de uso privado de Cults3D: puedes imprimirlo para ti. No se permite compartir el archivo ni vender las impresiones.
Al descargar aceptas respetar la licencia y dar crédito a made_by_Roman.
Archivos (10)
- Christmas_Ball_Ornament_STEP.zip ZIP
- XmasBall_Rosette_A1mini.3mf 3MF
- XmasBall_Rosette_back.stl STL
- XmasBall_Rosette_front.stl STL
- XmasBall_Snowflake_A1mini.3mf 3MF
- XmasBall_Snowflake_back.stl STL
- XmasBall_Snowflake_front.stl STL
- XmasBall_Voronoi_A1mini.3mf 3MF
- XmasBall_Voronoi_back.stl STL
- XmasBall_Voronoi_front.stl STL
- Categoría
- Hogar
- Formatos
- ZIP, 3MF, STL
- Descargas
- 2
- Publicado
Sobre este modelo
A lacy Christmas bauble that prints without a single support. 🎄
Each ball is made of two halves with a flat back. The pattern is drawn on a sphere and projected, so the openings get smaller towards the edge just like on a real ball – even one half looks round. Glue two halves together for a full bauble, or print just one for a flat ornament in half the time.
FEATURES
- 3 patterns: Voronoi (24 openings, in the style of my garden tiles), Snowflake (6-point snowflake with branches, 18 openings) and Rosette (6 + 6 opposite spirals, 18 openings)
- Ø64 mm (72 mm with the loop), 18 mm thick when assembled
- All walls of the openings are vertical and the top is a dome – no overhangs, no supports
- The back half is a mirror of the front, so the openings go straight through when glued
- 3 holes on the back for pins made from 1.75 mm filament scraps – the halves line up by themselves
- Hanging loop in the plane of the ball (Ø4.6 mm hole)
- Tested in software: all 6 halves watertight, nothing floats; the only overhangs are the tiny ceilings of the 3 pin holes (10.3 mm², a 2 mm bridge); the flipped back half matches the front exactly (0.0 mm² difference)
INCLUDED FILES
- 6 STL files: front + back half for each pattern, ready to print (back on the bed)
- 3 Bambu Studio projects (3MF) for the A1 mini, sliced (white PETG) – both halves of one ball per plate
- STEP file in a zip (editable CAD, made in Autodesk Fusion)
PRINT SETTINGS
- Material: PETG or PLA – white, gold, red or silk look great
- Nozzle 0.4 mm, layer height 0.2 mm (0.16 mm gives a smoother dome, about 15–20 % more time)
- 2 walls, 15 % infill
- Supports: NOT needed, no brim
- Elephant foot compensation 0.1 mm
- Time and PETG per full ball (A1 mini): Voronoi – 56 min, 16.0 g; Snowflake – 57 min, 17.6 g; Rosette – 54 min, 17.1 g. One half takes about 28–29 min.
ASSEMBLY (full ball)
1. Cut 3 pieces of 1.75 mm filament, about 4.5 mm long.
2. Put them into the holes on the back of the front half (a drop of superglue).
3. Apply a thin line of superglue on the rim and the back of the front half, press the back half onto the pins and hold for 30 s.
4. Thread a ribbon, string or metal hook through the loop.
TIP: PETG can leave fine strings in the small openings – use dry filament and a quick pass with a hot-air gun if needed.
All images are 3D renders.
Descripción original del autor, publicada en Cults3D.



