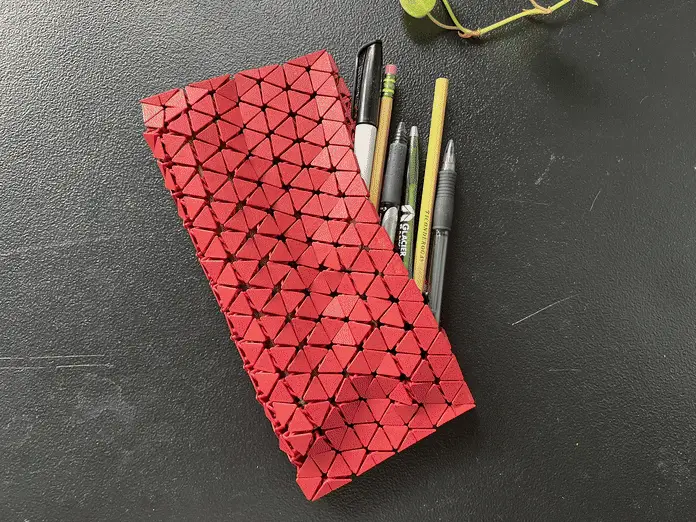
Chainmail Pencil Case Pouch
por Ereeb en MakerWorld
A fun back-to-school print to bring a bit of customization to your kid's school supplies! Or just a fun way to organize the loose pencils/pens we all have floating around our homes :)
MakerWorld entrega los archivos a usuarios con cuenta gratuita
Licencia
Solo uso personalMakerWorld Exclusive License
Licencia exclusiva de la plataforma: uso personal, no se permite compartir el archivo ni vender las impresiones.
Al descargar aceptas respetar la licencia y dar crédito a Ereeb.
Archivos (4)
- ChainMailPouch.step STEP · 178,5 MB
- ChainMailPouch.stl STL · 27,9 MB
- ChainmailPouch_Mini.step STEP · 95,6 MB
- ChainmailPouch_Mini.stl STL · 16,5 MB
- Categoría
- Educación
- Formatos
- STEP, STL
- Descargas
- 1,226
- Publicado
Sobre este modelo
A fun back-to-school print to bring a bit of customization to your kid's school supplies! Or just a fun way to organize the loose pencils/pens we all have floating around our homes :)
Requires 4x2mm magnets for the closing action and superglue to assemble. The 20pcs magnets from Bambu makes 2 pouches.
Slicing can take a long time for this complex of a model, so have patience and maybe find something else to do while you wait for it to slice :)
Make sure your bed is clean and ready to stick well, and watch the first layer if you aren't sure. On the other hand, take care when removing the pouch from the build plate, each link wants to stick onto the plate so don’t try to just rip it off. Give the plate plenty of bends back and forth and if you have really good adhesion you may need to use a tool to gently remove remaining links.
EDIT: Added a mini version that fits on the A1 Mini and holds regular sized pens and mechanical pencils, but not full sized unsharpened regular pencils. I printed mine out of silk filament and it looks amazing, but keep in mind silk PLA tends to have worst layer adhesion, so it's worth being more gentle with the pouch if you use silk.
Boost Meif you like this pencil pouch and have a boost available, feel free to leave it here to let more people see this! It also helps a lot if you use the provided links to purchase parts and filament, if you plan to anyway. Assembly
- Super glue a magnet into each of the holes in the blue circles, using just enough so it squishes out a tiny bit. Make sure the magnets are oriented so they will stick together when the pouch is folded together. Wait until glue fully cures.
- Put super glue into the holes shown in the yellow circles, then fold the sheet in half so that the raised parts shown in green fit into the holes shown in yellow. Press and hold on a flat surface until the glue fully cures.
Descripción original del autor, publicada en MakerWorld.