
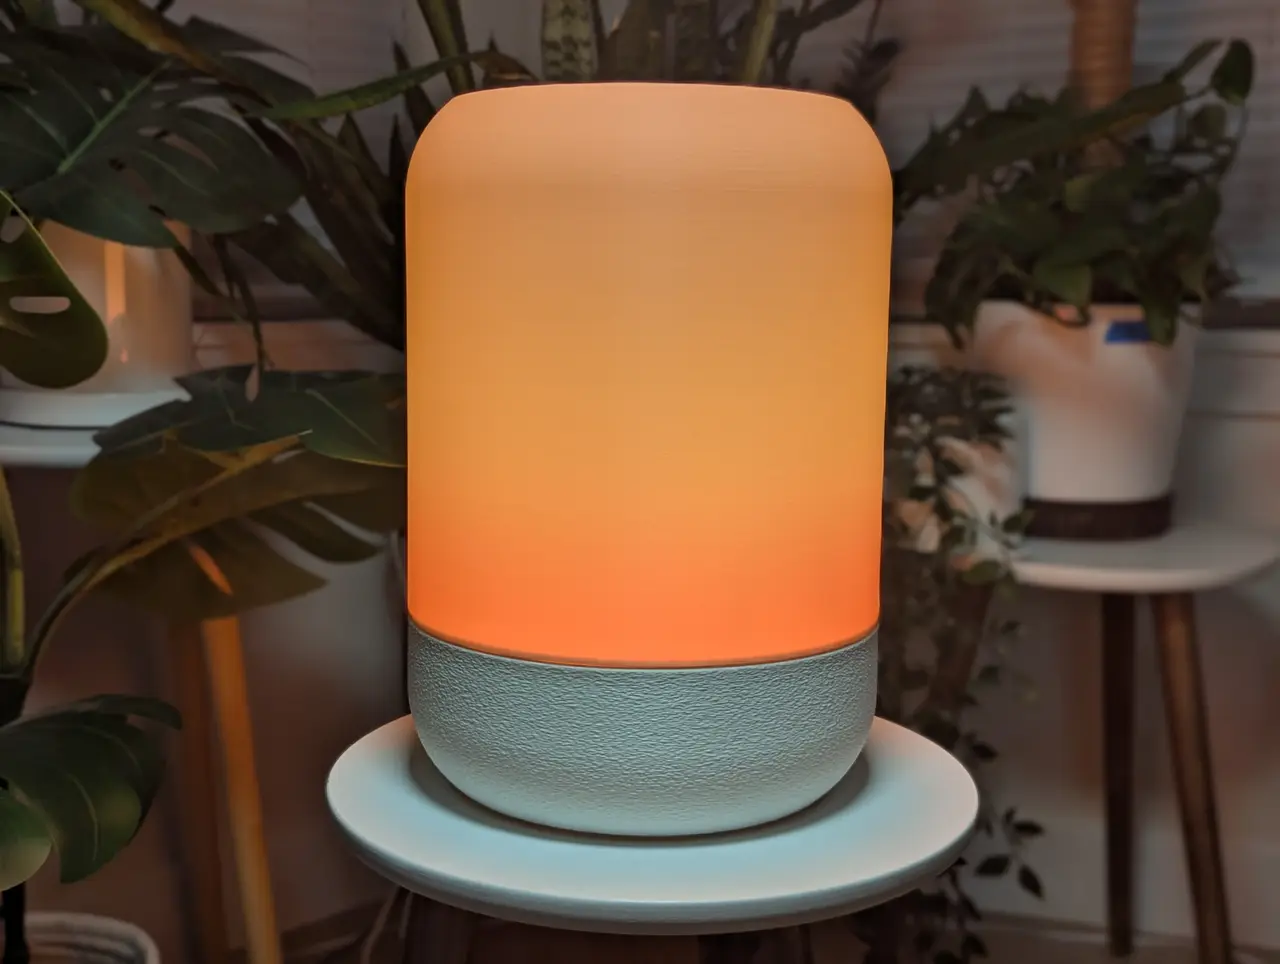
Capsule Lamp
por naschorr en Printables
Add a touch of warmth and ambiance with this small modern lamp
Licencia
Uso comercial permitidoCC BY-SA 4.0 — Atribución, compartir igual
Puedes usarlo y modificarlo dando crédito; las versiones modificadas deben compartirse con la misma licencia.
Al descargar aceptas respetar la licencia y dar crédito a naschorr.
Archivos (2)
- Categoría
- Hogar
- Formatos
- STL
- Descargas
- 46
- Publicado
Sobre este modelo
Why? I was looking for a clean, easy to print lamp model to get a bit more warmth and ambiance in my living room. After looking at some other designs, I combined the ideas that I liked from them with some of my own touches to make something that turned out really nice. Required Items - E12 candelabra socket (most should work, I used this one: https://www.amazon.com/dp/B0DPZG3F6J)
- E12 LED bulb (I'd recommend something warm white with a frosted exterior. I used this one: https://www.amazon.com/dp/B0F4LLL514)
- Aluminum foil tape (this prevents light leakage through the base, and bounces it back up into the diffuser)
- 2x 10mm M3 screw
- 2x M3 nut
- 3x self adhesive rubber feet (I like 3M Bumpons)
- Xacto knife
Optional Items - Gel sheets in the colors that you'd like to tint the lamp with. Alternatively, you can probably print the diffuser in a color and allow that to tint it
Printing Diffuser Print this in vase mode, with the bottom solid layers cranked up so that the bottom shell is 3mm thick. This is a bit more complex than a normal vase mode print, because we want to preserve the mounting features on the bottom of the diffuser, as they'd otherwise end up hollow/thin and be too weak. Setting the bottom shell thickness to 3mm forces the slicer to make it thick enough to attach the diffuser to the base. I'm printing at a 0.2mm layer height, so I chose 15 solid bottom layers in this example: Base Nothing special for this, but it might be nice to paint a fuzzy skin onto the outer surface for some interesting texture, and possibly set the seam to be on the rear. Assembly - Cut strips of the aluminum foil tape and lay them down next to each other (tightly!) on the base. If you leave too much space between them, light will leak through the base and illuminate below it.
- Trim the tape to fit the base with the xacto knife: - Trim the tape's outer circumference slightly inboard, so that none of the tape creeps onto the outer chamfer of the base.
- Trim the tape's inner hole slightly large, so that none of the tape obstructs the hole that the socket will pop into
- Push the E12 socket into the base, and let the wings lock into place.
- Screw the bulb into the socket
- Add any gels to the diffuser if desired (see below).
- Push the M3 screws through the holes in the bottom of the diffuser, then feed the screws through the holes in the base.
- Tighten the M3 nuts to the screws to lock the diffuser in place.
Adding Gels to the Diffuser - Gels can be cut to into a rectangle 188mm by 134mm.
- Roll this up over the long side, so that you've got a cylinder 60mm in diameter and 134mm long.
- Tape this with some clear tape to hold the cylinder together.
- Feel free to add strips of other colors to change the colors that the lamp throws. My build uses an orange gel as the base, with a small strip of red along the bottom.
- Tape the cylinder inside the circular hole in the bottom of the diffuser
Descripción original del autor, publicada en Printables.



