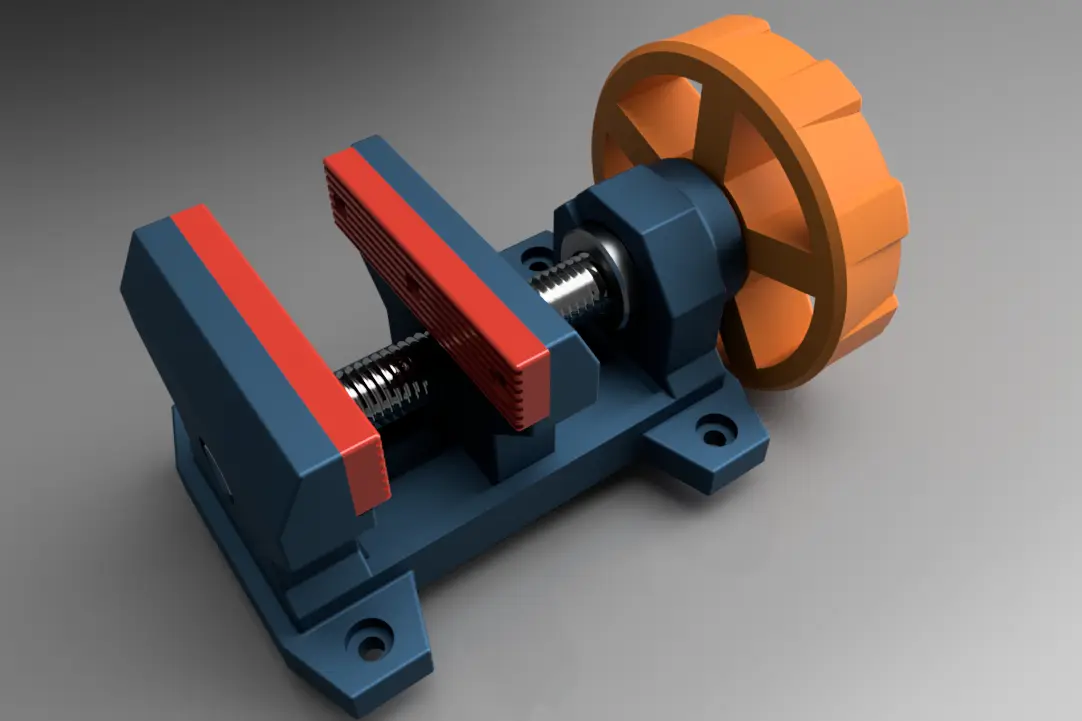
Bench Vise
por Rex en Printables
Bench Vise that provides actual shop functionality and duty.
Licencia
Solo uso personalCC BY-NC 4.0 — Atribución, no comercial
Puedes imprimirlo y modificarlo para uso personal dando crédito. No se permite vender las impresiones.
Al descargar aceptas respetar la licencia y dar crédito a Rex.
Archivos (7)
- Categoría
- Herramientas
- Formatos
- STL
- Descargas
- 15
- Publicado
Sobre este modelo
There are many great designs for hobby and craft vises that utilize 3D-printed parts. I use several of these very effectively for soldering, gluing, painting and other hobby oriented tasks. HOWEVER... I also have a need for something heavier, for the garage, to perform tasks beyond hobby and craft duty. I needed a small, but capable vise strong enough to hold items when sawing, grinding, and torch soldering. My design for this Bench Vise utilizes common hardware that provides MUCH greater strength than any 3-D printed part can provide, yet is readily available. I chose a 5/8-11 x 6"L bolt for the lead screw as it provides enough travel per revolution to work effectively and is readily available in comparison to ACME threaded options. I printed the main body and floating jaw in PETG-CF with 5 walls and 22% gyroid infill. The handle was printed with PETG-GF filament with the 3 walls and 22% gyroid infill. I printed the jaw pads with Rapid TPU-95A with 3 walls and 22% infill. Hardware Required: Item Qty Description Part Number Purpose
1 1 5/8"-11 UNC x 6"L Hex Bolt - Full Thread Everbilt 801166 Lead Screw
2 1 5/8" x 1-1/8" x 1/2" Shaft Collar Hillman 838621 Retainer
3 1 5/8"-11 UNC Hex Nut Everbilt 801786 Drive Nut
4 2 5/8" x 1" x #14 gauge Machine Bushing Hillman 882393 Thrust Washer
5 6 #4 x 1/2" Black SS sheet metal screw (Amazon) X004P0P57P Retain Jaw Pad
Refer to animation for assembly sequence. Note the Shaft Collar is tightened with the hex set screw after aligning with the slot in the main base. Assembly: - Affix jaw pads to vise jaws.
- Insert hex bolt into handle and seat head into hex recess.
- Place one machine bushing on bolt.
- Pass bolt through vise body and slide remaining machine bushing and collar onto bolt.
- Press nut into hex recess in floating jaw and thread bolt through jaw until flush with outer body Optional: Depending on your print tolerances, you may add a drop of CA adhesive to help retain the nut during jaw retraction.
- Align collar setscrew with recessed slot in vise body and tighten appropriately. Optional: You may wish to file a flat on the bolt threads and/or drill a shallow divot for more positive engagement.
- Press Handle Center Cap into recess.
Counterbore mounting holes are sized for #10 pan head screws.
Descripción original del autor, publicada en Printables.