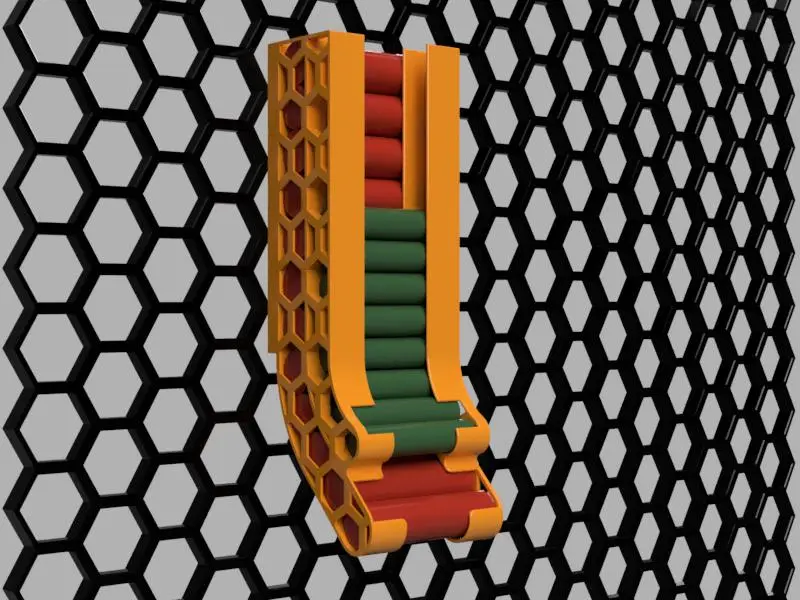
Battery holder for AA+AAA, honeycomb storage wall (HSW)
por ORM en Printables
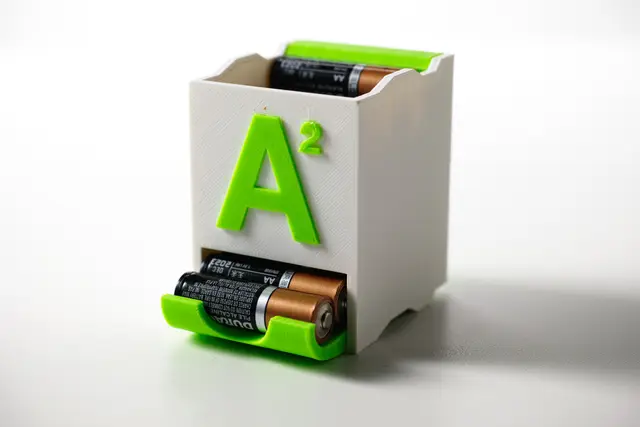
A space saving battery dispenser for AA and AAA batteries for mounting on the honeycomb storage wall
Licencia
Solo uso personalCC BY-NC 4.0 — Atribución, no comercial
Puedes imprimirlo y modificarlo para uso personal dando crédito. No se permite vender las impresiones.
Al descargar aceptas respetar la licencia y dar crédito a ORM.
Archivos (10)
- AA + AAA HSW countersunk holes.3mf 3MF · 445 KB
- AA HSW countersunk holes.3mf 3MF · 270 KB
- AAA HSW countersunk holes.3mf 3MF · 230 KB
- AA + AAA HSW flat holes.3mf 3MF · 445 KB
- AA HSW flat holes.3mf 3MF · 271 KB
- AAA HSW flat holes.3mf 3MF · 230 KB
- Insert stump M3 thread v1.3mf 3MF · 208 KB
- Insert stump M3 nut.3mf 3MF · 68 KB
- Battery dispenser HSW v1.f3d F3D · 3,8 MB
- HSW insert stump M3 v1.f3d F3D · 810 KB
- Categoría
- Organización
- Formatos
- 3MF, F3D
- Descargas
- 2,602
- Publicado
Sobre este modelo
This space saving battery dispenser for the honeycomb storage wall is designed to hold both AA and AAA batteries, 12 AA and 13 AAA. A hexagonal pattern on the sides of the magazine makes it easy to see how many batteries are left. A drawback of this design is that batteries can fall between the rails when inserted. To reduce the risk of batteries falling out during loading, the rear wall follows the curve of the magazine. However, you still need to be careful when loading. Installation The battery dispenser is mounted to the honeycomb wall using a customised insert and screwed to the insert using a M3 screw. This ensures that the mounting is strong and secure. To assemble the battery dispenser, place the right and left wings together and overlap them, then insert the screws through the screw holes and screw them into the insert. I have modified the original insert by removing the top of the insert to allow the battery dispenser to sit flush with the honeycomb wall. I made two different versions of the insert to which the battery dispenser is attached. One is threaded for an M3 screw and the other is for a M3 nut. I personally prefer the threaded one. There are also two different versions of the battery dispenser, one with countersunk holes and the other with flat holes, which you use depends on the type of screws you use. The screws that fit should be about 12-14mm long. Printing and print settings In the model files, the parts are oriented in the best direction for printing. For best results, print the battery dispenser with the outsides down and the inserts flat on the front. For the battery dispenser use e.g. PLA for printing with a layer height of 0.2mm and a nozzle width of 0.4mm or less. A wall thickness of at least 3 lines and an infill of 25%. A support structure is recommended for the screw holes. The insert with the M3 thread must be printed with a layer height of 0.12mm in order for the thread to be usable. The inserts for a M3 nut can be printed with a layer height of 0.2mm. Other settings can be: PLA for printing with a nozzle width of 0.4 mm or less. A wall thickness of at least 3 lines and a fill of 25%. A support structure is recommended.
More of my models
Set of bins for small parts for the honeycomb storage wall
A collection of hooks for the Honeycomb storage wall
Feedback is always good. To encourage me or other designers to make more models, please hit like and/or post your makes. If something doesn't work or is missing and can be improved, please leave a comment.
Descripción original del autor, publicada en Printables.