Basic sword
por Ivan en MakerWorld
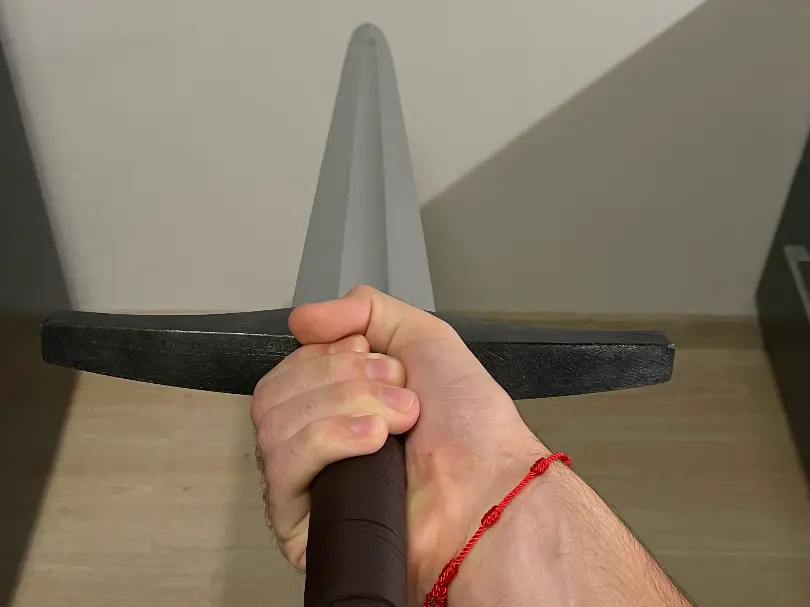
A simple, life-size sword originally created for a Xaden costume inspired by the book Fourth Wing.
MakerWorld entrega los archivos a usuarios con cuenta gratuita
Licencia
Solo uso personalCC BY-NC-SA 4.0 — Atribución, no comercial, compartir igual
Uso personal dando crédito; sin fines comerciales y las modificaciones con la misma licencia.
Al descargar aceptas respetar la licencia y dar crédito a Ivan.
Archivos (7)
- FULL_SWORD.stl STL · 1,6 MB
- BLADE.stl STL · 963 KB
- GUARD.stl STL · 353 KB
- HANDLE.stl STL · 716 KB
- POMMEL.stl STL · 480 KB
- TEST4A5MM10.stl STL · 140 KB
- FINAL_PRINT.3mf 3MF · 603 KB
- Categoría
- Cosplay y props
- Formatos
- STL, 3MF
- Descargas
- 0
- Publicado
Sobre este modelo
A simple, life-size sword originally created for a Xaden costume inspired by the book Fourth Wing. Description This is a simple, life-size sword inspired by the sword featured in the book Fourth Wing. The sword is primarily intended as a prop. It was not designed to withstand mechanical stress during handling and is therefore unsuitable for sword fighting or similar activities. The finished sword weighs approximately 600 g, with its center of gravity located about 600 mm from the tip of the blade. Materials For this project, I used:
- PETG filament
- 1× M4 × 1000 mm threaded rod (DIN 975)
- 2× M5 × 1000 mm threaded rods (DIN 975)
- M4 nut and washer
- 5-minute epoxy adhesive
- Sandpaper
- Leather cord for wrapping the handle
Build Guide 1. Preparing the Holes for the Threaded Rods First, print the test block with holes for M4 and M5 threaded rods, which is included in the 3D model files. I recommend printing the test block using the same material you plan to use for the sword. Based on the test results, select the appropriate hole diameters to ensure that:
- The threaded rods can slide through the holes without excessive force.
- The rods fit snugly enough to prevent unwanted movement during gluing.
- There is sufficient space between the threaded rods and the inner walls of the holes for the epoxy adhesive.
Once you have determined the appropriate diameters, adjust the hole sizes in the 3D models. 2. Printing the Parts I printed all parts using PETG with the following settings: ParameterValue Layer height0.2 mm Perimeters3 Infill density15% Infill patternGyroid
Handle and Pommel I printed the handle and pommel without any significant modifications to the print settings. Guard I printed the guard with supports and an 8 mm brim to improve stability and bed adhesion at the beginning of the print. Blade I divided the blade into four 200 mm sections using the slicer. I arranged the individual sections on the print bed as follows:
- I positioned all sections approximately in the center of the Y-axis.
- I arranged them from left to right along the X-axis.
- I oriented the sections so that their cutting edges were almost touching.
I chose this arrangement to reduce vibrations along the printer's Y-axis during faster movements and minimize the risk of the tall sections falling over during the later stages of printing. 3. Preparing the Threaded Rods First, cut the threaded rods to the required length. TIP: Before cutting, screw a nut onto the threaded rod, positioning it on the side you intend to keep. If the threads become damaged or deformed during cutting, removing the nut afterward can help restore them. I recommend positioning the cut ends of the rods toward the tip of the blade, leaving the original, undamaged threads on the handle side. 4. Assembling the Blade Step 1 – Preparing the Parts Sand the mating surfaces of all four blade sections to ensure they fit together as closely as possible, minimizing any gaps between the parts after assembly. Step 2 – Securing the Threaded Rods
- Secure the blade tip section in a vise.
- Mix the 5-minute epoxy adhesive.
- Apply the adhesive inside the holes and to the cut ends of the threaded rods.
- Insert the threaded rods into the holes.
- Remove any excess adhesive from the mating surface.
- Allow the adhesive to harden.
Step 3 – Attaching the Second Section
- Mix another batch of epoxy adhesive.
- Apply the adhesive to the threaded rods along the length corresponding to the next blade section.
- Apply adhesive to the mating surface of the first section as well.
- Slide the second blade section onto the threaded rods.
- Hold it in the correct position until the adhesive hardens.
Descripción original del autor, publicada en MakerWorld.