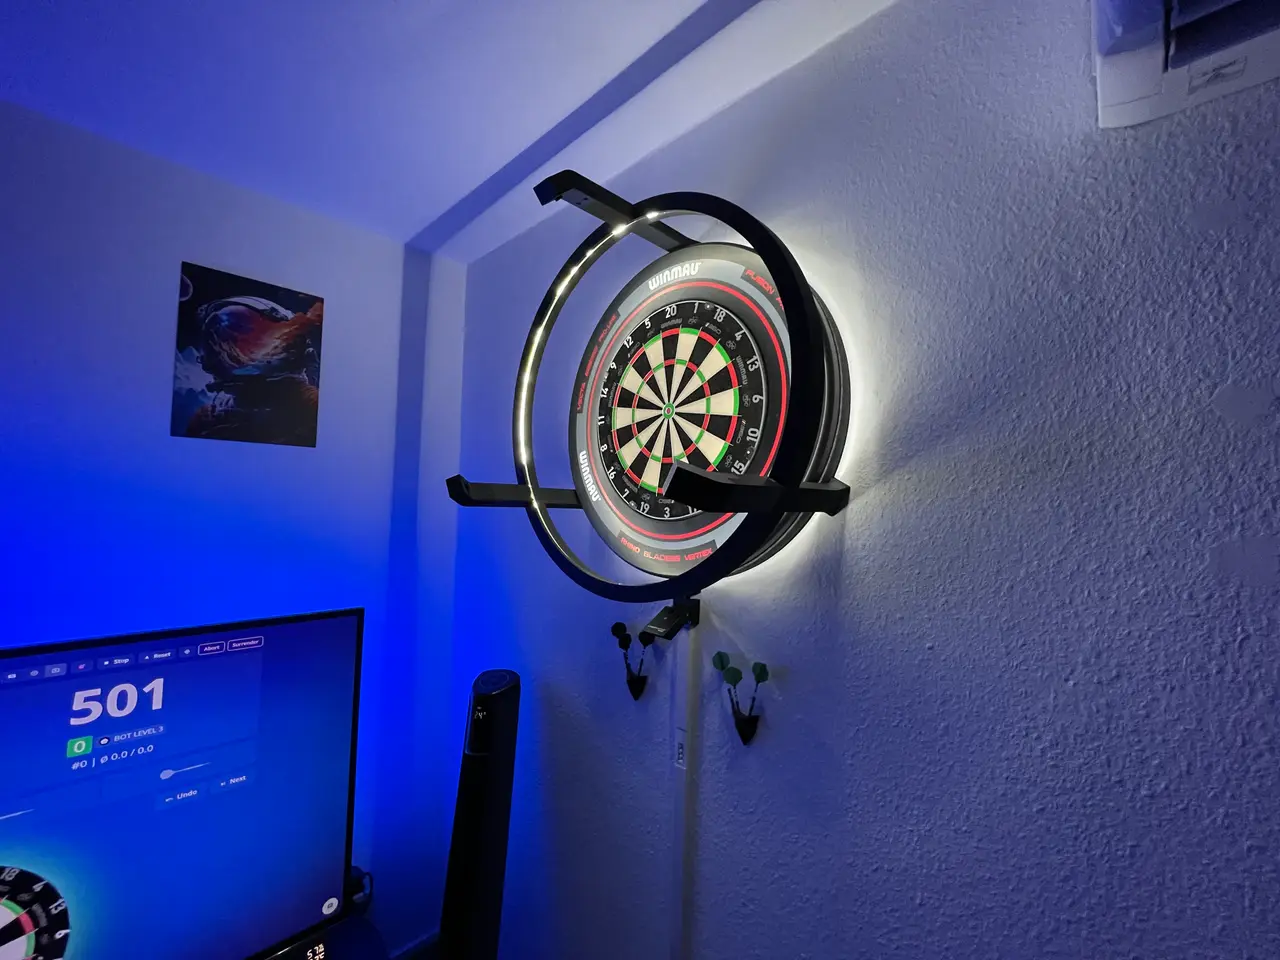
Autodarts Dart camera setup V2 / USER MANUAL / Darts (joint plug-in method)
por Groni3D en Printables
Website: www.groni3d.com / Questions? WhatsApp at +49 163 8036832 or private Message.
Licencia
Solo uso personalCC BY-NC-SA 4.0 — Atribución, no comercial, compartir igual
Uso personal dando crédito; sin fines comerciales y las modificaciones con la misma licencia.
Al descargar aceptas respetar la licencia y dar crédito a Groni3D.
Archivos (60)
- 3x Feet.stl STL · 52 KB
- 3x Ring light right.stl STL · 37 KB
- 2x Ring light middle.stl STL · 37 KB
- 1x Ring light middle LED Stripe.stl STL · 119 KB
- 3x Ring light left.stl STL · 37 KB
- 1x Connector Middle.stl STL · 243 KB
- 3x Connector.stl STL · 44 KB
- 1x Connector Bottom.stl STL · 17 KB
- 3x Arm.stl STL · 34 KB
- 3x Case .stl STL · 206 KB
- 3x Cover.stl STL · 169 KB
- 3x Arm no Heat insert needed.stl STL · 38 KB
- Connector Middle for Prusa Mk4 Top.stl STL · 151 KB
- Connector Middle for Prusa Mk4 Bottom.stl STL · 115 KB
- 3x Feet (width 14mm).stl STL · 52 KB
- 1x Ring light middle LED Stripe (width 14mm).stl STL · 117 KB
- 2x Ring light middle (width 14mm).stl STL · 37 KB
- 3x Ring light right (width 14mm).stl STL · 37 KB
- 3x Ring light left (width 14mm).stl STL · 37 KB
- 3x Feet.stl STL · 50 KB
- 3x Ring light right.stl STL · 37 KB
- 1x Ring light middle LED Stripe.stl STL · 119 KB
- 2x Ring light middle.stl STL · 37 KB
- 3x Ring light left.stl STL · 37 KB
- 1x Connector Middle.stl STL · 243 KB
- 3x Connector.stl STL · 40 KB
- 1x Connector Bottom.stl STL · 17 KB
- 3x Arm.stl STL · 33 KB
- 3x Case.stl STL · 203 KB
- 3x Cover.stl STL · 150 KB
- 3x Camera Cover.stl STL · 150 KB
- 1x Connection Left.stl STL · 46 KB
- 1x Ring light Entrance.stl STL · 103 KB
- 1x Connection Ring.stl STL · 149 KB
- 1x Connection Top.stl STL · 39 KB
- 3x Ring light right.stl STL · 28 KB
- 1x Connection Bottom.stl STL · 33 KB
- 2x Ring light mid .stl STL · 30 KB
- 1x Connection right.stl STL · 40 KB
- 3x Stand Top.stl STL · 48 KB
- Dart Setup dovetail joint 0,04mm.3mf 3MF · 467 KB
- 3x Ring light left.stl STL · 35 KB
- 3x Camera Case.stl STL · 232 KB
- 3x Stand bottom.stl STL · 50 KB
- 1x Connection Bottom 0,1mm.stl STL · 33 KB
- 1x Connection Left 0,1mm.stl STL · 46 KB
- 3x Camera Case.stl STL · 232 KB
- 1x Connection right 0,1mm.stl STL · 40 KB
- 3x Camera Cover.stl STL · 150 KB
- 2x Ring light mid 0,1mm.stl STL · 30 KB
- 3x Ring light left 0,1mm.stl STL · 35 KB
- Dart Setup dovetail joint 0,1mm.3mf 3MF · 460 KB
- 1x Connection Ring 0,1mm.stl STL · 149 KB
- 3x Ring light right 0,1mm.stl STL · 28 KB
- 1x Connection Top 0,1mm.stl STL · 39 KB
- 1x Ring light Entrance 0,1mm.stl STL · 103 KB
- 3x Stand bottom 0,1mm.stl STL · 50 KB
- 3x Stand Top 0,1mm.stl STL · 48 KB
- V2 User manual Dart setup - Aufbauanleitung V2.pdf PDF · 10,0 MB
- V1 (OLD) User manual Dart setup - Aufbauanleitung.pdf PDF · 3,1 MB
- Categoría
- Moda y joyería
- Formatos
- STL, 3MF, PDF
- Descargas
- 2,972
- Publicado
Sobre este modelo
My Website This is my custom-designed Dart camera setup with an integrated light ring. I printed the whole setup on a Bambu Lab A1. The problem with other setups is that I hit the camera on top when trying to throw a double 20. User manual You can find a user manual in form of a PDF in the files. It will explain every step you need to make. Contact If anything doesn't fit or you have a problem, feel free to write a comment, send me a private message, or contact me via WhatsApp at +49 163 8036832 or E-Mail at [email protected] :) If you enjoy the setup I would kindly ask you to upload a picture of your setup with a small feedback and rate the setup. In the middle, there is a small bridge with a height of 0.2mm. You can use it to center the setup and mark the drilling holes. If you don't need it anymore, you can just break it off. It is also very stable thanks to the bracing on the back. So if you bump into the cameras, nothing will happen. If you want the same NUMBER RING as me check this out:
If you want only the LIGHT RING without the cameras check this out. Its the same as this one:
Requirement / Dimensions / Components - Outer ring diameter: 745mm = 74,5cm
- Farthest point from the wall: 375mm = 37,5cm
- ca. 36h or 1d 12h print time (printed on Bambu Lab A1 and X2D)
- 1.370g filament
- Printer bed size: 256x256 (length, width) tallest object: 190mm
- Cylinder head screws: - 12x DIN ISO 4762 M2x8 or M2x10
- 6x DIN ISO 4762 M4x18 or shorter
- 6x M4 Thread inserts (NOT REQUIRED -> Component is in a separate folder)
- LED Strip 6000K 3 meter width 8mm
- Ov9732 Camera MIN. 2m !!!
- Bubble level mini
Print settings - Layer height: 0.2mm (or smaller if you want more detail)
- Support: Feet / Light feet / Case / Ring light left & right
- Support settings: Tree auto / Threshold angle 30° / ✔ "Remove small overhangs"
- Wall loops: min. 3
- Infill: 7% to 10% with Grid or Gyroid (depends what you like more)
- Seam position: back
Improvement from V1 to V2 Camera Position adjusted - LED strip position adjusted - Cable path adjusted - no ring joint visible from the front - length of the arms is shorter - tolerances adjusted
Descripción original del autor, publicada en Printables.