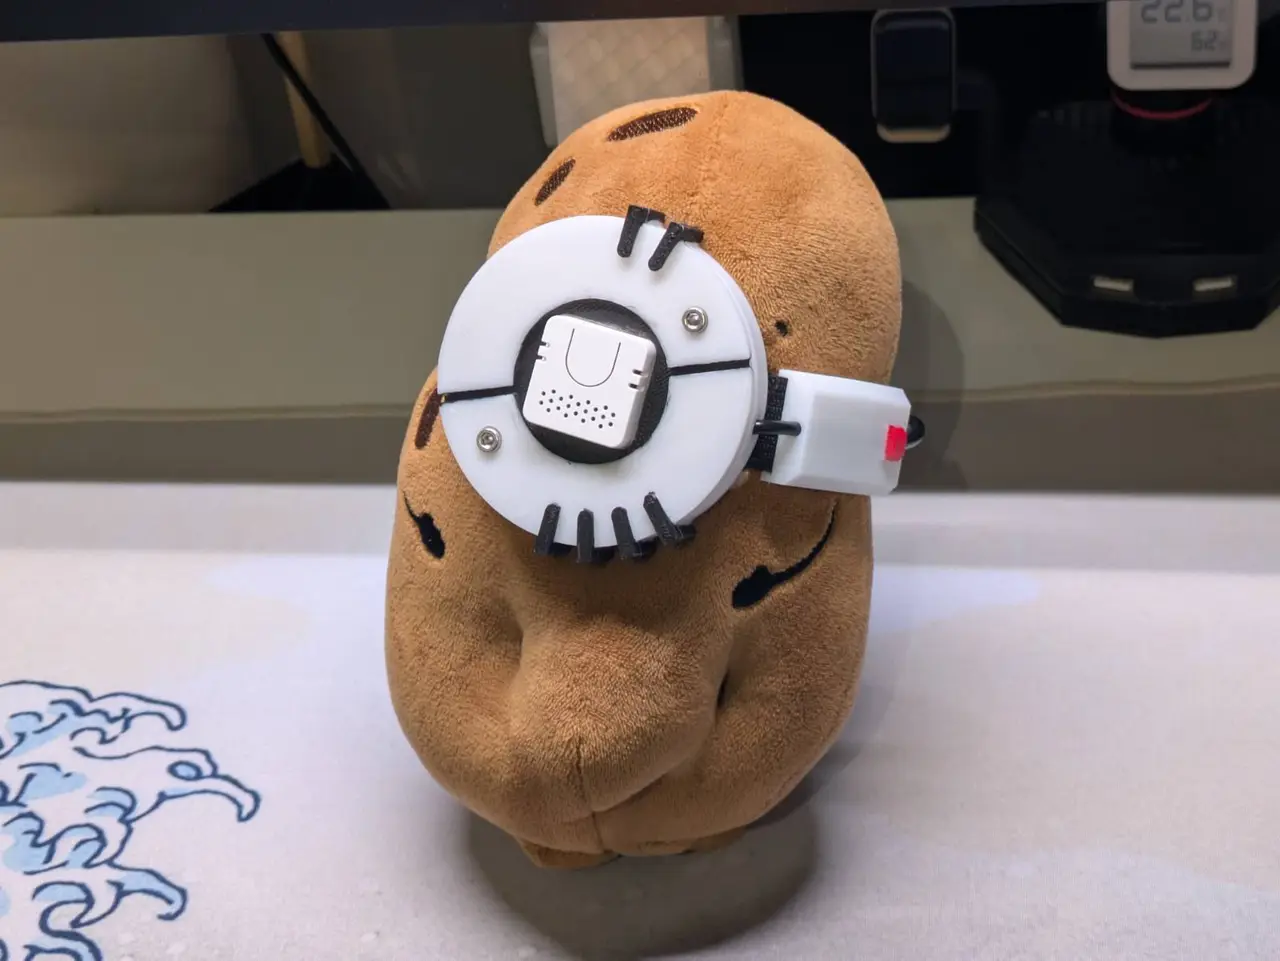
Atom Echo potato GLaDOS Ziemowit cosplay kit
por Mateusz Kusiak en Thingiverse
Potato GLaDOS cosplay kit for Ziemowit the potato using Atom Echo This is a cosplay kit for Ziemowit the potato plushie that turns it into an interactive potato-GLaDOS from Portal 2. The Atom Echo used as the core can be made into a Home Assistant integrated voice satellite! Read the blog post In...
Licencia
Uso comercial permitidoCC BY-SA 4.0 — Atribución, compartir igual
Puedes usarlo y modificarlo dando crédito; las versiones modificadas deben compartirse con la misma licencia.
Al descargar aceptas respetar la licencia y dar crédito a Mateusz Kusiak.
Archivos (8)
- glados_desk_support.FCStd FCSTD · 105 KB
- atom-glados.FCStd FCSTD · 739 KB
- glados_desk_support-Body.stl STL · 129 KB
- atom-glados-corebase.stl STL · 463 KB
- atom-glados-corespring.stl STL · 170 KB
- atom-glados-coreface.stl STL · 255 KB
- atom-glados-passpassthrough.stl STL · 208 KB
- atom-glados-chargercharger-mod.stl STL · 175 KB
- Categoría
- Tecnología
- Formatos
- FCSTD, STL
- Descargas
- 32
- Publicado
Sobre este modelo
Potato GLaDOS cosplay kit for Ziemowit the potato using Atom Echo This is a cosplay kit for Ziemowit the potato plushie that turns it into an interactive potato-GLaDOS from Portal 2. The Atom Echo used as the core can be made into a Home Assistant integrated voice satellite! Read the blog post In this readme I've left only the basics and how to assemble the kit. If you want to learn more about how it works, please read my recent blog post: https://danceswithmachines.github.io/posts/the-glados-home-assistant-potato-edition/ Here's also a link to the YouTube short showcasing how it works: https://youtube.com/shorts/T_5mpHbUrIY Poland lore The biggest supermarket chain in Poland (by revenue) is Biedronka, and every year they come back with a promotion, that for every X złoty spent on groceries you get a sticker, and a certain number of stickers gets you a free cursed plushie. Among "a roll of toilet paper plushie", "a slice of bread plushie" and "a wiener plushie" there was also Ziemowit the potato, which this kit is designed for. Hardware needed To complete the build you'll need: - USB-C port of this type - USB-C plug module - ~3mm diameter two-wire cable - 2x A2-70 DIN912 M3 screws (lengths from 4mm to 8mm will do) - M5 Atom Echo or Atom VoiceS3R (refer to the blog post) - 20mm wide elastic band
Note: For the wire and USB-C plug you can use a cheapo USB-C cable you probably have lying around. You can harvest the connector and the cable from it. Assembly There are 3 main pieces of the cosplay kit: - The core - where the Atom Echo mounts - The core support - used as a simple cable passthrough - The rear support - for mounting the contraption and for power delivery
Start by soldering the wires to the USB-C port and putting it into the rear support. Then use hot glue to secure the cable and the port in place. I designed the part to be filled with hot glue to the brim, so the excess can be cut off with a flat knife. Note: I used black hot glue. Guide the cable through the core support to the core base, and leave it in this state for now. Next, the core base has openings for the elastic band to wrap around. Start from the side that has a hole for the cable to pass through. Put the elastic band through the outer hole from the back, and make it exit through the inner hole. Then sew the band in and guide it through the core support and the rear support. Now test fit the contraption onto the potato body, mark how much of the elastic band to cut off, and sew the band in. Next, put the spring into the core body with the flat side facing upwards, and put the Atom Echo in so it's locked by the spring. Now simply guide the cable along the outer side of the support, cut the excess, and solder it to the USB-C connector. Note: Refer to the last picture above. The final step is to put the front face on top of the core and secure it with the M3 screws. Painting The model is designed to be printed on single-color printers. To paint the details, I'd suggest simple acrylic paints, or nail polish for a glossy effect. I simply masked the parts I didn't want to touch with masking tape and painted it with a kids' brush. Mounting The rear support has a round 10mm slot, so you can mount the newly created GLaDOS onto a 10mm rod to make it stand upright. Among the STLs you will find the glados-desk-support file, an example base I created so I can mount the plushie to the rear of my desk (the rod is not included in the design). The kit relocates the USB-C port to the back of the plushie, so you can hide the wires. Like what I do? Consider leaving a tip via the "Tip Designer" option under my Thingiverse profile.
Descripción original del autor, publicada en Thingiverse.