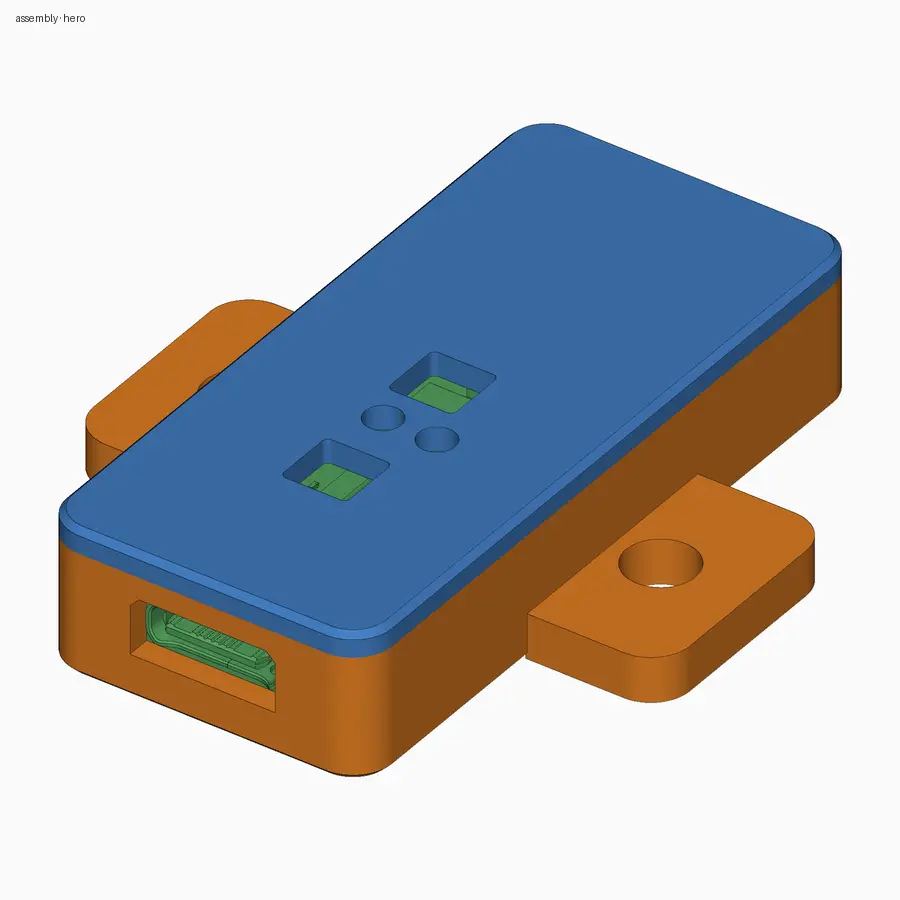
Arduino Nano Matter Case, USB-C, Button and LED Access, No Supports
por Dim Ram en Thingiverse
Low-profile case for the Arduino Nano Matter (ABX00112) that turns the bare board into a finished Matter-over-Thread device: a light, switch or status node for Home Assistant, Apple Home or Google Home. It sits on a desk or a shelf, or screws to a wall. In daily use only the USB-C power cable...
Licencia
Uso comercial permitidoPuedes imprimirlo, modificarlo y venderlo dando crédito al autor.
Al descargar aceptas respetar la licencia y dar crédito a Dim Ram.
Archivos (4)
- Categoría
- Tecnología
- Formatos
- STL, ZIP
- Descargas
- 1
- Publicado
Sobre este modelo
Low-profile case for the Arduino Nano Matter (ABX00112) that turns the bare board into a finished Matter-over-Thread device: a light, switch or status node for Home Assistant, Apple Home or Google Home. It sits on a desk or a shelf, or screws to a wall. In daily use only the USB-C power cable connects. Features - Built from Arduino's official 3D model of the Nano Matter, not from photos. The board lies flat on the floor (its underside is bare) and four posts in the lid hold it down. - USB-C hole sized to the receptacle with a 45-degree roof, so a standard USB-C cable plugs straight in - Press windows over both push buttons (the one next to USB-C is used for Matter commissioning) and light holes over the RGB LED and the power LED - Plain lid over the MGM240S module, which has its own antenna, so nothing gets in the way of the radio - Two screw ears for a wall or the underside of a shelf (M4 or 4 mm wood screws), or switch them off and use double-sided tape - Press-fit lid with a locating lip. No supports, no brim, both parts print flat. - Why it is this size: 21.6 x 47 x 9.8 mm (39.6 mm wide with the ears). The height is the floor, the board, the USB-C receptacle and room for the lid lip, nothing more. No vents and no cable holes, because nothing else connects.
What you need - Arduino Nano Matter ABX00112 (affiliate): https://s.click.aliexpress.com/e/_c3PetbNd , about $41 / EUR 35.43 - PETG filament, 1.75 mm (PLA works too) (affiliate): https://s.click.aliexpress.com/e/_c3rjIgZd , about $43 / EUR 37 per kg - A USB-C cable and a 5 V USB power supply - Optional: 2 screws, M4 or 4 mm wood screws, for the ears
Print settings - Material: PETG or PLA - Layer height 0.2 mm, 0.4 mm nozzle - Infill 20%, 3 perimeters - Orientation: body open side up, lid flat side down (the print plate STL already has both parts placed like this) - Supports: none. Brim: none. - About 35 minutes and 7 g for both parts (estimated from the part volumes)
Assembly - Tilt the board and slide the USB-C end into the end-wall hole first, then lay the board flat. - Press the lid on with the press windows over the buttons. Its four posts rest on the edge of the board and hold it in place. - Screw the case to the wall through the ears, or stick it down with tape. - Plug in USB-C. To commission, press the button next to USB-C with a toothpick or a pen tip.
Files - arduino-nano-matter-case-body.stl, arduino-nano-matter-case-lid.stl: the two parts - arduino-nano-matter-case-print-plate.stl: both parts on one plate - arduino-nano-matter-case-source.zip: the parametric build123d (Python) source
Parameters you can change (model.py) - TOL (0.3): clearance per side between the board and the walls - WALL / FLOOR (1.6 / 1.6), LID_T (1.6), LIP_H (1.5), LID_TOL (0.2): how tightly the lid lip fits - POST_D / POST_GAP (2.2 / 0.15): lid hold-down posts - BTN_HOLES (on), LED_HOLES (on), LED_HOLE_D (2.4) - MOUNT: "ears" or "none"; EAR (9), EAR_T (3), EAR_SCREW (M4) - WIRE_EXIT (off), WIRE_D (4.0): a cable hole in the far end wall for a sensor lead - VENTS (off): two 2 mm lid slots, only if you add something that gets warm
Fit The board gets 0.3 mm of clearance per side and the lid lip 0.2 mm. If the lid is loose, lower LID_TOL to 0.1. If it is tight, raise it to 0.3 or scale the lid by 100.5% in X and Y. If the board will not drop in, raise TOL to 0.4. The images are CAD renders; the board shown in them is Arduino's own 3D model. Links marked (affiliate) earn me a small commission at no extra cost to you; it helps me keep designing and sharing. Prices at time of posting.
Descripción original del autor, publicada en Thingiverse.