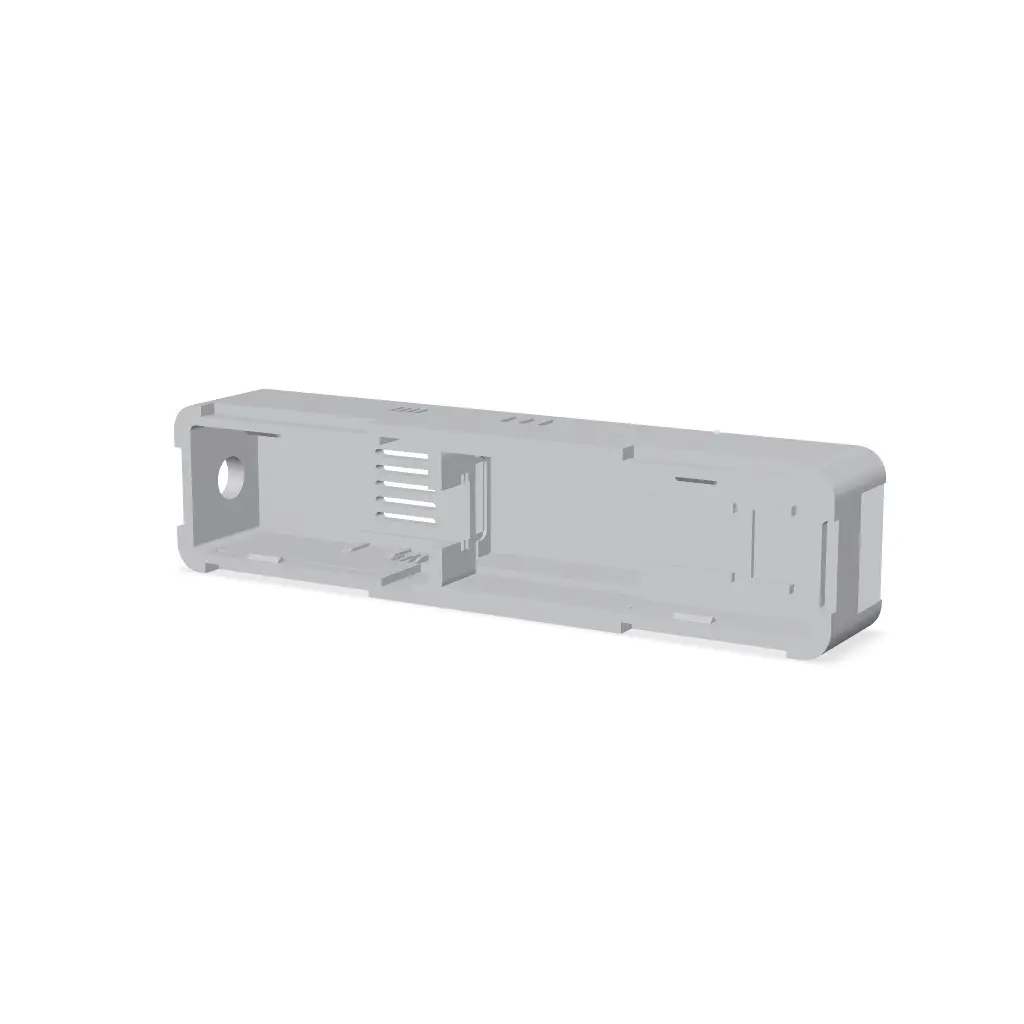
Aquarium Camera Housing for XIAO ESP32S3 Sense
A vented, non-waterproof bar-shaped enclosure for a Seeed Studio XIAO ESP32S3 Sense with a 160 degree OV5640 camera module on a long flex cable. It mounts to the outside of aquarium glass with double-sided foam tape; the lens sits in a collar against the glass. The thin flex cable is fully enclosed
Thangs entrega los archivos a usuarios con cuenta gratuita
Licencia
Solo uso personalCC BY-NC-SA 4.0 — Atribución, no comercial, compartir igual
Uso personal dando crédito; sin fines comerciales y las modificaciones con la misma licencia.
Al descargar aceptas respetar la licencia y dar crédito a Bertlab3D.
Archivos (6)
- Aquarium_Camera_Housing_Tray.stl STL · 287 KB
- Aquarium_Camera_Housing_Lid.stl STL · 163 KB
- Aquarium_Camera_Housing_Channel_Cover.stl STL · 3 KB
- Aquarium_Camera_Housing_Saddle.stl STL · 4 KB
- Aquarium_Camera_Housing_X1C_ABS.3mf 3MF · 127 KB
- Aquarium_Camera_Housing_Drawing.pdf PDF
- Categoría
- Tecnología
- Formatos
- STL, 3MF, PDF
- Descargas
- 0
- Publicado
Sobre este modelo
A vented, non-waterproof bar-shaped enclosure for a Seeed Studio XIAO ESP32S3 Sense with a 160 degree OV5640 camera module on a long flex cable. It mounts to the outside of aquarium glass with double-sided foam tape; the lens sits in a collar against the glass. The thin flex cable is fully enclosed and lies straight, the USB-C cable runs in its own channel, and a rod antenna screws into the far end. Long-term adhesion was not tested. Please check before you print: - Made for the XIAO ESP32S3 Sense (board with the camera expansion board) and a 160 degree OV5640 module with a 24-pin flex cable. The distance from the edge where the flex leaves the board connector to the back edge of the round lens should be about 73 mm with the cable laid straight (our module: flex 79.9 mm overall). Camera head: square plate 8.8 mm, lens Ø 10 mm, 9.9 mm from the back of the plate to the front of the lens. Modules with different dimensions may not fit as intended; compare every listed dimension before printing. - The short standard camera of the XIAO Sense does not fit this housing. - USB-C cable: it enters at the camera end, runs through a channel under the flex cable and is plugged in at a service window. The plug body may be at most 14 x 7.2 mm; the cable exit is 16 x 9 mm. - Antenna: you need a U.FL to SMA bulkhead pigtail and a 2.4 GHz rod antenna; the SMA bulkhead goes through the Ø 6.6 mm hole at the far end. In our setup, 3 m from the access point, the tested adhesive antenna measured −85 to −86 dBm with about 1 Mbit/s, 80% retries and ping up to 900 ms. The tested rod antenna measured −40 dBm and 19.5 to 21.6 Mbit/s. These are single-setup observations, not guaranteed performance.
Safety Vented and not waterproof or splashproof. Mount outside the aquarium only. Keep every mains-powered part, the USB power supply and all plug connections dry, well away from the tank and above the water line; provide a drip loop. Disconnect power before cleaning the glass or working near water; never spray liquid onto the enclosure. Long-term tape adhesion was not tested. The tesa Powerbond Indoor tape used for the prototype is not rated as humidity-resistant or waterproof. Use a tape whose manufacturer rates it for glass and the actual humidity and temperature, follow its surface-preparation instructions, support the lid when removing the tray, and inspect and replace the tape regularly. Position the device so detachment cannot drop it or its cable into the water. Keep away from children; small parts, the cable and the antenna can present choking, pulling and breakage hazards.
What is included - Tray (back side): board compartment, two slots for the saddle, USB-C channel, a bridge on which the flex cable lies straight, camera pocket with stops, vents, two snap beams on each long side. - Lid (glass side): tape pocket 0.8 mm deep with three fields (6.6, 7.2 and 6.6 mm wide), lens collar Ø 17 mm with a Ø 10.6 mm bore, a sleeve that stops the camera head, a tongue that limits upward movement of the flex cable, snap skirts. - Channel cover: closes the service window over the USB-C plug. - Saddle: drops into its two slots over the USB-C socket and holds the board down; the flex cable lies on top of it. Assembled size: 104.5 x 25.2 x 21.2 mm.
Assembly (see the animation) 1. Place the XIAO with the camera flex already plugged in. The antenna pigtail goes to the hole in the end chamber. 2. Drop the saddle over the USB-C socket into its two slots. 3. Push the USB-C cable in from the camera end through the channel and plug it in at the open window. 4. Put the channel cover on. 5. Lay the flat cable straight onto the bridge. 6. Put a 9 x 9 mm piece of foam tape into the pocket (leave the top liner on), then the camera head, lens up. The foam acts as a spring and presses the lens against the glass. 7. Press the lid on until both sides click. 8. Put three 6 mm strips of double-sided foam tape (about 1 mm thick) into the fields, check the live image, then press the housing onto the outside of the glass. The tray snaps out of the lid from behind, so you can reach the electronics without taking the lid off the glass. We did that once after mounting to change the antenna; support the lid while doing it.
Printing - Settings: Bambu Lab X1 Carbon, 0.4 mm nozzle, 0.20 mm layer height, Bambu ABS (white), Textured PEI plate, 4 walls, 40 % grid infill, 8 mm outer brim, no supports. - The lid prints with the glass side on the plate; the floor of the tape pocket is bridged and looks rough, which did not matter for the foam tape. All STL files are already oriented for printing. - The 3MF project contains all four parts with these settings (saddle and channel cover as one combined object; split it in the slicer if needed). Slicer estimate: approximately 57 min and 25.0 g of filament. - Tray, lid and channel cover were printed with these settings. The saddle in the files is a corrected version: in our print the saddle was 2.25 mm too long at one end and had to be trimmed by hand. The corrected saddle was checked against the tray in the CAD model (no overlap, 0.3 mm clearance), but it has not been printed yet. - Only Bambu ABS on an X1 Carbon was print-tested. PLA and ASA were not tested. No long-term temperature test or power-consumption measurement was performed. Monitor the enclosure and USB connection during initial and continued use, and stop using it if unusual heat, deformation or odor occurs.
Notes - Our live image shows a bright edge in two corners, likely caused by the white bore or collar entering the wide-angle field of view. A black lid or a non-conductive, electronics-safe black coating on the inner bore may reduce it; neither remedy was tested. - Mechanical fit is not firmware-specific. Our live-view test used the ESP32 camera web-server example at 640 x 480.
Files - Aquarium_Camera_Housing_Tray.stl - Aquarium_Camera_Housing_Lid.stl - Aquarium_Camera_Housing_Channel_Cover.stl - Aquarium_Camera_Housing_Saddle.stl - Aquarium_Camera_Housing_X1C_ABS.3mf (3MF project, all four parts with the print settings) - Aquarium_Camera_Housing_Drawing.pdf (key dimensions) There is no STEP file: the parts were modelled as meshes, so a STEP file would only contain the same triangles.
About the pictures: the photos show the printed housing (white ABS, with the hand-trimmed saddle inside) on our aquarium and a 640 x 480 live-view frame through the 160 degree lens. The animation and the renders are made from the model files; the electronics are simplified and the printed parts are shown in orange.
Seeed Studio, XIAO, tesa, Powerbond, Bambu Lab, X1 Carbon and Bambu ABS are product names and/or trademarks of their respective owners. They are used only to identify the intended hardware and the equipment and materials used for the prototype. This independent design is not affiliated with, sponsored by or endorsed by the respective manufacturers.
License: CC BY-NC-SA 4.0 (https://creativecommons.org/licenses/by-nc-sa/4.0/). Free to print, share and remix for non-commercial use, with attribution. Mark your changes and share remixes under the same license.
Deutsch (Kurzfassung) Belüftetes, nicht wasserdichtes Gehäuse in Leistenform für den Seeed Studio XIAO ESP32S3 Sense mit einem 160-Grad-Kameramodul OV5640 am langen Flachkabel. Es wird mit doppelseitigem Schaumband außen am Aquariumglas befestigt, das Objektiv sitzt in einem Kragen am Glas. Das dünne Flachkabel liegt gerade und geschützt im Gehäuse, das USB-C-Kabel läuft in einem eigenen Kanal und tritt am Kamera-Ende aus, am anderen Ende sitzt eine Stabantenne. Passt, wenn das Flachkabel von der Kante, an der es aus dem Stecker der Platine kommt, bis zur Hinterkante des runden Objektivs etwa 73 mm misst (gerade gelegt). Kamerakopf: Plättchen 8,8 mm, Objektiv Ø 10 mm, 9,9 mm hoch. Module mit anderen Maßen passen womöglich nicht; alle Maße vor dem Druck vergleichen. USB-C-Stecker höchstens 14 x 7,2 mm. Für die Antenne braucht es ein Kabel von U.FL auf SMA-Einbaubuchse und eine 2,4-GHz-Stabantenne (Bohrung Ø 6,6 mm). Gemessen bei uns, 3 m vom Access Point: mit der getesteten Klebeantenne −85 bis −86 dBm und etwa 1 Mbit/s, mit Stabantenne −40 dBm und 19,5 bis 21,6 Mbit/s; Einzelbeobachtung, keine Zusage. Sicherheit: Belüftet und weder wasser- noch spritzwasserdicht. Nur außen am Aquarium betreiben. Netzbetriebene Teile, USB-Netzteil und alle Steckverbindungen trocken, weit vom Becken und oberhalb der Wasserlinie halten; eine Tropfschlaufe vorsehen. Vor der Glasreinigung oder Arbeiten nahe am Wasser die Stromversorgung trennen; das Gehäuse nie ansprühen. Die Langzeithaftung wurde nicht geprüft. Das am Prototyp verwendete tesa Powerbond Indoor ist laut Hersteller nicht feuchtigkeitsbeständig. Nur ein vom Hersteller für Glas und die tatsächliche Feuchte und Temperatur freigegebenes Band nach dessen Anleitung verwenden, regelmäßig prüfen und ersetzen sowie beim Abziehen der Wanne den Deckel abstützen. So anbringen, dass bei Ablösung weder Gerät noch Kabel ins Wasser fallen können. Von Kindern fernhalten; Kleinteile, Kabel und Antenne bergen Verschluck-, Zug- und Bruchgefahren. Teile: Wanne, Deckel (Glasseite), Kanaldeckel, Sattel. Montage in acht Schritten wie in der Animation; unter den Kamerakopf kommt ein Stück Schaumband 9 x 9 mm mit oberer Schutzfolie als Feder, auf den Deckel drei 6-mm-Streifen. Die Wanne lässt sich von hinten aus dem Deckel ziehen. Druck: Bambu Lab X1 Carbon, Bambu ABS weiß, 0,20 mm, 4 Wände, 40 % Gitter, 8 mm Rand, ohne Stützen; das 3MF mit allen vier Teilen ergibt laut Slicer etwa 57 min und 25,0 g. Praktisch gedruckt wurde nur auf dem Bambu Lab X1 Carbon mit Bambu ABS; andere Drucker sowie PLA und ASA wurden nicht getestet. Der veröffentlichte korrigierte Sattel wurde nur im CAD geprüft und noch nicht gedruckt; unser gedruckter Sattel musste von Hand gekürzt werden. Ein Langzeit-Temperaturtest und eine Messung des Stromverbrauchs fehlen; Gehäuse und USB-Anschluss im Betrieb beobachten. Lizenz CC BY-NC-SA 4.0 (https://creativecommons.org/licenses/by-nc-sa/4.0/).
Descripción original del autor, publicada en Thangs.