AmmoBox Mk2 - 9mm - 50+ Rounds - Stacking
por Layer51 en MakerWorld
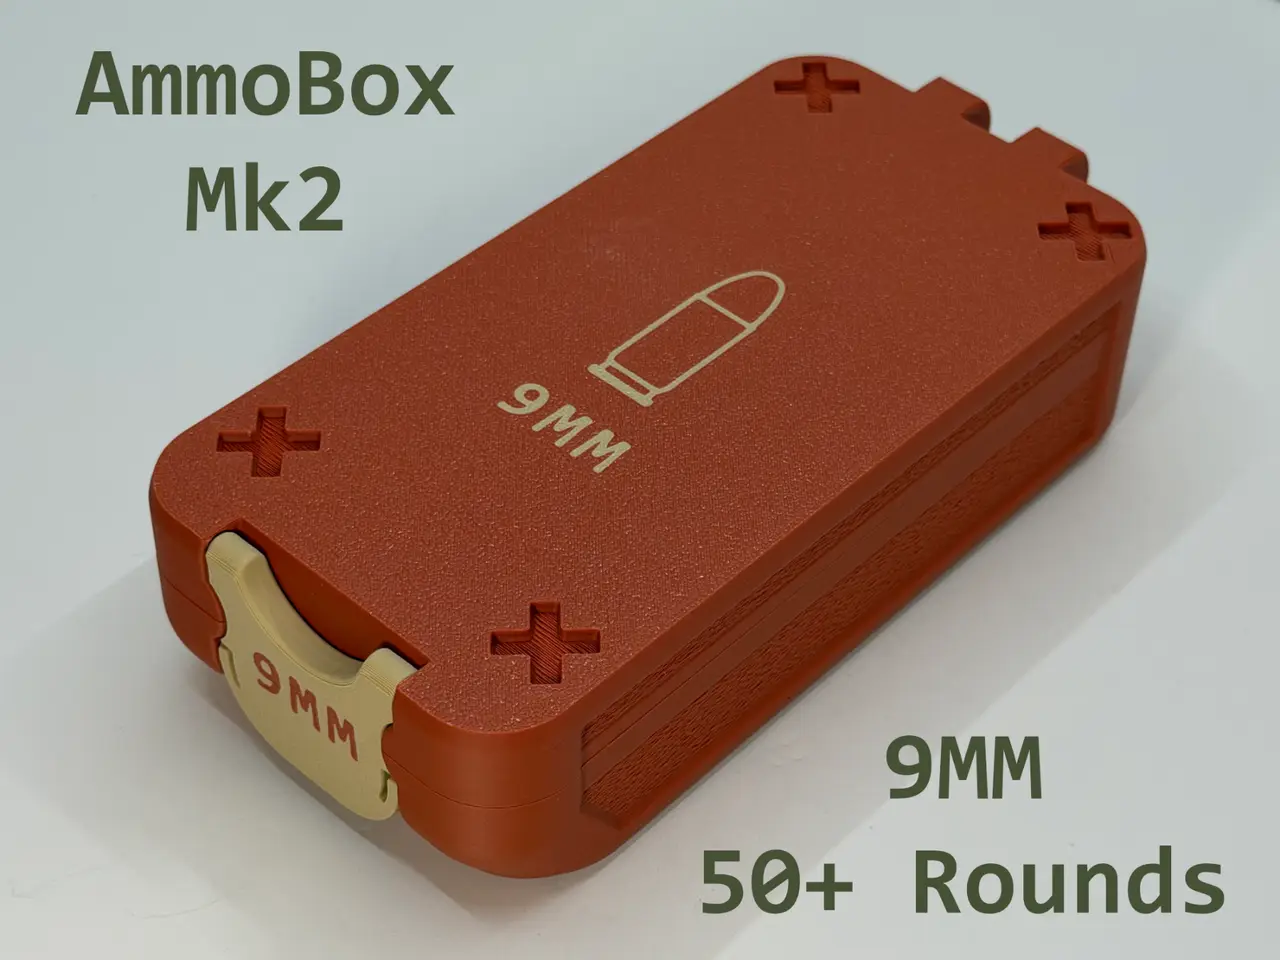
9mm Ammo Box – Mk2. Marking one year since the release of the original ammo box, the Mk2 introduces a series of refinements focused on improved strength, handling, stacking, and added ingress resistance.
MakerWorld entrega los archivos a usuarios con cuenta gratuita
Licencia
Solo uso personalStandard Digital File License
Licencia estándar de archivos digitales: solo uso personal. No se permite compartir, revender ni subir el archivo a otros sitios, ni vender las impresiones.
Al descargar aceptas respetar la licencia y dar crédito a Layer51.
- Categoría
- Jardín
- Descargas
- 2
- Publicado
Sobre este modelo
9mm Ammo Box – Mk2 Marking one year since the release of the original ammo box, the Mk2 introduces a series of refinements focused on improved strength, handling, stacking, and added ingress resistance.
The updated design retains the same familiar hardware-free assembly, sliding hinge, and secure latch system while introducing several structural improvements and optional features. It also maintains compatibility with the original removable inserts, allowing existing inserts to be carried over without modification. What's New in Mk2
- Stackable Design – Recessed mounting areas accommodate separately printed stacking feet, which attach with glue. Feet can be printed in TPU or your preferred material, allowing for additional grip and customization.
- Optional TPU Gasket – A new perimeter gasket can be printed separately in TPU and glued into place, providing additional water and ingress protection. The integrated alignment rim helps properly mate the lid and base while maintaining the box's overall rigidity and ruggedness.
- Reinforced Construction – Box side walls have increased from 3mm to 7mm, while the top and bottom have increased from 3mm to 4mm. These changes provide additional strength while accommodating the new gasket and recessed stacking features.
- Improved Grip – Recessed grooves along the sides provide additional grip and can also be enhanced with fuzzy skin settings for improved handling.
- Refined Printability – Updated chamfers along the top and bottom improve printability and help produce cleaner results.
What Stays the Same
- Hardware-free assembly with no screws or mechanical fasteners.
- Familiar sliding hinge and secure latch system.
- Compatible with the original removable inserts.
- Rounded edges and the same overall design language.
The latch has been increased in height by 1mm compared to the original. A debossed X on the backside of the new latch also makes it easier to distinguish from the original after printing.
This is the first revised Mk2 release, with additional sizes planned for the future. The goal is to build on what worked well in the original while introducing meaningful improvements without changing the fundamental design or functionality.
Click below for the full Ammo Box Collection:
AmmoBox - 9mm - specific details:
- Holds 50+ rounds of 9mm ammuntion based on insert
Assembly Instructions
- Join the lid and base - Align the lid’s hinge tabs with the grooves on the bottom of the base.
- Gently slide the lid upward into the hinge slots.
- Once you feel resistance, wiggle the hinge slightly along the pivot joint as you move it upward to help it seat properly.
- Continue until the lid clicks securely into place and pivots smoothly.
- Attach the front latch - Position the latch so the rounded side inserts into the lid at a slight angle.
- Lightly squeeze the top of the latch to help it pop into place.
- Make sure the flat side faces outward, so the finger lip curves toward the box.
- While the latch will technically fit either way, this orientation provides the best comfort and clearance when opening or closing.
- Ammo Tray Installation - Place the insert tray into the box and press firmly down on all four corners to lock the legs into place. You’ll know it’s fully seated when the top surface sits flush all the way around.
- Ammo Tray Removal - Remove one round from a corner, then insert the end of a pencil (or similar tool) into the empty hole to gently pry the tray upward at an angle. Once it starts to lift, you can continue with the pencil or grab the exposed edges to fully remove the tray from the box.
NEW - Support & Commercial Use Memberships Supporter and limited commercial license memberships are now available on Patreon @ (https://patreon.com/Layer51).
Boost MeLike this model? Be sure to send a boost, so I can keep making more. Thank you!
Descripción original del autor, publicada en MakerWorld.