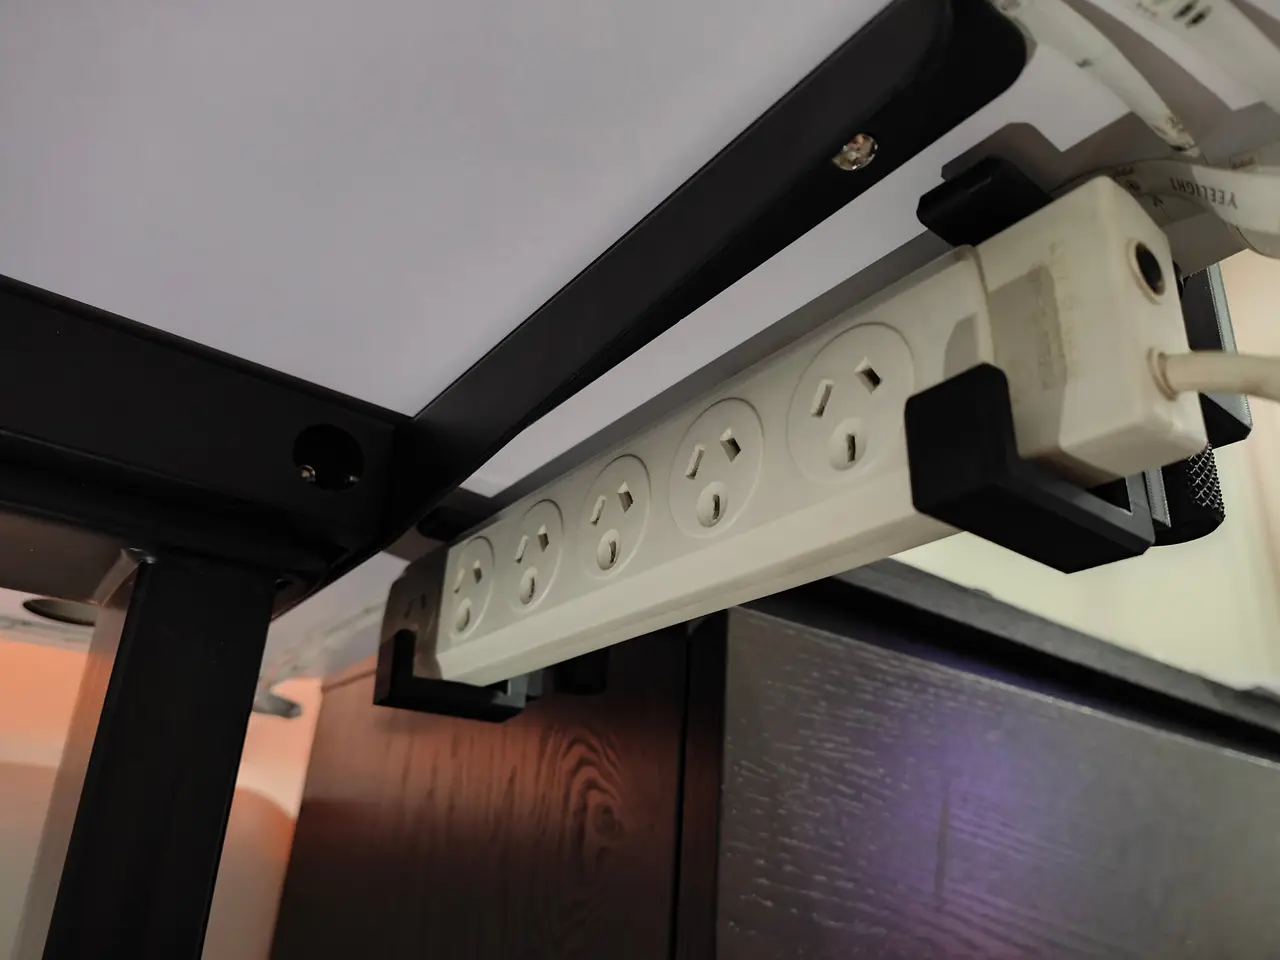
Adjustable power strip clamp mount
por Jackey en Thingiverse
Clamp to mount power strips/boards under desks non-destructively (instead of using a mount that screws into the desk). Helps to organise computer cables, particularly for standing desks. Adjustable width to fit a variety of power strip sizes. Features: - Fits desks up to: --- Regular size: 25 mm/1..
Licencia
Solo uso personalCC BY-NC-SA 4.0 — Atribución, no comercial, compartir igual
Uso personal dando crédito; sin fines comerciales y las modificaciones con la misma licencia.
Al descargar aceptas respetar la licencia y dar crédito a Jackey.
Archivos (10)
- Clamp.stl STL · 878 KB
- Clamp_Large.stl STL · 835 KB
- Screw_-_Large.stl STL · 981 KB
- Pad.stl STL · 260 KB
- Arm.stl STL · 40 KB
- Screw_-_Small.stl STL · 2,1 MB
- Nut.stl STL · 966 KB
- Requests_-_Clamp_75_mm_Desks.stl STL · 564 KB
- Requests_-_Clamp_55_mm_Depth.stl STL · 831 KB
- Requests_-_Arm_55_mm_Depth.stl STL · 33 KB
- Categoría
- Hogar
- Formatos
- STL
- Descargas
- 7,838
- Publicado
Sobre este modelo
Clamp to mount power strips/boards under desks non-destructively (instead of using a mount that screws into the desk). Helps to organise computer cables, particularly for standing desks. Adjustable width to fit a variety of power strip sizes. Features: - Fits desks up to: --- Regular size: 25 mm/1 inch thick --- Large size: 50 mm/2 inches thick - Fits power strips 60 - 90 mm wide and 35 mm thick - Mounts power strips in vertical orientation to reduce interference with desk frames (e.g. standing desks)
Parts: - Clamp, screw (large) and pad - main body that clamps to the desk - Arm - adjustable lower portion of the power strip mounting area. Raise/lower to fit different power strip widths - Screw and nut - fixes the arm in place. Nut fits into the hex nut groove of the arm
Instructions: - Pick the clamp size that fits your desk thickness - Print two sets (1 of each part) to mount at both ends of your power strip. All parts are shared between the different clamp sizes - Insert the nut into the groove in the arm - Place the arm against the bottom of the clamp and pass the smaller screw through to the nut - Pass the larger screw through the clamp - Place the pad onto the ball joint of the larger screw. It should snap into place with some pressure - Place the clamp onto the desk and tighten the larger screw until the clamp is snugly - against the desk. Be careful of overtightening as you may damage your desk surface - Loosen the smaller screw and slide your power strip onto the arm. Push the arm up until the power strip fits snugly and tighten the smaller screw again
Print settings: - Print as orientated - Layer height: 0.16 mm for smoother threads - Walls: 2 is sufficient - Infill: 15% adaptive cubic is sufficient - Supports: not necessary, but may be needed for the hole in the clamp's powerboard mount area depending on your printer's bridging abilities (see picture). Easiest to use support blockers under the C clamp threads and let your slicer auto-generate supports for this hole - Depending on how well your printer can print the threads, you may need to scale down the screws by 0-5% for a better fit
Notes: - I designed the mount to fit the variety of power strip sizes I had. If you have larger power strips (e.g. double row of sockets), feel free to let me know the width and depth so I can adjust the design to fit your use case
Updates: - Hex nut changed to square nut for easier tightening (reduced rotation) of the arm - Hook added to top part of clamp to stop smaller power strips falling forwards and out - Large version of clamp added for thicker desks - fits up to 50 mm/2 inch thickness
Custom requested versions: - Taller desks - Clamp (75 mm) fits desks up to 75 mm thick - Taller boards - Clamp and Arm (55 mm depth) fits boards up to 55 mm thick
Descripción original del autor, publicada en Thingiverse.