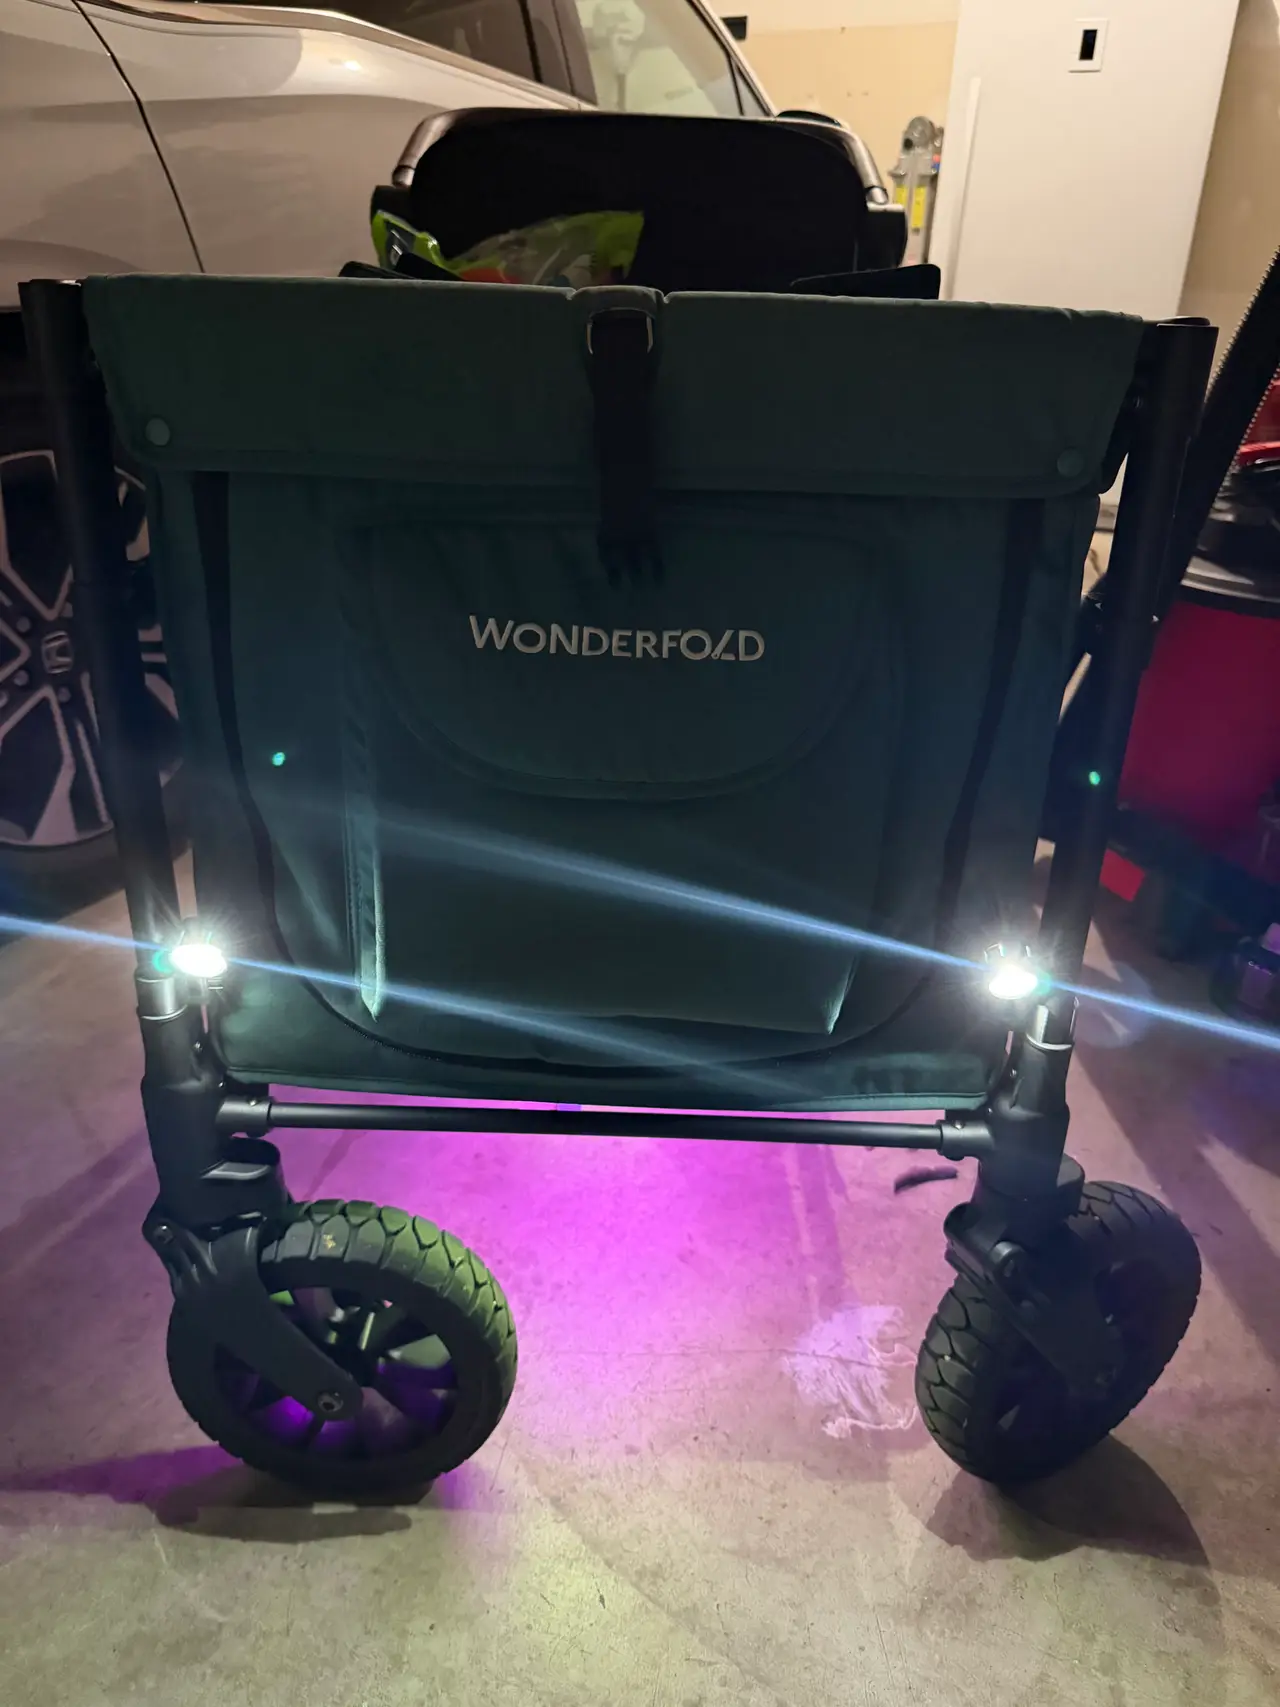
Adjustable Headlight Mount for Wonderfold Wagon (LuxPro Mini Puck Light)
por MrBonsai en Printables
Clip-on, tool-free headlights for Wonderfold wagons. Tilts up and down in 15° clicks, and works on either side.
Licencia
Solo uso personalCC BY-NC 4.0 — Atribución, no comercial
Puedes imprimirlo y modificarlo para uso personal dando crédito. No se permite vender las impresiones.
Al descargar aceptas respetar la licencia y dar crédito a MrBonsai.
Archivos (1)
- Categoría
- Jardín
- Formatos
- 3MF
- Descargas
- 1
- Publicado
Sobre este modelo
Snap-on headlight mounts for the Wonderfold wagon’s oval leg rails, sized for the LuxPro battery-operated mini puck lights (31 mm × 17 mm). Features - Snaps onto the wagon’s oval rail (40.7 × 21 mm). No tools, no adhesive.
- A 24-tooth rosette joint tilts the light up or down in 15° steps.
- Reversible: the same parts work on the left and right legs, with the light facing forward.
- Three snap fingers hold the puck. Press it in from the back, and pop it out to change batteries.
- The cup sits clear of the wagon frame, so it won’t rub or rattle.
Hardware (per light) - 1× M3 × 16 socket head cap screw
- 1× M3 hex nut
Print settings - Material: PETG recommended. The clip needs to flex, and PLA may crack.
- Layer height: 0.16–0.2 mm
- Walls: 3–4
- Infill: 30%+
- Supports: none
Print orientation - Rail clip: flat on its oval base
- Puck cup: front bezel down
- Knob: flat side down, head pocket facing the bed
Assembly - Press the screw head into the knob’s pocket with a drop of CA glue, and let it set.
- Snap the clip onto the wagon’s leg rail.
- Drop the M3 nut into the slot at the top of the inner prong. It falls into a hex seat.
- Spread the outer prong slightly and slide the cup’s toothed blade between the prongs.
- Insert the screw and turn the knob until it’s snug. Loosen it to re-aim.
- Push the LuxPro puck into the cup from the back until it clicks.
Notes - Designed and tested on a Wonderfold wagon. Measure your rail before printing if you have a different model.
- Don’t overtighten the M3 screw. Snug is enough to lock the teeth.
Descripción original del autor, publicada en Printables.