6" Wall Shelf Bracket – Hidden Keyhole Mount, No Supports (PETG/PLA)
por jhit en Printables
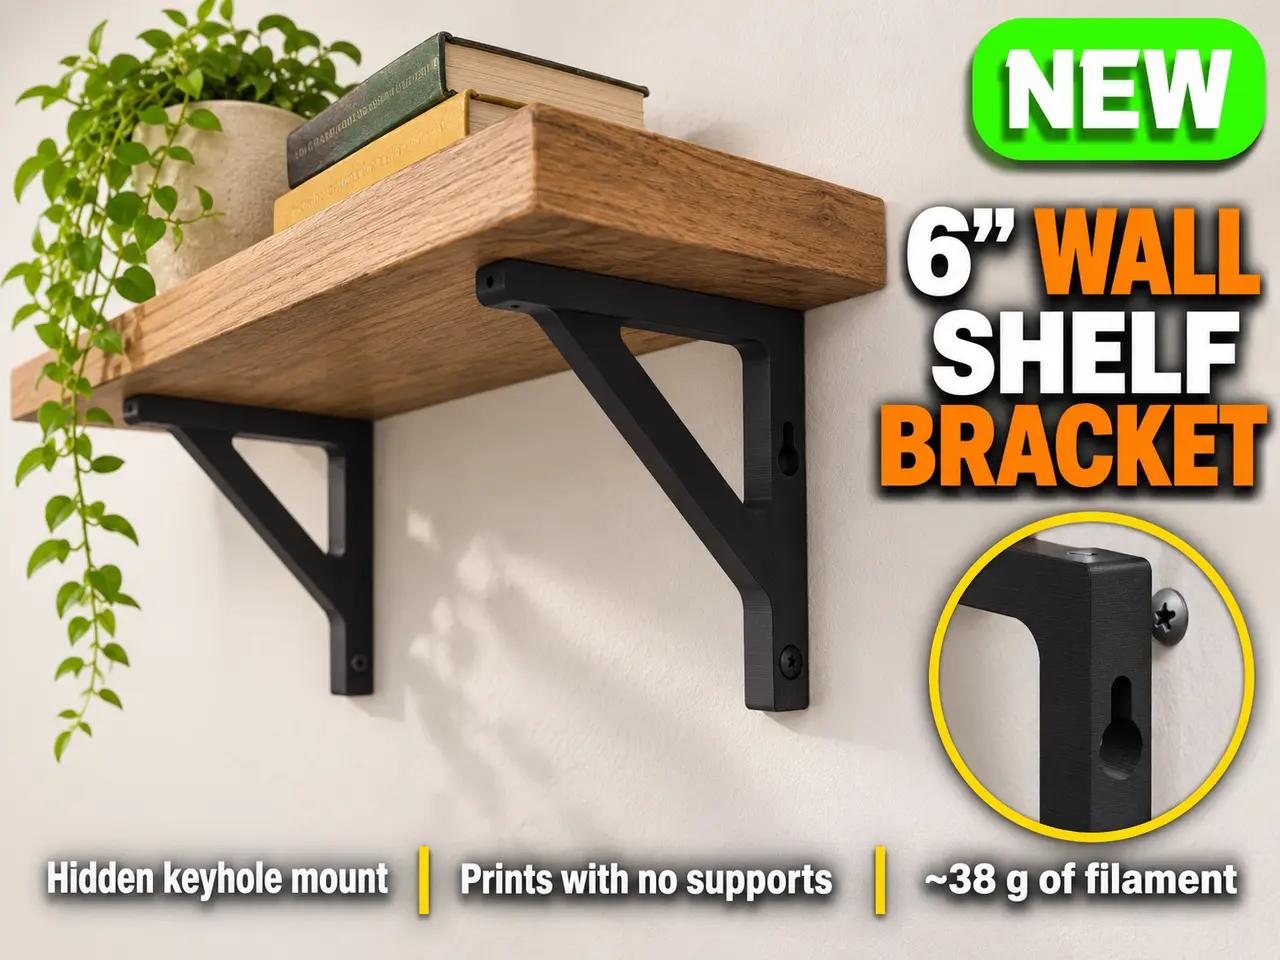
Strong 6" wall shelf bracket with a hidden keyhole mount. Fits shelves up to 8" deep. Prints flat, no supports.
Licencia
Solo uso personalCC BY-NC 4.0 — Atribución, no comercial
Puedes imprimirlo y modificarlo para uso personal dando crédito. No se permite vender las impresiones.
Al descargar aceptas respetar la licencia y dar crédito a jhit.
Archivos (1)
- Categoría
- Hogar
- Formatos
- STL
- Descargas
- 4
- Publicado
Sobre este modelo
A strong, minimal 3D printed wall shelf bracket for shelves up to about 8" (200 mm) deep. The open truss design keeps it light and fast to print, and a hidden keyhole slot on the back makes it easy to hang and level. Prints flat on its side with no supports, so the layer lines run along the load and can't split under weight.
FEATURES • Hidden keyhole mount – hang it on a screw head, slide down, then lock it with one screw • Countersunk bottom hole so the screw sits flush • Optional screw hole at the arm tip to fix the shelf from below • Open triangle truss: strong, light, and quick to print • Prints flat with zero supports
DIMENSIONS • Arm (shelf depth): 150 mm / 6" • Wall leg: 100 mm / 4" • Thickness: 16 mm • Works with shelves up to ~8" deep
PRINT SETTINGS (tested on a Creality CR-10 V2) • Material: PETG recommended (PLA works for light indoor loads) • Orientation: flat on its side, as exported • Layer height: 0.2–0.24 mm • Walls: 4 • Infill: 15–20% gyroid • Supports: none • About 38 g of filament and ~2.5 h per bracket
HARDWARE (per bracket) • 1× #8 pan-head screw for the keyhole (a flat-head won't sit right in the slot) • 1× #8 flat-head screw, 2" long, for the bottom hole • Optional: 1× #6 short screw up into the shelf • Wall anchors if you're not screwing into a stud
INSTALL - Drive the pan-head screw into the wall, leaving about 3 mm of the head sticking out.
- Hang the bracket on it by the keyhole and slide it down.
- Level it and drive the bottom screw through the countersunk hole.
- Repeat for the second bracket and set the shelf on top.
TIP: For heavier loads, screw into studs. The wall and screws will give out before the bracket does.
Designed in Fusion. Comments and makes are welcome!
Descripción original del autor, publicada en Printables.