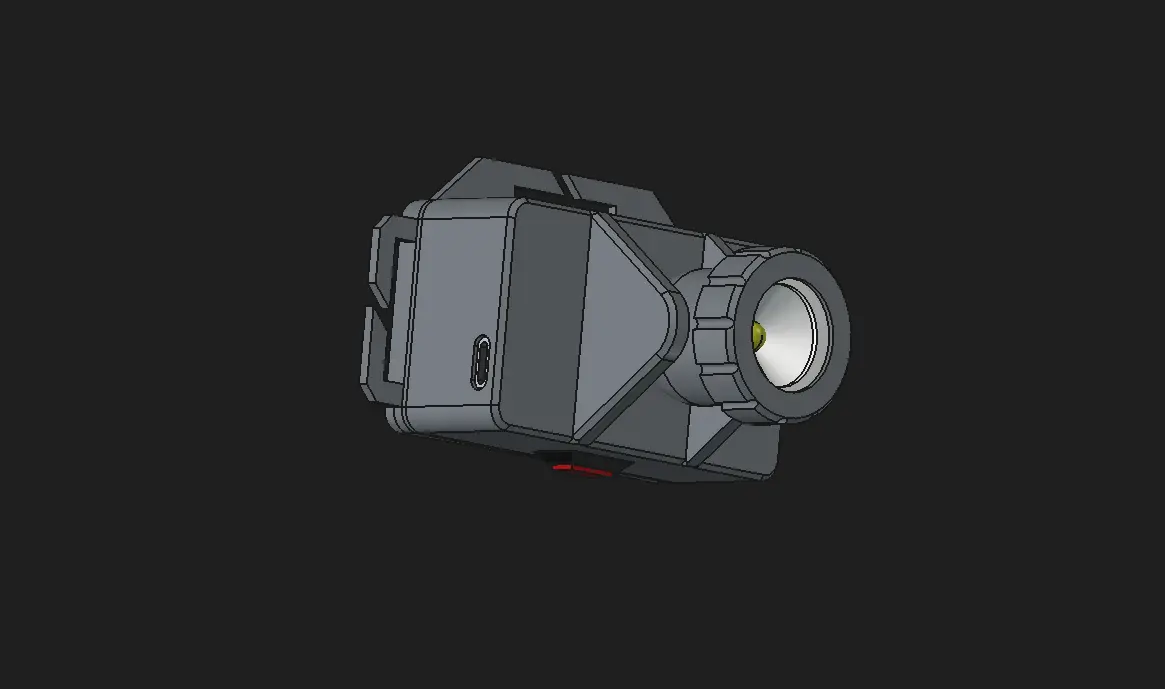
3w LED Headlamp
por Krasnolikiy en Thingiverse
Налобный фонарь на светодиоде мощностью 1-3вт. Использовал доступные материалы, которые легко купить на Aliexpress и других площадках, а именно: -Светодиод на подложке-звезде диаметром ~20мм -Модуль зарядки TP4056 -Повышающий модуль MT3608 -Светодиодный драйвер CN5711 (можно заменить на резистор...
Licencia
Solo uso personalCC BY-NC 4.0 — Atribución, no comercial
Puedes imprimirlo y modificarlo para uso personal dando crédito. No se permite vender las impresiones.
Al descargar aceptas respetar la licencia y dar crédito a Krasnolikiy.
Archivos (7)
- Categoría
- Herramientas
- Formatos
- STL, FCSTD
- Descargas
- 11
- Publicado
Sobre este modelo
Налобный фонарь на светодиоде мощностью 1-3вт. Использовал доступные материалы, которые легко купить на Aliexpress и других площадках, а именно: -Светодиод на подложке-звезде диаметром ~20мм -Модуль зарядки TP4056 -Повышающий модуль MT3608 -Светодиодный драйвер CN5711 (можно заменить на резистор 5-10вт) -Выключатель 10x15 мм -Аккумулятор литиевый 18650 Светодиод пришлось отрегулировать ШИМ драйвером до потребления в 1-1.5 вт, чтобы использовать без радиатора, но можно попробовать засунуть небольшой алюминиевый радиатор, благо места достаточно. Провода просовываются через уши крепления корпуса светодиода. Крышка с креплением ремня крепится поверх основной крышки, но можно использовать и без нее, если прикрутить только крепление ремня к основному корпусу. Подложку светодиода может потребоваться обработать напильником, так как он должен заходить в корпус с небольшим усилием, а диаметры как звезды, так и корпуса могут плавать. Крепление ремня рассчитаны под стандартную ширину 25 мм, чтобы можно было купить готовый или сделать свой, сам же я использую диаметр ремня 30 мм, хоть сами ушки под это не рассчитаны, но это работает отлично. Есть возможно установить защитное стекло или линзу диаметром 20-24 мм. Прикрепил файл проекта FreeCAD, чтобы у людей была возможность вносить свои правки, если такие найдутся, пожалуйста поделитесь ремиксом, это будет полезно как мне, так и другим! Headlamp on a 1-3W LED. I used accessible materials that are easy to buy on Aliexpress and other platforms, namely: - LED on a star substrate ~20mm in diameter - TP4056 charging module - MT3608 boost module - CN5711 LED driver (can be replaced with a 5-10W resistor) - 10x15 mm switch - 18650 lithium battery
The LED had to be adjusted with a PWM driver to a consumption of 1-1.5W so it could be used without a heatsink, but you can try to fit a small aluminum heatsink, since there is enough space. The wires are routed through the mounting ears of the LED housing. The cover with the strap mount is attached on top of the main cover, but it can also be used without it if you screw only the strap mount to the main housing. The LED substrate may need to be filed down, since it should go into the housing with slight force, and the diameters of both the star and the housing may vary. The strap mount is designed for a standard width of 25 mm so that you can buy a ready-made one or make your own; I personally use a strap diameter of 30 mm, even though the ears themselves are not designed for this, but it works great. It is possible to install a protective glass or lens with a diameter of 20-24 mm. I attached the FreeCAD project file so that people have the opportunity to make their own edits; if any are found, please share a remix, it will be useful both to me and to others!
Descripción original del autor, publicada en Thingiverse.