28BYJ-48 Stepper Linear Actuator with Printed Ball Screw
por Tom Knox en Thingiverse
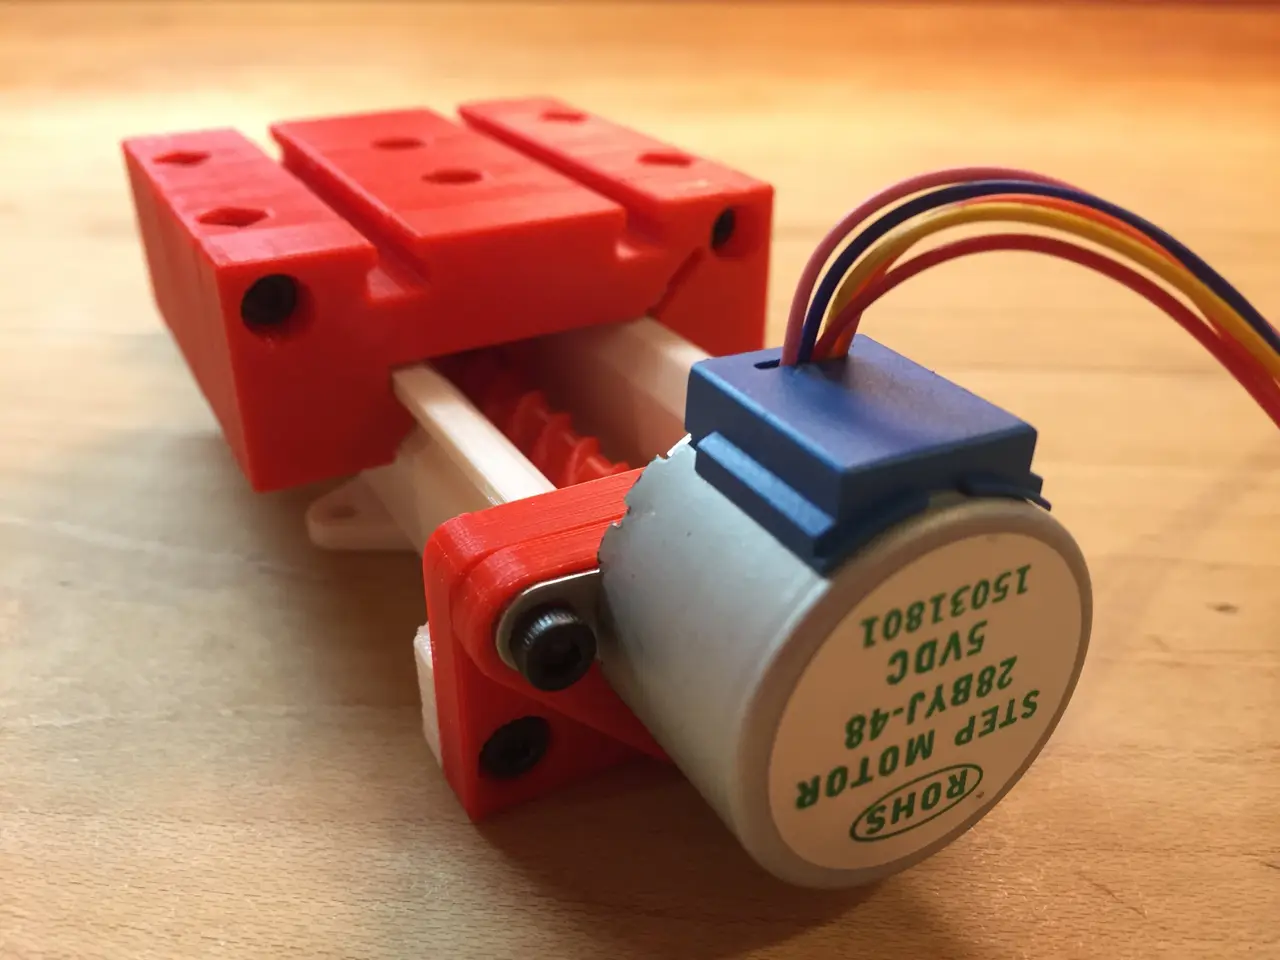
A pocket-sized motion axis you can print in an evening. The slide uses the cheap 28BYJ-48 5 V stepper that comes with most Arduino kits, a printed rail with a recirculating linear bearing running on ordinary 4.5 mm (.177) steel BBs, and a printed lead screw with its own BB thrust bearing. Two lead..
Licencia
Uso comercial permitidoPuedes imprimirlo, modificarlo y venderlo dando crédito al autor.
Al descargar aceptas respetar la licencia y dar crédito a Tom Knox.
Archivos (13)
- BS-V1-NUT-1.stl STL · 2,2 MB
- BS-V1-NUT-1_2.stl STL · 2,2 MB
- BS-V1-SCREW-1-QUAD.stl STL · 3,5 MB
- BS-V1-SCREW-1_2-DBL.stl STL · 3,4 MB
- BS-V2-CARRIAGE.stl STL · 4,2 MB
- BS-V2-CARRIAGE_CAP-MIRROR.stl STL · 2,2 MB
- BS-V2-CARRIAGE_CAP.stl STL · 2,2 MB
- BS-V2-RAIL.stl STL · 2,1 MB
- DT-V3-BEARING_CAP.stl STL · 383 KB
- DT-V3-BEARING_FLANGE.stl STL · 410 KB
- DT-V3-END_CAP.stl STL · 178 KB
- 28BYJ-48_Stepper_Linear_Actuator_with_Printed_Ball_Screw_-_Bill_of_Material.pdf PDF · 54 KB
- 28BYJ-48_Stepper_Linear_Actuator_with_Printed_Ball_Screw_-_Build_Guide.pdf PDF · 67 KB
- Categoría
- Educación
- Formatos
- STL, PDF
- Descargas
- 150
- Publicado
Sobre este modelo
A pocket-sized motion axis you can print in an evening. The slide uses the cheap 28BYJ-48 5 V stepper that comes with most Arduino kits, a printed rail with a recirculating linear bearing running on ordinary 4.5 mm (.177) steel BBs, and a printed lead screw with its own BB thrust bearing. Two lead screws are included: a twin-start screw for force (the original author moved over 25 lb / 11 kg with it) and a quad-start screw for speed. Mounting holes on the base, carriage and end plate line up, so several slides can be bolted together into a two- or three-axis stage. Add a microswitch endstop and the Arduino sketch in the guide, and you have a homing linear axis for pushers, small camera sliders, syringe drives and motion-control experiments. This is a refurbished remix of the Linear Ball Bearing Stepper Slide v2 by 3DPRINTINGWORLD (John Mulac), Thingiverse thing 2813896 (https://www.thingiverse.com/thing:2813896), updated for modern use with an Arduino Nano + ULN2003 build path, endstop homing, a current-parts Bill of Material and a rewritten English build guide. The 11 print files are unchanged from the original design (duplicate uploads left out). What you build - A printed rail with Gothic-arch bearing grooves and a solid carriage with two end caps that recirculate the BBs - A printed lead screw (twin-start for force or quad-start for speed) with its matching drive nut - A BB thrust bearing: flange, cap and far end cap, with the 28BYJ-48 bolted to the flange - Preload screws on the carriage so the slide runs with no play and no binding
Files - All 11 print files (STL): rail, carriage, two carriage caps, twin-start screw and nut, quad-start screw and nut, thrust-bearing flange, bearing cap and end cap - Build Guide PDF: Arduino and ULN2003 setup with the example sketch first, then printing, bearing packing, assembly, wiring, homing and calibration - Bill of Material PDF with every purchased part, quantities, notes and a shop link per row
Print settings PLA, 0.2 mm layers (0.12 mm for the screw and nut helps), 4 walls, 30 % infill, no supports. Print the screws standing up and the rail flat on its base. The bearing grooves and the screw threads are the precision surfaces: slow the outer wall to 25 to 30 mm/s and calibrate your extrusion width first. Print one screw and its nut, not both pairs. Electronics - 28BYJ-48 5 V stepper with ULN2003 driver board - Arduino Nano V3 (ATmega328P) - Microswitch endstop with lever - 5 V 2 A supply with a barrel-jack screw-terminal adapter, jumper wires - 4.5 mm (.177) steel BBs for the linear and thrust bearings, M3 socket screws and nuts, grease
Bill of Material Every part you need to buy, with quantities, notes and shop links, is in the Bill of Material PDF in the files of this thing. Parts cost is about 10 to 15 USD plus filament. Software The example sketch in the build guide (AccelStepper, half-step mode) homes the carriage against the endstop, then moves 20 mm out and back. Set MM_PER_REV to the lead of the screw you printed: 12.7 mm for the twin-start screw, 25.4 mm for the quad-start screw, then correct it with a caliper measurement. Skill level Beginner to intermediate: printing, M3 screws, packing about 40 BBs into the bearing, breadboard wiring and an Arduino upload. Full build guide and source The build guide, the Bill of Material and all project files: https://github.com/ToolKnox/hawkridge-stepper-linear-actuator-28byj48 (Code > Download ZIP). Limits Low force, low voltage: nothing hazardous. The printed screw is not a precision ball screw; expect a few tenths of a millimetre of backlash, fine for pushers and sliders, not for CNC. The 28BYJ-48 is a 15 rpm motor and will not go faster; more force comes from the twin-start screw, not from speed.
Descripción original del autor, publicada en Thingiverse.